TABLE OF CONTENTS
- Product Overview
- Quick Reference
- What's in the Box
- Parts & Controls
- Charging Vayu 4.0
- Turning the Inflator ON or OFF
- Selecting an Inflation Mode
- Switching Pressure Units
- Setting the Preset Pressure
- Connecting the Air Hose and Adapter
- Measuring the Current Pressure
- Starting and Stopping Inflation
- Corded Use in a Car
- Using the Flashlight
- Care, Maintenance & Safety
- Troubleshooting
- Still stuck?
- Support
Product Overview
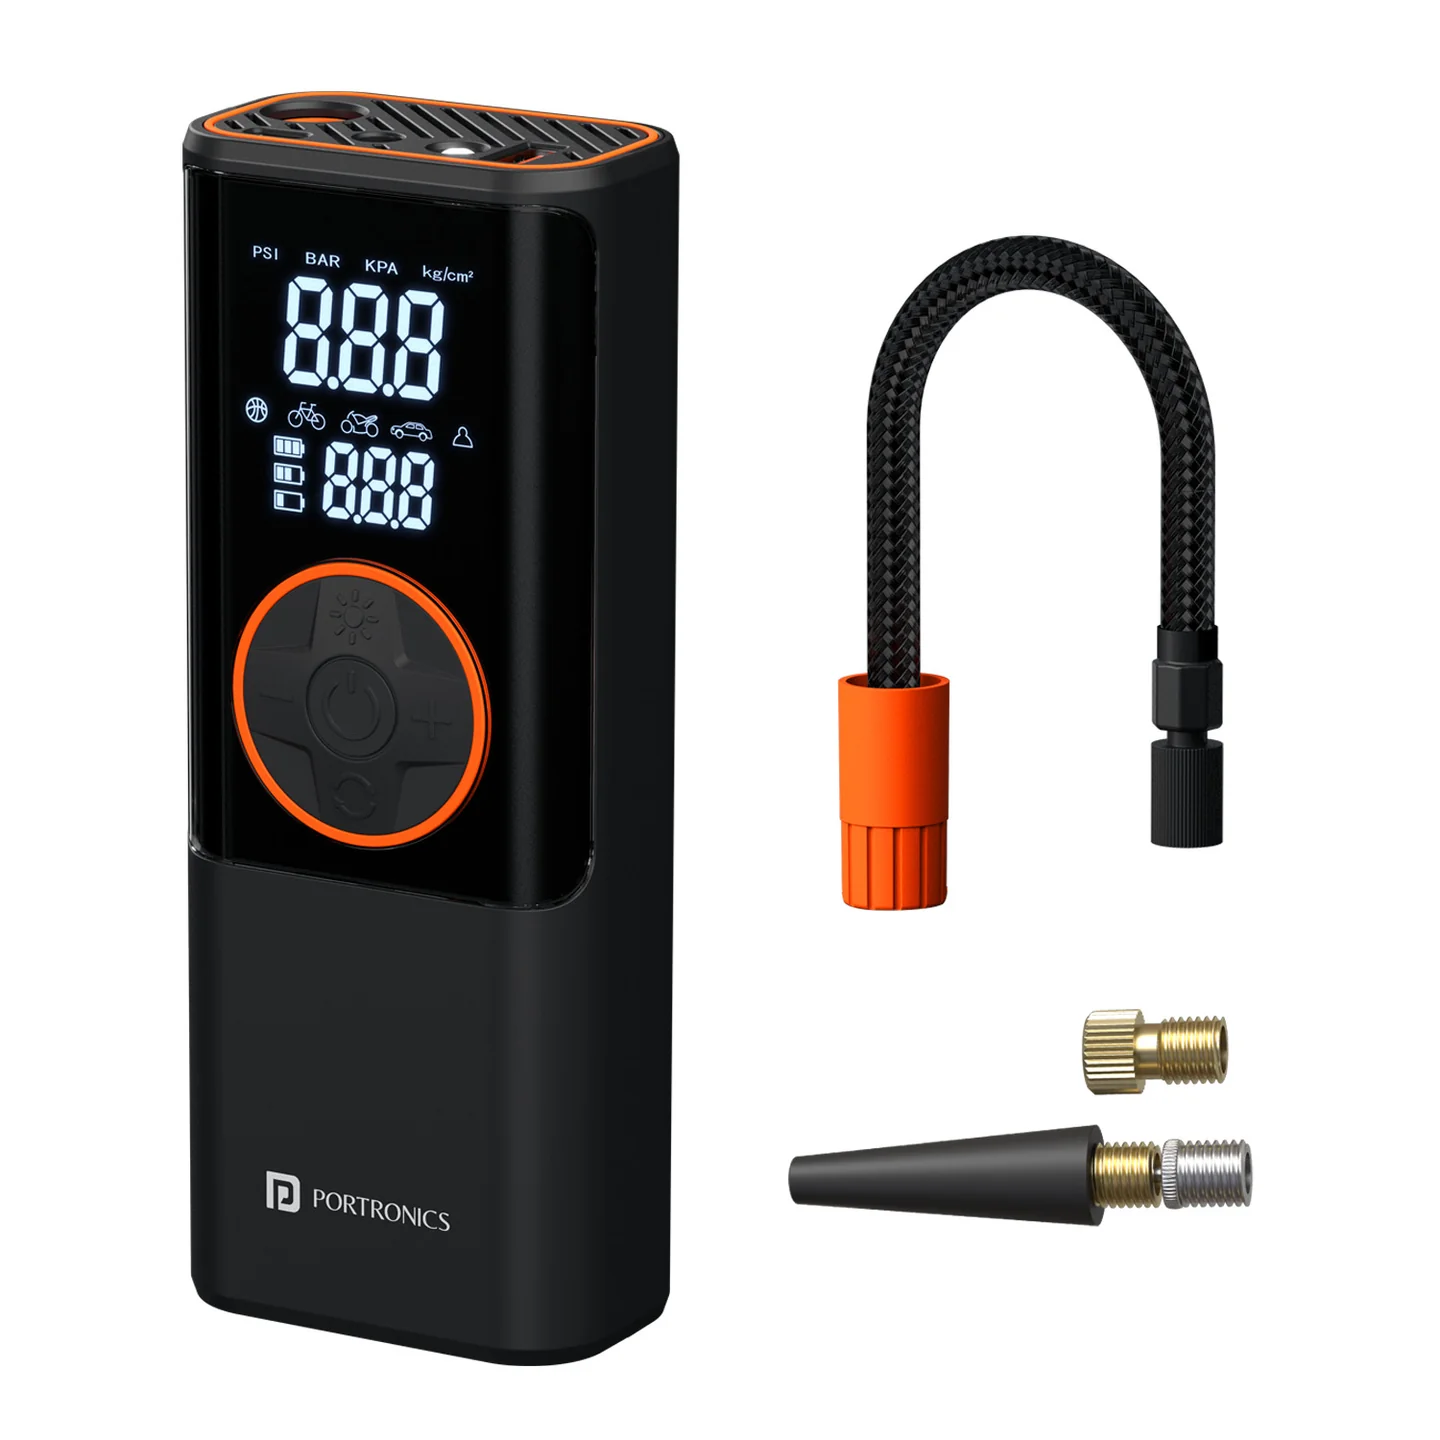
The Portronics Vayu 4.0 is a rechargeable, 2-in-1 cordless and corded tyre inflator. It is designed for inflating car tyres, motorcycle tyres, bicycle tyres and sports balls. It features a digital pressure display, five inflation modes, adjustable preset pressure, automatic shut-off and a built-in flashlight.
The inflator can be powered by its built-in lithium battery or through the supplied auxiliary power cable connected to a car's cigarette-lighter socket.
Quick Reference
| Feature | Details |
|---|---|
| Product | Portronics Vayu 4.0 |
| Product Type | Rechargeable Tyre Inflator |
| Operation | Cordless and corded |
| Rated Voltage | DC 7.4V |
| Rated Input | 5V/1A |
| Rated Power | 60W |
| Cylinder Inner Diameter | 19mm |
| Air Flow Capacity | 18L/min |
| Pressure Range | 3–150 PSI |
| Charging Interface | USB Type-C |
| Charging Time | 4–5 hours |
| Inflation Modes | Car, Motorcycle, Bicycle, Ball and Free |
| Pressure Units | PSI, Bar, kPa, kg/cm² |
| Battery | Built-in, non-removable lithium battery |
What's in the Box
| Item | Quantity |
|---|---|
| Vayu 4.0 Tyre Inflator | 1 |
| Presta Valve Adapter | 1 |
| Needle Adapter | 1 |
| Nozzle Adapter | 1 |
| Anti-scald Silicone Sleeve | 1 |
| Charging Cable | 1 |
| Auxiliary Power Cable (Car Cigarette-Lighter Cable) | 1 |
| Air Hose | 1 |
Parts & Controls
| Part / Control | Function |
|---|---|
| Air Hose Port | Connects the air hose to the inflator |
| Type-C Input | Charges the inflator |
| Inflation Mode Display | Shows the selected inflation mode |
| Real-Time Pressure Display | Shows the current pressure of the connected object |
| Preset Pressure Display | Shows the target pressure |
| Battery Display | Indicates remaining battery level |
| LED Flashlight | Provides illumination and flashing modes |
| Mode Button | Short-press to switch inflation modes; long-press for 2 seconds to switch pressure units |
| − Button | Decreases preset pressure |
| + Button | Increases preset pressure |
| Power Button | Long-press for 3 seconds to turn the inflator ON; short-press to start inflation |
| Hose Storage | Storage area for the air hose |
Charging Vayu 4.0
- Fully charge the pump before using it for the first time.
- Connect the supplied charging cable to the Type-C input.
- Connect the other end to a 5V USB adapter.
- Allow approximately 4–5 hours for charging.
The 5V USB adapter is not listed among the included accessories.
Battery Level Indication
| Display Indication | Battery Level |
|---|---|
| 1 bar flashing | 0% to below 30% |
| 2 bars ON and 1 bar flashing | 30% to below 65% |
| 3 bars ON | Fully charged |
Turning the Inflator ON or OFF
- Press and hold the Power Button for 3 seconds to turn ON the inflator.
- The display will turn on.
- The machine automatically switches OFF after 90 seconds in standby.
- The machine automatically shuts OFF after 2 minutes of empty inflation.
Selecting an Inflation Mode
Short-press the Mode Button to cycle through the five inflation modes.
| Mode | Default Pressure | Adjustable Range |
|---|---|---|
| Car | 36 PSI | 26–50 PSI |
| Bicycle | 45 PSI | 30–120 PSI |
| Motorcycle | 32 PSI | 26–45 PSI |
| Ball | 9 PSI | 4–16 PSI |
| Free Mode | User adjustable | 3–150 PSI / 0.2–10.3 Bar |
Select the mode that matches the object being inflated. Always check the recommended pressure for that object before starting.
Switching Pressure Units
- Press and hold the Mode Button for 2 seconds.
- The inflator enters pressure-unit switching mode.
- Select the required pressure unit.
The supported pressure units are:
- PSI
- Bar
- kPa
- kg/cm²
Important: Confirm the correct pressure unit before setting the target pressure. Selecting the wrong unit may cause over-inflation and a tyre blowout.
Setting the Preset Pressure
- Select the required inflation mode.
- Press + to increase the preset pressure.
- Press − to decrease the preset pressure.
- Each press changes the value by:
- 0.05 Bar
- 0.5 PSI
- 0.05 kg/cm²
- 5 kPa
- Continue adjusting until the required pressure is displayed.
The available adjustment is limited by the selected mode's pressure range. Free Mode allows a range of 3–150 PSI / 0.2–10.3 Bar.
Connecting the Air Hose and Adapter
- Screw the required inflatable tube or adapter clockwise onto the air hose.
- Connect the air hose clockwise to the inflator's air outlet.
- For a car tyre, connect the air hose to the tyre's inflation valve.
- Check that the connections are secure before starting inflation.
The package includes Presta, needle and nozzle adapters for compatible valves and inflatables.
Measuring the Current Pressure
- Connect the high-pressure hose to the object being inflated.
- Turn ON the inflator.
- The first line of the display shows the current pressure.
Check the current pressure before setting the target pressure.
Starting and Stopping Inflation
- Connect the air hose securely to the valve.
- Select the correct inflation mode.
- Confirm the pressure unit.
- Set the preset pressure using + or −.
- Short-press the Power Button to start inflation.
- The inflator automatically stops when the preset pressure is reached.
- To stop inflation manually, use the Power Button.
Do not leave the inflator unattended during operation. Observe the inflation process, particularly if a preset pressure has not been set.
Corded Use in a Car
If the pump battery is low, use the car's cigarette-lighter socket to power the inflator.
- Start the car.
- Locate the car's cigarette-lighter socket.
- Connect the supplied auxiliary power cable to the cigarette-lighter socket.
- Connect the other end to the corresponding power connection at the bottom of the inflator.
- Connect the air hose and operate the inflator as required.
Using the Flashlight
The flashlight has four operating steps:
- Short-press the Light Button once to turn ON the white light.
- Short-press again to activate slow white-light flashing (0.85-second interval).
- Short-press again to activate rapid white-light flashing (0.4-second interval).
- Press again to turn OFF the light.
Care, Maintenance & Safety
- Read the instruction manual carefully before use.
- Keep children at a safe distance during inflation.
- The product has a built-in, non-removable lithium battery. Do not throw it into fire or discard it improperly.
- Avoid impact, overheating and water ingress, which may create a risk of fire, spontaneous combustion or explosion.
- Do not leave the product in a hot car or expose it to high temperatures.
- The stated storage temperature is between −10°C and 45°C.
- The built-in DC motor may become warm during use.
- Do not touch the air outlet or hose during use or immediately after use.
- If abnormal noise occurs or the temperature becomes too high, shut down the product immediately.
- Do not leave the inflator unattended while inflating.
- Check the pressure unit before setting the target pressure to avoid over-inflation.
- Use the product in a dry, clean environment.
- The product is not waterproof. Do not rinse it with water.
- Sediment or sand entering the product may cause damage.
Troubleshooting
| Issue | Possible Cause | Recommended Action |
|---|---|---|
| Inflator does not operate | Battery may be low | Charge the inflator using the Type-C charging cable |
| Inflator stops after standby | Automatic standby shut-off | Turn the inflator ON again using the Power Button |
| Inflator stops after empty inflation | Automatic empty-inflation shut-off | Turn the inflator ON again and connect it correctly to the object |
| Pressure setting appears incorrect | Wrong pressure unit selected | Long-press the Mode Button for 2 seconds and select the correct unit |
| Inflation does not reach the intended pressure | Preset pressure or mode may be incorrect | Check the selected mode, pressure unit and preset value |
| Inflator becomes unusually hot or makes abnormal noise | Excessive heat or abnormal operation | Shut down the product immediately and allow it to cool |
Still stuck?
If the issue persists after following the relevant instructions, please raise a support request.
Our support team will assist you further.
Support
- Website: www.portronics.com
- Support Portal: support.portronics.com
Was this article helpful?
That’s Great!
Thank you for your feedback
Sorry! We couldn't be helpful
Thank you for your feedback
Feedback sent
We appreciate your effort and will try to fix the article