TABLE OF CONTENTS
- Product Overview
- Quick Reference
- What's in the Box
- Parts & Controls
- Charging Vayu 3.0
- Turning the Inflator ON or OFF
- Selecting an Inflation Mode
- Setting the Preset Pressure
- Connecting the Air Hose
- Measuring the Current Pressure
- Starting Inflation
- Stopping Inflation
- Using the LED Flashlight
- USB Output
- Completing Inflation and Storing the Hose
- Care, Maintenance & Safety
- Troubleshooting
- Still stuck?
- Support
Product Overview
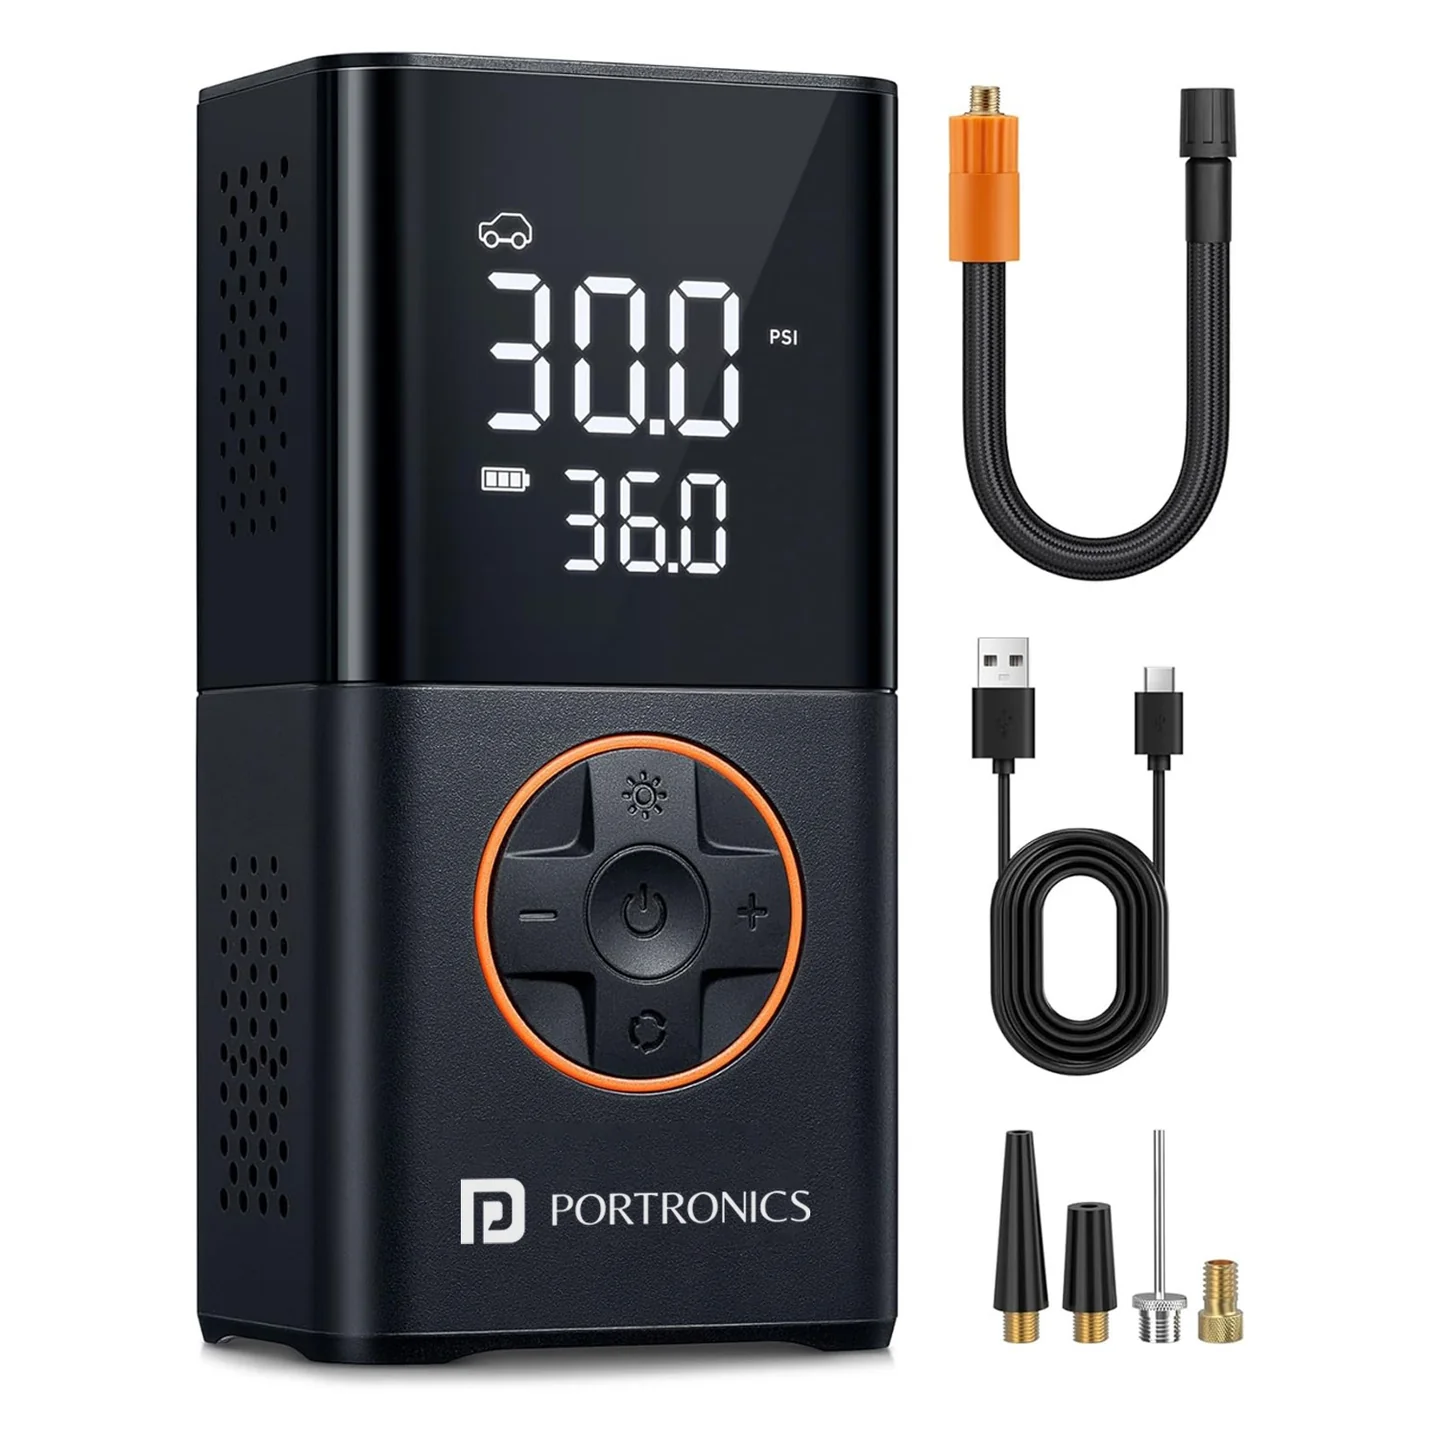
The Portronics Vayu 3.0 (POR 2544) is a rechargeable, cordless tyre inflator designed for cars, motorcycles, bicycles and sports balls. It features a digital pressure display, five inflation modes, preset pressure adjustment, automatic shut-off and a built-in LED flashlight.
The inflator has a 4000mAh rechargeable battery (2 × 2000mAh) and charges through a Type-C port.
Quick Reference
| Feature | Details |
|---|---|
| Product | Portronics Vayu 3.0 |
| Model Code | POR 2544 |
| Product Type | Rechargeable Tyre Inflator |
| Colour | Black |
| Power | 50W |
| Inflation Speed | 17L/min |
| Maximum Working Pressure | 150 PSI |
| Battery Capacity | 4000mAh (2 × 2000mAh) |
| Input | 5V/1A (Type-C) |
| USB Output | 5V/1A |
| Inflation Modes | Cars, Motorcycles, Bicycles, Basketballs and Custom |
| Display Units | PSI, Bar, kPa, kg/cm² |
| Functions | Inflation, Illumination and SOS |
| Air Hose Length | 25cm |
| USB Charging Cable Length | 89.716cm |
| Dimensions | 13.4 × 6.6 × 5cm |
| Charging Port | USB Type-C |
| Warranty | 1 year |
What's in the Box
| Item | Quantity |
|---|---|
| Vayu 3.0 Tyre Inflator | 1 |
| Air Hose | 1 |
| USB Charging Cable | 1 |
| Air Nozzles | 4 |
| User Manual | 1 |
Parts & Controls
| Part / Control | Function |
|---|---|
| Air Hose Port | Connects the air hose to the inflator |
| Type-C Charging Port | Charges the inflator |
| Inflation Mode Display | Shows the selected inflation mode |
| Real-Time Pressure Display | Shows the current pressure of the connected inflatable |
| Battery Level Display | Indicates the remaining battery level |
| Preset Pressure Display | Shows the selected target pressure |
| LED Flashlight Button | Controls the built-in LED light |
| − Button | Decreases the preset pressure |
| Settings Button | Switches between the five inflation modes |
| LED Light | Provides illumination |
| Hose Storage Port | Stores the air hose when not in use |
| USB Output Port | Provides 5V/1A output |
| Pressure Units | Displays the selected pressure unit |
| Light Icon Display | Indicates the light status |
| Input Charging Icon Display | Indicates charging status |
| Output Charging Icon Display | Indicates USB output status |
| + Button | Increases the preset pressure |
| Power Button | Turns the inflator ON/OFF and starts/stops inflation |
Charging Vayu 3.0
- Connect the included Type-C charging cable to the Type-C charging port.
- Connect the other end to a suitable USB power source.
- Charge the product before first use.
- The outlet adapter is not included.
Battery Level Indication
The battery icon displays three levels:
- One cell: Less than 30% charge.
- Two cells: Approximately 50% charge.
- Three cells: Fully charged.
The battery icon flashes while the product is charging and remains ON when fully charged.
Turning the Inflator ON or OFF
- Press and hold the Power Button for 1.5 seconds to turn ON the inflator.
- Press and hold the Power Button for 1.5 seconds to turn it OFF.
- The product also turns OFF automatically if there is no operation for 90 seconds.
Selecting an Inflation Mode
Press the Settings Button to switch between the five inflation modes:
| Mode | Intended Use |
|---|---|
| Car | Car tyres |
| Motorcycle | Motorcycle tyres |
| Bicycle | Bicycle tyres |
| Basketball | Basketballs |
| Custom | User-defined pressure setting |
Select the mode that matches the object being inflated.
Setting the Preset Pressure
- Select the required inflation mode using the Settings Button.
- Press + to increase the preset pressure.
- Press − to decrease the preset pressure.
- Press and hold either button to change the pressure value rapidly.
- After selecting the desired value, the number will blink three times and then be set.
Check that the preset pressure matches the object being inflated before starting.
Connecting the Air Hose
- Screw the air hose onto the air hose port of the inflator.
- Remove the valve cap from the tyre valve stem.
- Attach the other end of the air hose to the valve stem.
- Check that the connection is secure before starting inflation.
Measuring the Current Pressure
- Connect the air hose to the inflatable's valve.
- Turn ON the inflator.
- The digital screen displays the inflatable's real-time pressure value.
- Check the displayed pressure before setting the target pressure.
Starting Inflation
- Connect the air hose securely to the valve.
- Select the appropriate inflation mode.
- Set the desired preset pressure.
- Press the Power Button to start inflation.
- The digital screen displays the real-time pressure during inflation.
Important: Do not touch the air hose during inflation.
Stopping Inflation
- The air pump automatically stops when it reaches the preset pressure value.
- Press the Power Button to manually stop inflation before the preset pressure is reached.
Using the LED Flashlight
The LED flashlight has four button actions:
- Press the LED Light Button once to turn ON the light.
- Press it a second time to activate slow flashing.
- Press it a third time to activate quick flashing.
- Press it a fourth time to turn OFF the light.
USB Output
- The USB output port provides 5V/1A.
- Connect a compatible USB-powered device using a suitable cable.
Completing Inflation and Storing the Hose
- Once inflation is complete, remove the air hose from the tyre valve stem.
- Attach the valve cap back to the tyre valve stem.
- When not in use, screw the air hose onto the hose storage port.
Care, Maintenance & Safety
- Read the instructions carefully before use.
- Check the preset pressure value before inflating. It should match the object being inflated.
- Keep the product away from flammable and explosive chemicals or objects.
- Avoid storing the product in humid or dusty conditions.
- Do not place the product where it can easily fall.
- Keep the product out of children's reach.
- Do not dispose of the product improperly or expose it to an open flame.
- Prolonged continuous use may cause high temperatures and damage the product.
- After 15 minutes of continuous use, allow the pump to cool for 10 minutes.
- Do not use chemical cleaners to clean the pump.
- Store the product in a cool, dry place and avoid direct sunlight.
- Before long-term storage, charge the battery to approximately 50%–80%.
- Charge the product once every month during long-term storage to help prolong battery life.
Troubleshooting
| Issue | Possible Cause | Recommended Action |
|---|---|---|
| Air pump does not work | Battery may be discharged | Check the battery level and recharge the product |
| Inflation is slow | Air hose may not be correctly connected | Check and secure the air hose connection to the tyre valve stem |
| Pump becomes hot | Continuous use | Allow the pump to cool before using it again |
Still stuck?
If the issue persists after following the relevant instructions, please raise a support request.
Our support team will assist you further.
Support
- Website: www.portronics.com
- Support Portal: support.portronics.com
Was this article helpful?
That’s Great!
Thank you for your feedback
Sorry! We couldn't be helpful
Thank you for your feedback
Feedback sent
We appreciate your effort and will try to fix the article