Welcome to your Beem 540, and thanks for choosing Portronics! This guide walks you through unboxing, setup, daily use, maintenance— everything you need in one place.
TABLE OF CONTENTS
- 1. What's in the Box
- 2. Key Specifications
- 3. Safety Guidelines
- 4. Placement & Installation
- 5. Getting to Know the Remote
- 6. Adjusting Focus
- 7. Keystone Correction
- 8. Software Settings (Wi-Fi, Bluetooth, Language & More)
- 9. Media Player & Screen Sharing
- 10. Cleaning & Maintenance
- 11. Warranty & Support
1. What's in the Box
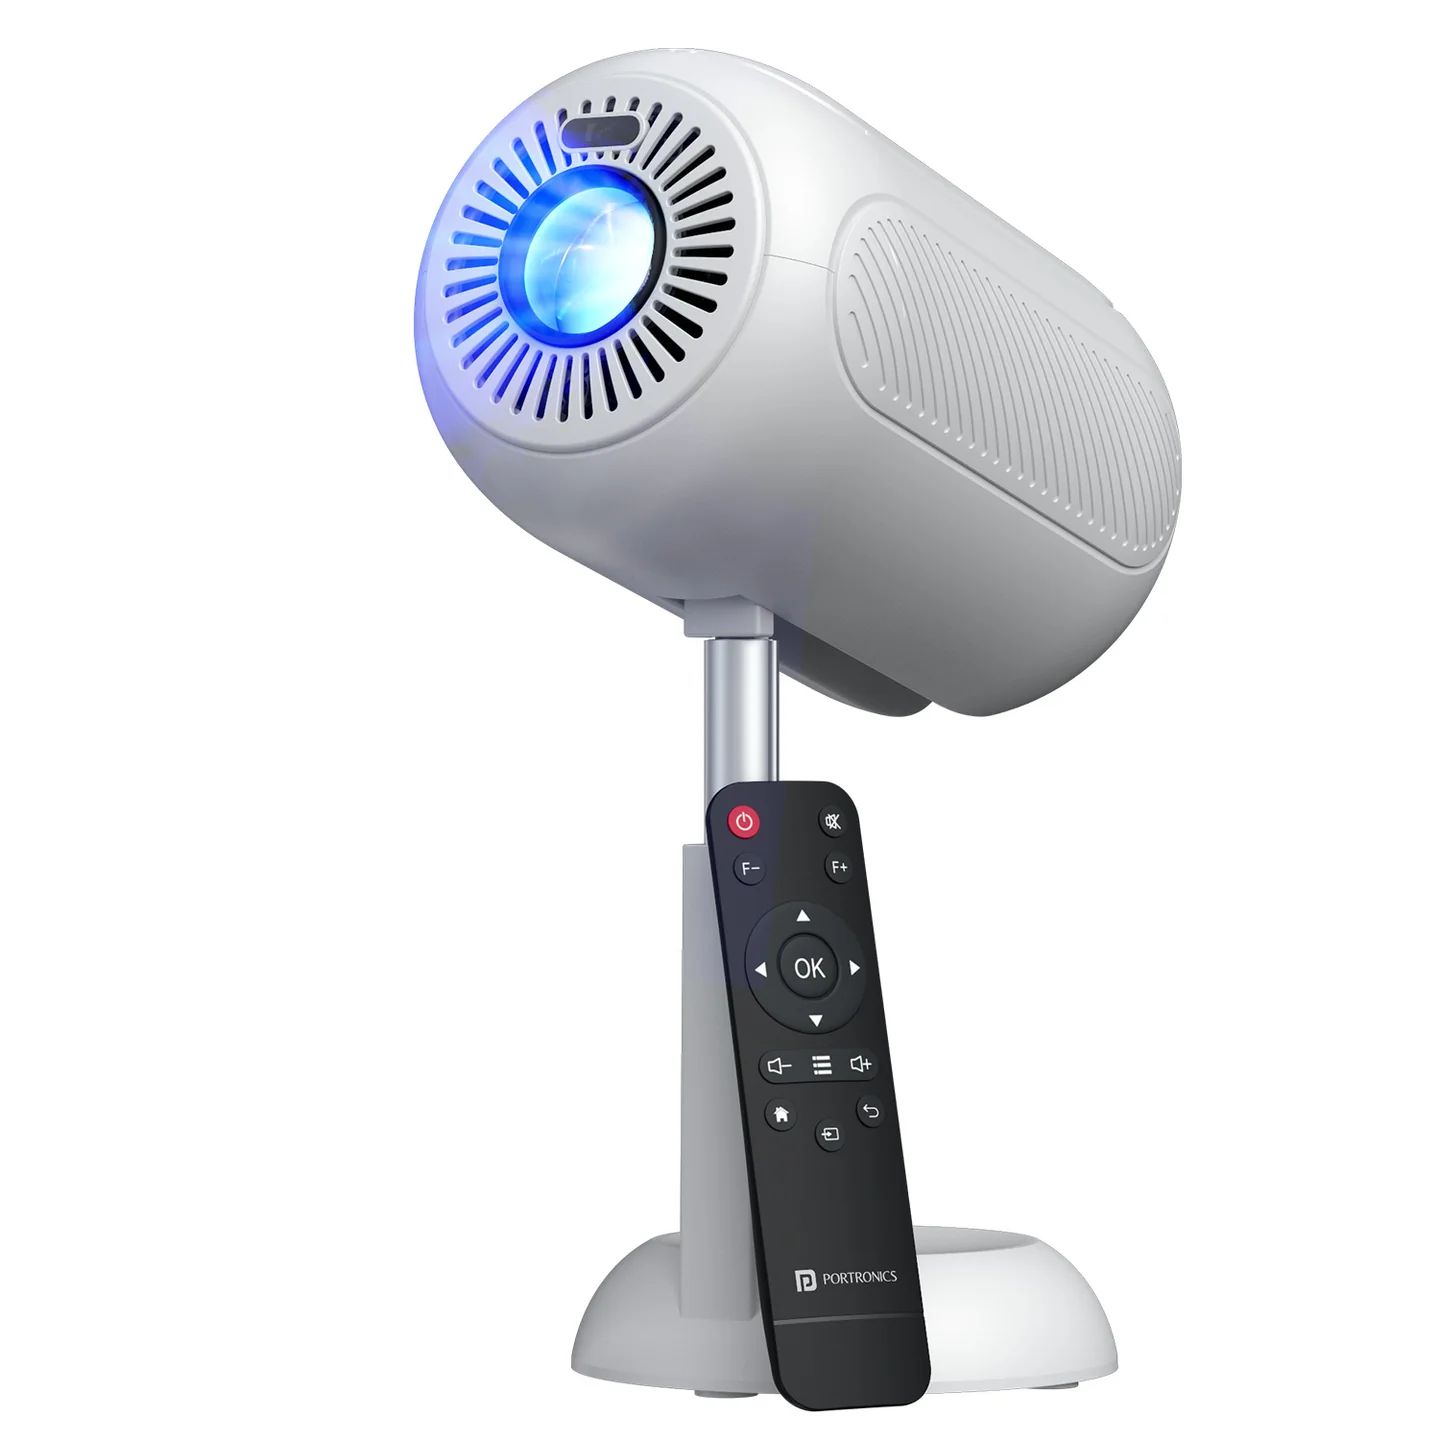
- 1 × Projector
- 1 × Power Cable
- 1 × Remote Control
- 1 × User Manual
2. Key Specifications
| Spec | Detail |
|---|---|
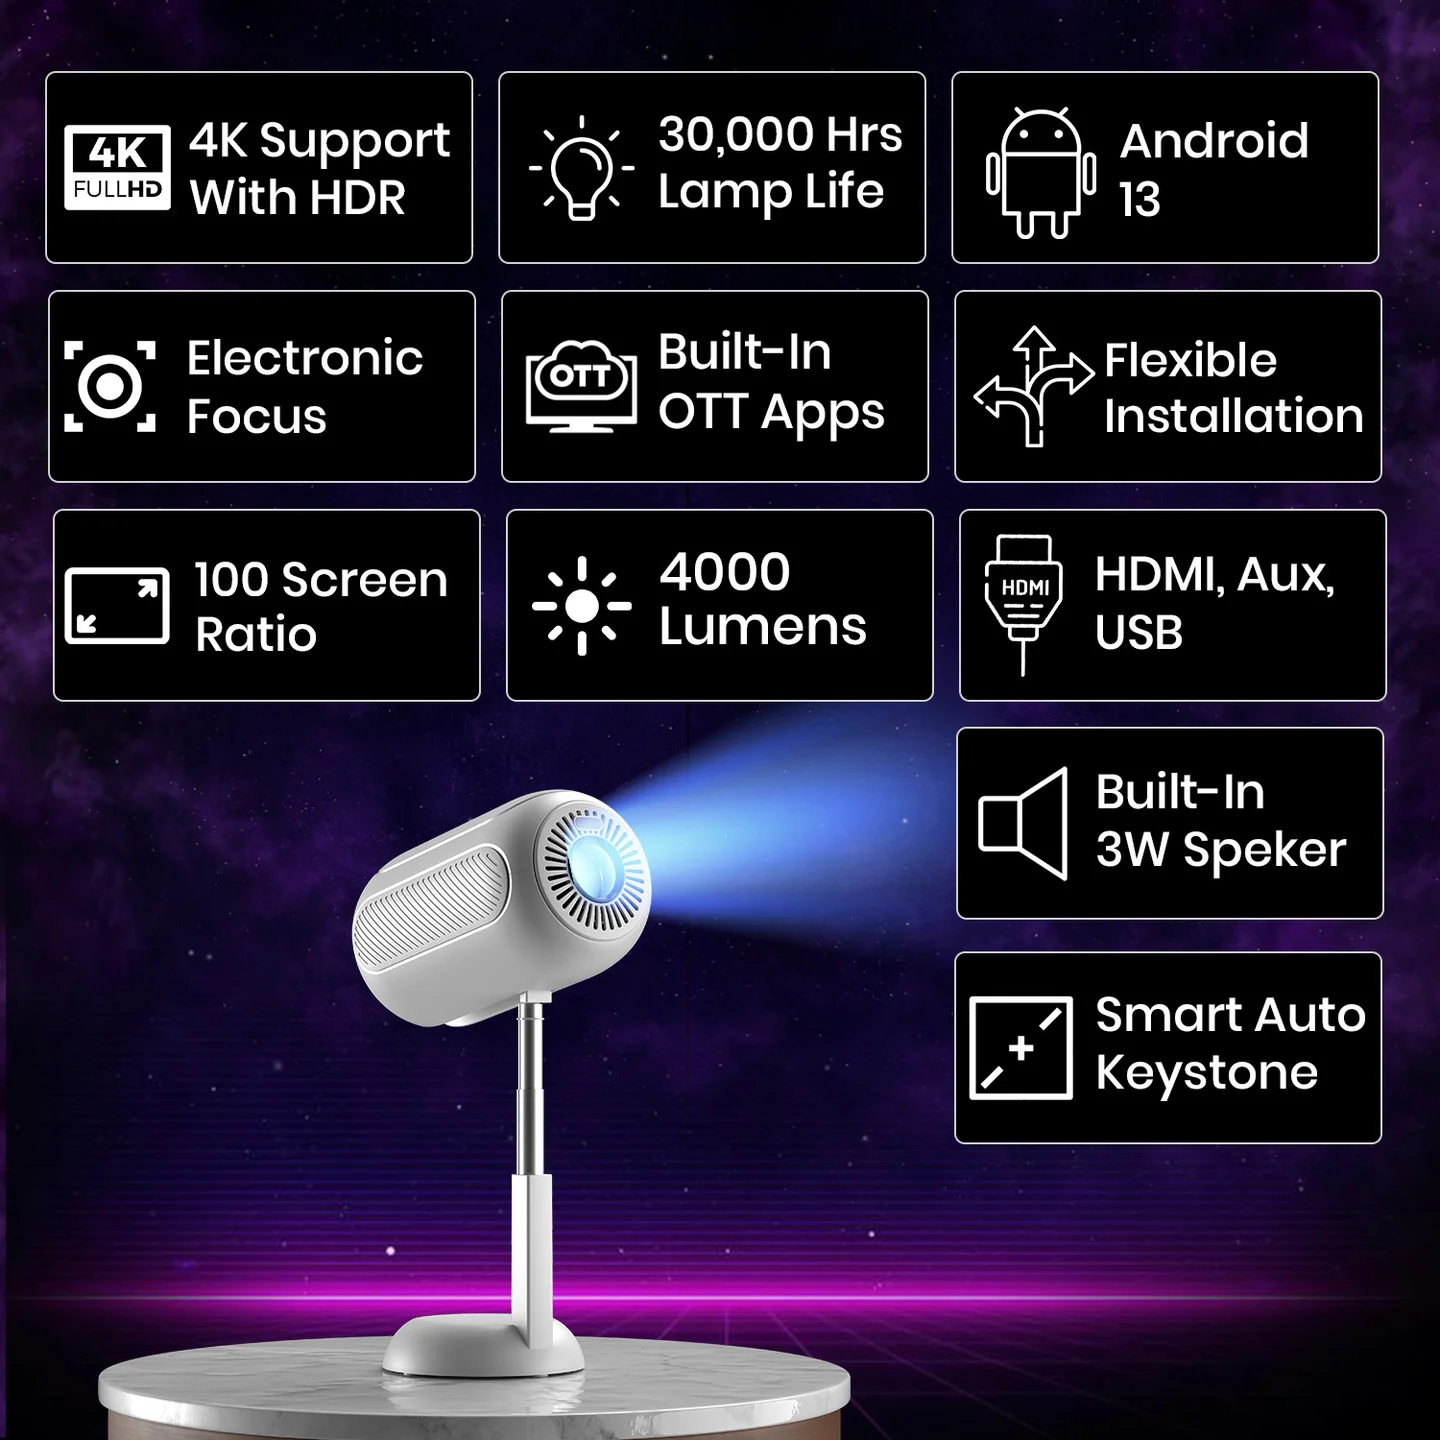
| Model | Beem 540 (Model Code: POR 2313) |
| Product type | Smart LED Projector |
| Colour | White |
| Brightness | 4000 Lumens |
| Resolution | 720p Native, with 4K Ultra HD content support |
| Lamp type | LED |
| Built-in speakers | 3 Watts |
| Connectivity | Dual-band Wi-Fi, Bluetooth |
| Special features | Adjustable design, built-in streaming apps, auto keystone correction, auto focus, ceiling mountable |
| Pre-installed apps | Netflix, YouTube, Prime Video, and more |
| Warranty | 12 months |
3. Safety Guidelines
Please follow these safety guidelines to prevent damage or injury:
- Keep the projector in a dry, cool place away from direct sunlight and extreme temperatures.
- Ensure proper ventilation by not blocking the air vents, to prevent overheating.
- Do not look directly into the projector lens when it's operating — the strong light may harm your eyes.
- Always place the projector on a stable, flat surface to prevent it from falling.
- Avoid operating the projector near flammable materials or in damp environments.
- Allow the projector to cool down before moving it after extended use.
- Use only the provided power cable and accessories, and connect to a surge protector to avoid voltage fluctuations.
- Keep the projector out of reach of children unless supervised by an adult.
- Do not attempt to disassemble or repair the projector yourself, as this may void the warranty.
4. Placement & Installation
- Position the projector at least 5 feet away from the projection surface and 2 feet away from the wall.
- Maintain a height of 5 feet from the ground for the best viewing experience.
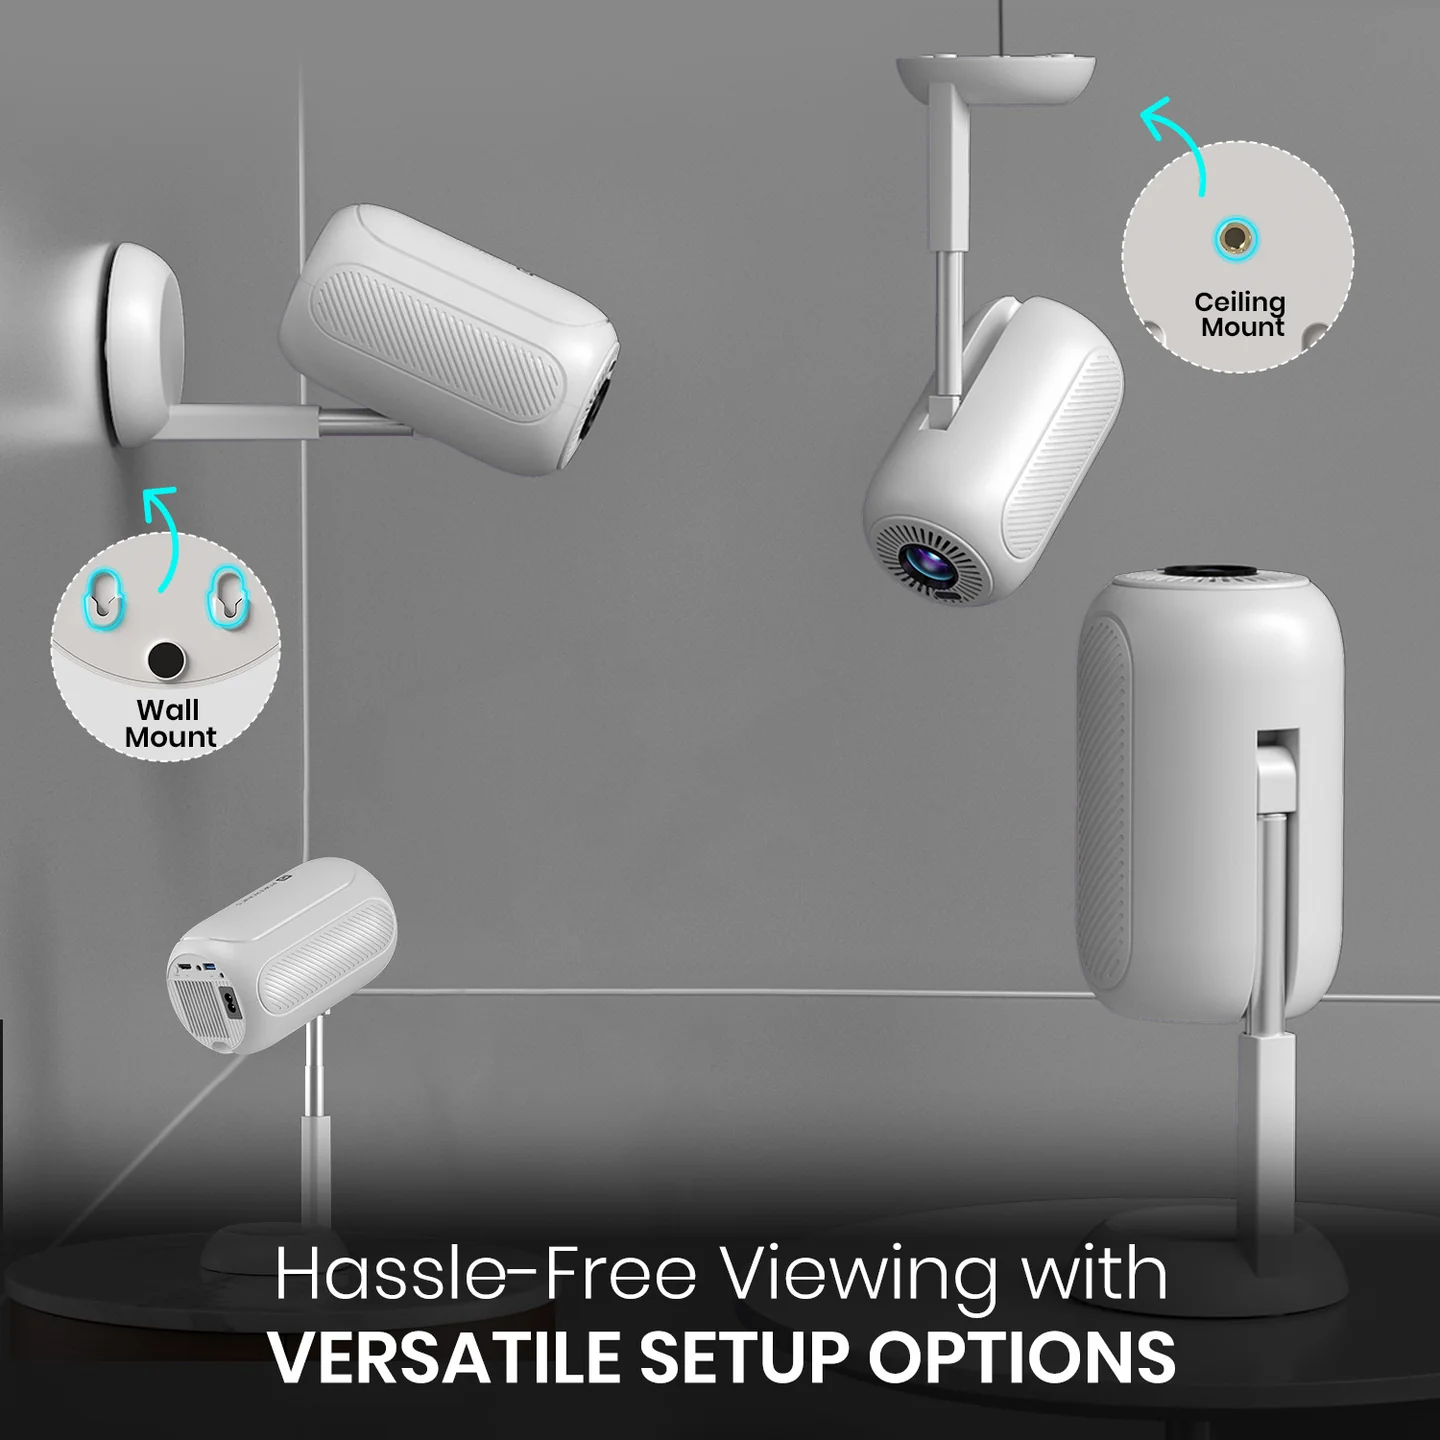
- Use a flat surface or ceiling mount for stable placement — the Beem 540 is ceiling mountable via its built-in hanging hole.
- The built-in telescopic stand lets you adjust the height (up to 10 inches) and angle to suit your viewing position.
5. Getting to Know the Remote
| Button | Function |
|---|---|
| Power | Turn the projector ON/OFF |
| Mute | Mute or unmute the projector speaker |
| Adjust Focus (backward/forward) | Adjust the lens focus |
| Direction keys | Up, down, left, right navigation |
| Enter | Performs accept action |
| Volume +/- | Increase / decrease speaker volume |
| Menu | Open the menu of applications or files |
| Home | Go to homepage |
| Return | Back to previous menu or close current applications |
| Signal Source | Switch between projection sources |
6. Adjusting Focus
- Auto Focus: Enable the auto focus option in Settings. The projector will automatically adjust the focus for you.
- Manual Focus: You can fine-tune the focal length using the remote control, whether you're in manual or auto focus mode. If your image looks blurry, use the Adjust Focus buttons until the picture sharpens.
7. Keystone Correction
If your projected image looks skewed or trapezoidal rather than a clean rectangle:
- Auto Keystone Correction: The projector automatically adjusts screen alignment for an optimal viewing experience based on its placement.
- Manual Keystone Correction: You can also adjust screen alignment manually through Settings for better projection angles.
8. Software Settings (Wi-Fi, Bluetooth, Language & More)
Wi-Fi Setup
Go to Settings → select your network → enter your password to connect.
Bluetooth Setup
Go to Settings → Bluetooth → turn it on and select a device to pair.
Important Note:
- Some Bluetooth devices may not connect due to compatibility limitations between devices
- Certain devices may not work together even though they function properly with other devices
Language Setting
Go to Settings → System Configuration → choose your preferred display language.
Time Setting
Go to Settings → System Configuration → set the appropriate time settings for your region.
Projection Mode
Go to Settings → select the projection method that suits your screen (e.g., front, rear, ceiling).
Note: With system version updates, on-screen menus may look slightly different from the images in this guide. Please refer to your projector's actual displayed interface as the final version.
9. Media Player & Screen Sharing
Playing Media from a USB Drive
- Press the Signal Source button on the remote and select USB.
- Insert a USB flash drive. The projector will detect it automatically and show a pop-up.
- Select the type of file you want to play — video, music, or photos.
- Press OK on the remote to open it.
Screen Sharing from Your Phone
- iPhone: Use AirPlay/Screen Mirroring.
- Android: Use Miracast (or your phone's built-in screen mirroring feature).
On the home screen, select the Screen Sharing app and follow the on-screen prompts to connect your phone.
10. Cleaning & Maintenance
Proper maintenance will enhance your projector's performance and longevity. Always unplug the power cord before cleaning or relocating the projector.
1. Cleaning the Lens
Use a soft, dry microfiber cloth to gently wipe the lens. If necessary, apply a small amount of lens-cleaning solution to the cloth — never directly on the lens.
2. Cleaning the Exterior
Wipe the projector body with a soft, dry cloth. Avoid abrasive cleaners or solvents that could damage the surface.
3. Cleaning the Ventilation Openings
Use a small brush or compressed air to remove dust from the ventilation grilles. Keeping vents unobstructed helps prevent overheating.
4. Cleaning the Remote Control
Use a slightly damp cloth to clean the remote. Avoid direct moisture contact with the buttons or battery compartment.
General Maintenance Tips
- Store the projector in a cool, dry place when not in use.
- Keep all cables properly organized to prevent damage.
- Ensure the power cord is unplugged before cleaning or relocating the projector.
11. Warranty & Support
- Warranty covers: Defects in materials and workmanship.
- Not covered: Damage due to physical impact, liquid exposure, or misuse.
Need Help?
- Visit: www.portronics.com
- Support Portal: support.portronics.com
Was this article helpful?
That’s Great!
Thank you for your feedback
Sorry! We couldn't be helpful
Thank you for your feedback
Feedback sent
We appreciate your effort and will try to fix the article