TABLE OF CONTENTS
- 1. Introduction
- 2. Package Contents
- 3. Product Specifications
- 4. Physical Overview
- 5. How to Use — Step by Step
- 6. Setting the Pressure Unit & Target Pressure
- 7. Changing the Fuse
- 8. Safety & Care
- 9. Warranty Note
- 10. Still Facing Issues?
1. Introduction
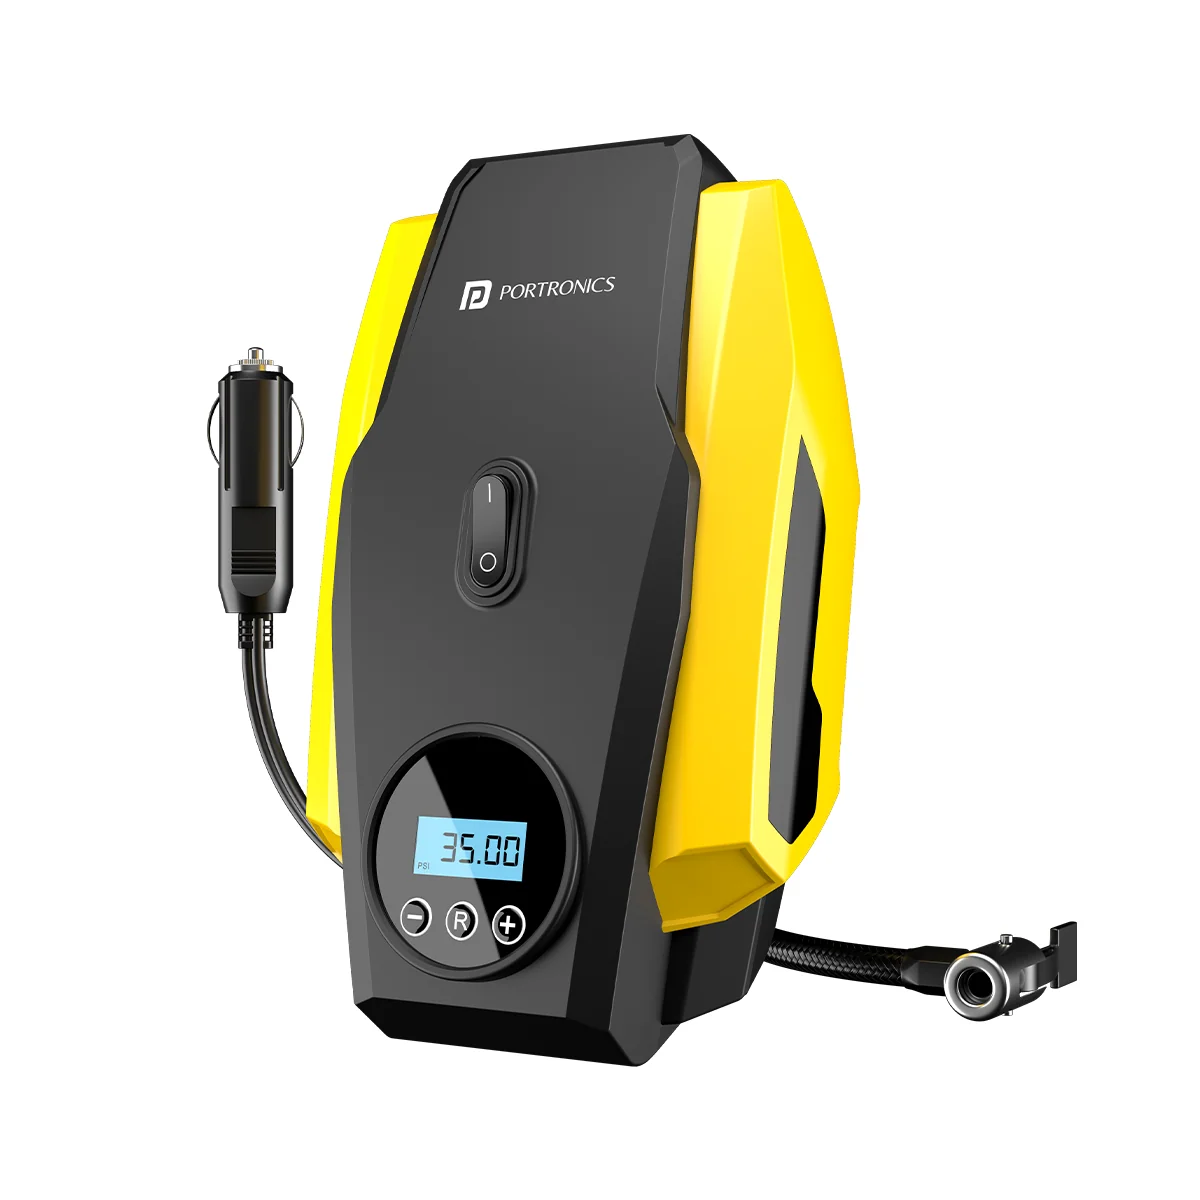
Thank you for choosing Portronics. The Vayu Lite is a 150 PSI portable tyre inflator designed for cars, bicycles, sports balls, and other inflatables. This guide covers everything needed to unbox, operate, and maintain the device safely.
2. Package Contents
- 1x Vayu Lite tyre inflator
- Multifunction nozzles (long tapered, short tapered, needle)
- 1x User Manual
3. Product Specifications
| Specification | Details |
|---|---|
| Power | 120W |
| Working Voltage | DC 12V |
| Max Operating Current | 10A |
| Max Working Pressure | For Tyre Pressure ≤ 150 PSI |
| Pressure Measurement Accuracy | ± 1 PSI |
| Continuous Working Time | ≤ 10 Mins |
| Material | ABS + Metal |
4. Physical Overview
- Power Switch — turns the appliance on/off
- Digital Display — shows PSI, KPA, BAR, KG/CM² readings
- "R" Button — switches the pressure units
- "–" Button — decreases the target value
- "+" Button — increases the target value
- LED Light — for low-light / roadside use
- Nozzles — Long Tapered, Short Tapered, and Needle attachments
5. How to Use — Step by Step
- Start the car engine.
- Insert the power cord into the 12V cigarette lighter socket. The LED will turn on to indicate power supply is being provided to the tyre inflator.
- Remove the dust cap of the valve, then connect the air hose to the valve. Make sure the hose and valve of the inflatable are connected tightly.
- Press the power switch to start inflating. When the preset pressure is reached, the inflator will automatically stop.
- Press the power switch again to turn off the appliance after inflation. Disconnect the power cord and the nozzle.
Note: Any damage caused by physical impact, water/liquid, fire, or caused by the customer or nature shall not be covered under warranty. Only product design, feature and functionality-related faults are considered under warranty. This product is only eligible for replacement (not repair) during the warranty period, as per the brand's discretion.
6. Setting the Pressure Unit & Target Pressure
Use the "R" button to cycle between pressure units (PSI, BAR, KPA, KG/CM²). Use the "+" and "–" buttons to set your desired target pressure once the correct unit is selected. The inflator will automatically stop once the actual pressure reaches the preset value.
7. Changing the Fuse
Applicable to vehicle power supply ONLY. Please check the status of the fuse if your appliance fails to start.
- Turn the screw anti-clockwise and take off the fuse.
- Exchange the fuse and then turn the screw back.
Follow the instructions above to get the appliance back to work. Use only compatible replacement fuses.
8. Safety & Care
- Only use the inflator for its intended applications.
- Avoid inflating objects beyond their recommended pressure limits.
- Do not operate the inflator in extreme temperatures or near flammable materials.
- Keep away from children to prevent accidental operation.
- Allow the inflator to cool down after prolonged use (max ~10 continuous minutes) to prevent overheating.
- Store the inflator in a dry and ventilated place, away from water or other liquids.
- Any damage caused by physical impact, water/liquid, fire, or caused by the customer or nature is not covered under warranty. Only product design, feature and functionality-related faults are considered.
9. Warranty Note
This product is only eligible for replacement (not repair) during the warranty period, as per the brand's discretion. Warranty does not cover damage from misuse, physical impact, water exposure, or normal wear.
10. Still Facing Issues?
If the issue persists after performing all troubleshooting steps, please raise a support request.
Our support team will assist you further.
Support
- Visit: www.portronics.com
- Support Portal: support.portronics.com
Was this article helpful?
That’s Great!
Thank you for your feedback
Sorry! We couldn't be helpful
Thank you for your feedback
Feedback sent
We appreciate your effort and will try to fix the article