TABLE OF CONTENTS
- 1. Introduction
- 2. Package Contents
- 3. Physical Specifications
- 4. Technical Specifications
- 5. 5 Built-in Inflation Modes
- 6. Safety Instructions
- 7. How to Use — Battery Powered Mode
- 8. How to Use — Cigarette Lighter Powered Mode
- 9. Pressure Pre-Set
- 10. Battery Display
- 11. Still Facing Issues?
1. Introduction
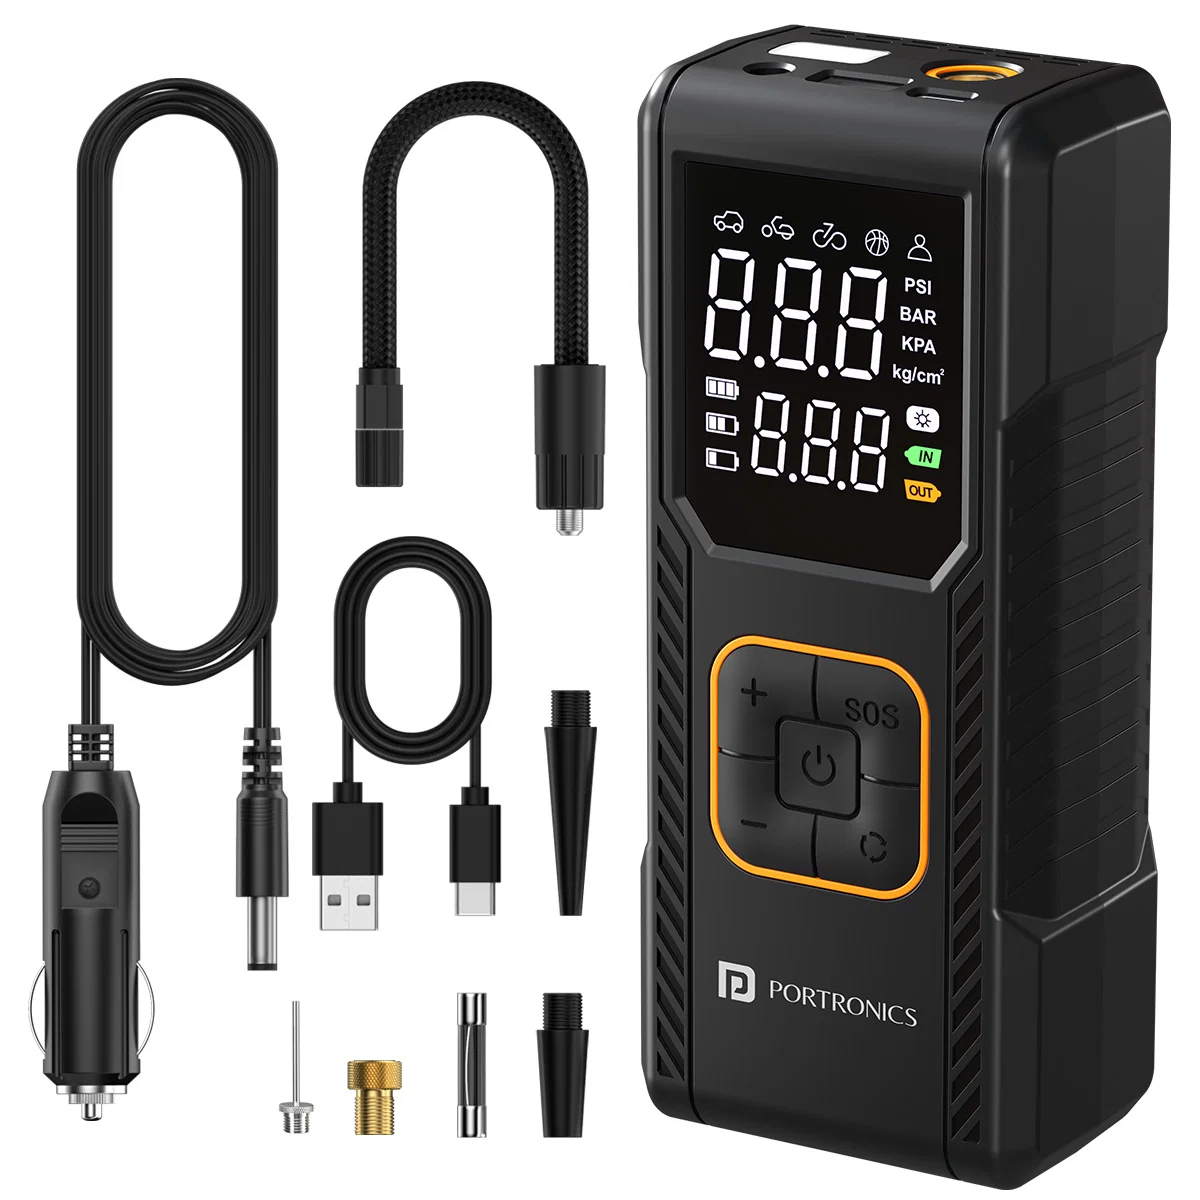
Thank you for choosing Vayu 9.0. This portable and easy-to-use inflator is designed to help you accurately inflate car tires, bicycle tires, sports balls, and more — with precision and convenience. Please read this manual carefully before use to ensure safe and proper operation.
2. Package Contents
- Air Hose
- Type-C Charging Cable
- Cigarette Lighter Power Cord x1
- Multifunctional Air Nozzle
3. Physical Specifications
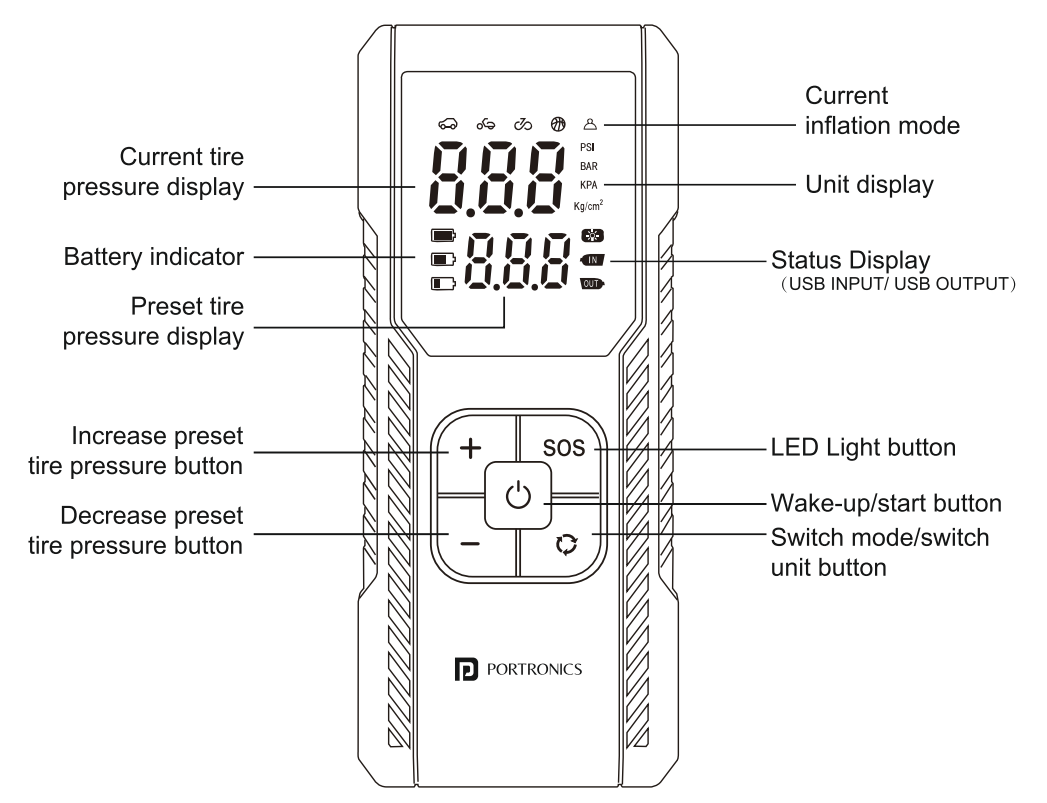
- Digital Display Screen
- Operation Buttons
- LED Light
- Air Hose Port
- Type-C Charging Port
- USB 5V 1A Output (cannot be used as a charging bank)
- DC Port
4. Technical Specifications
| Specification | Details |
|---|---|
| Product Version | Corded and Cordless |
| Product Model | Vayu 9.0 |
| Voltage | DC12V / 11.1V |
| Battery Capacity | 2000mAh x 3 |
5. 5 Built-in Inflation Modes
- For Car Tire
- For Motorcycle
- For Bicycle
- For Balls
- Custom Mode
6. Safety Instructions
- Use the inflator only for its intended purposes.
- Do not inflate objects beyond their recommended pressure limits.
- Avoid operating the inflator in extreme temperatures or near flammable materials.
- Keep out of reach of children to prevent accidental use.
- Allow the device to cool down after extended use to avoid overheating.
- Fully charge the battery before using it for the first time.
- Store the inflator in a cool, dry, and well-ventilated place.
- Do not expose the device to water or other liquids.
7. How to Use — Battery Powered Mode
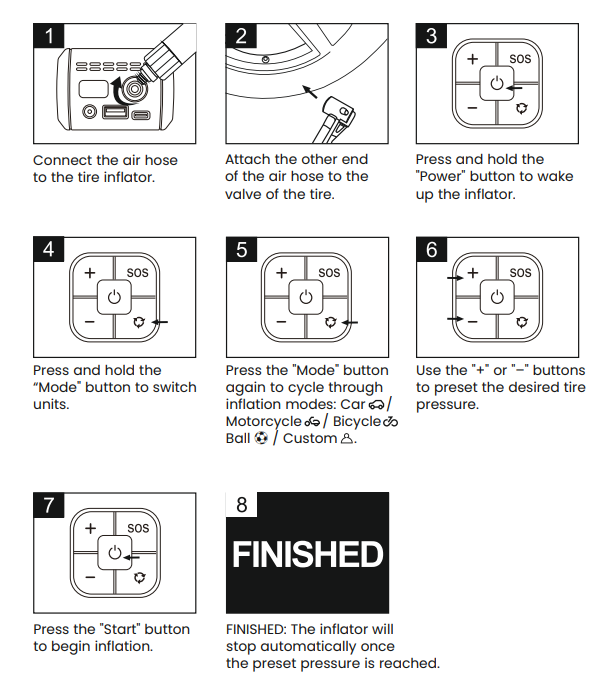
Please ensure the device is fully charged before use.
- Connect the air hose to the tire inflator.
- Attach the other end of the air hose to the valve of the tire.
- Press and hold the "Power" button to wake up the inflator.
- Press and hold the "Mode" button to switch units.
- Press the "Mode" button again to cycle through inflation modes: Car / Motorcycle / Bicycle / Ball / Custom.
- Use the "+" or "–" buttons to preset the desired tire pressure.
- Press the "Start" button to begin inflation.
- FINISHED: The inflator will stop automatically once the preset pressure is reached.
8. How to Use — Cigarette Lighter Powered Mode
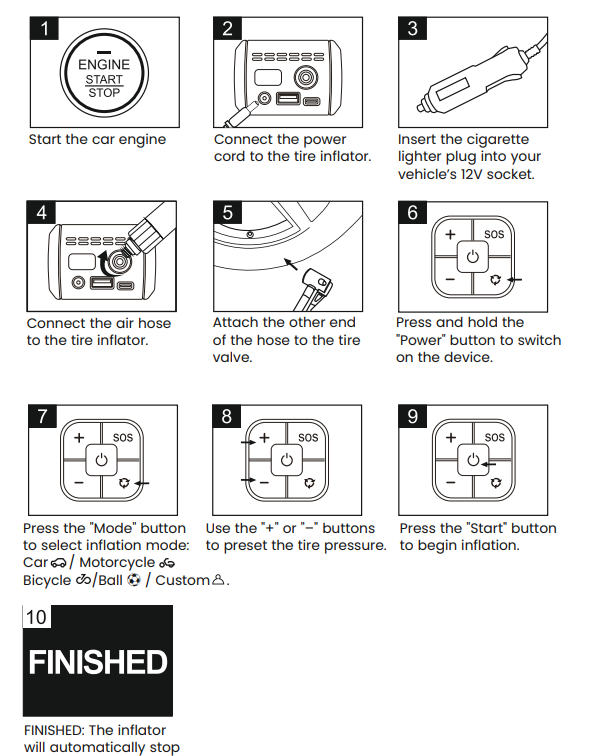
- Start the car engine.
- Connect the power cord to the tire inflator.
- Insert the cigarette lighter plug into your vehicle's 12V socket.
- Connect the air hose to the tire inflator.
- Attach the other end of the hose to the tire valve.
- Press and hold the "Power" button to switch on the device.
- Press the "Mode" button to select the inflation mode: Car / Motorcycle / Bicycle / Ball / Custom.
- Use the "+" or "–" buttons to preset the tire pressure.
- Press the "Start" button to begin inflation.
- FINISHED: The inflator will automatically stop once the preset pressure is reached.
9. Pressure Pre-Set
To preset your desired tire pressure:
- Press and hold the "Mode" button to switch the unit (e.g., PSI, BAR, KPA).
- Use the "+" or "–" buttons to adjust the pressure value.
- Once the desired value is set, wait a few seconds until the numbers stop flashing.
- Press the "Start" button to begin inflation.
- The inflator will automatically stop once it reaches the preset pressure.
10. Battery Display
The digital display screen has three battery modes:
| Battery Mark State | Charge Level |
|---|---|
| First battery mark display | 100% > power > 70% |
| Second battery mark display | 70% > power > 40% |
| Third battery mark display | 40% > power > 10% |
| Third battery mark flashing | Battery power less than 10% — needs recharging |
11. Still Facing Issues?
If the issue persists after performing all troubleshooting steps, please raise a support request.
Our support team will assist you further.
Support
- Visit: www.portronics.com
- Support Portal: support.portronics.com
Was this article helpful?
That’s Great!
Thank you for your feedback
Sorry! We couldn't be helpful
Thank you for your feedback
Feedback sent
We appreciate your effort and will try to fix the article