TABLE OF CONTENTS
- Product Overview
- Quick Reference
- Ports & Functions
- Getting Started
- Connecting an HDMI Display
- Connecting a VGA Display
- Using USB Data Ports
- Using the SD and TF Card Readers
- Wired Ethernet Connection
- USB-C PD Pass-Through Charging
- Using the 3.5mm Audio Jack
- Compatibility Checklist
- Heat During Use
- Care & Safety
- Still stuck?
Product Overview
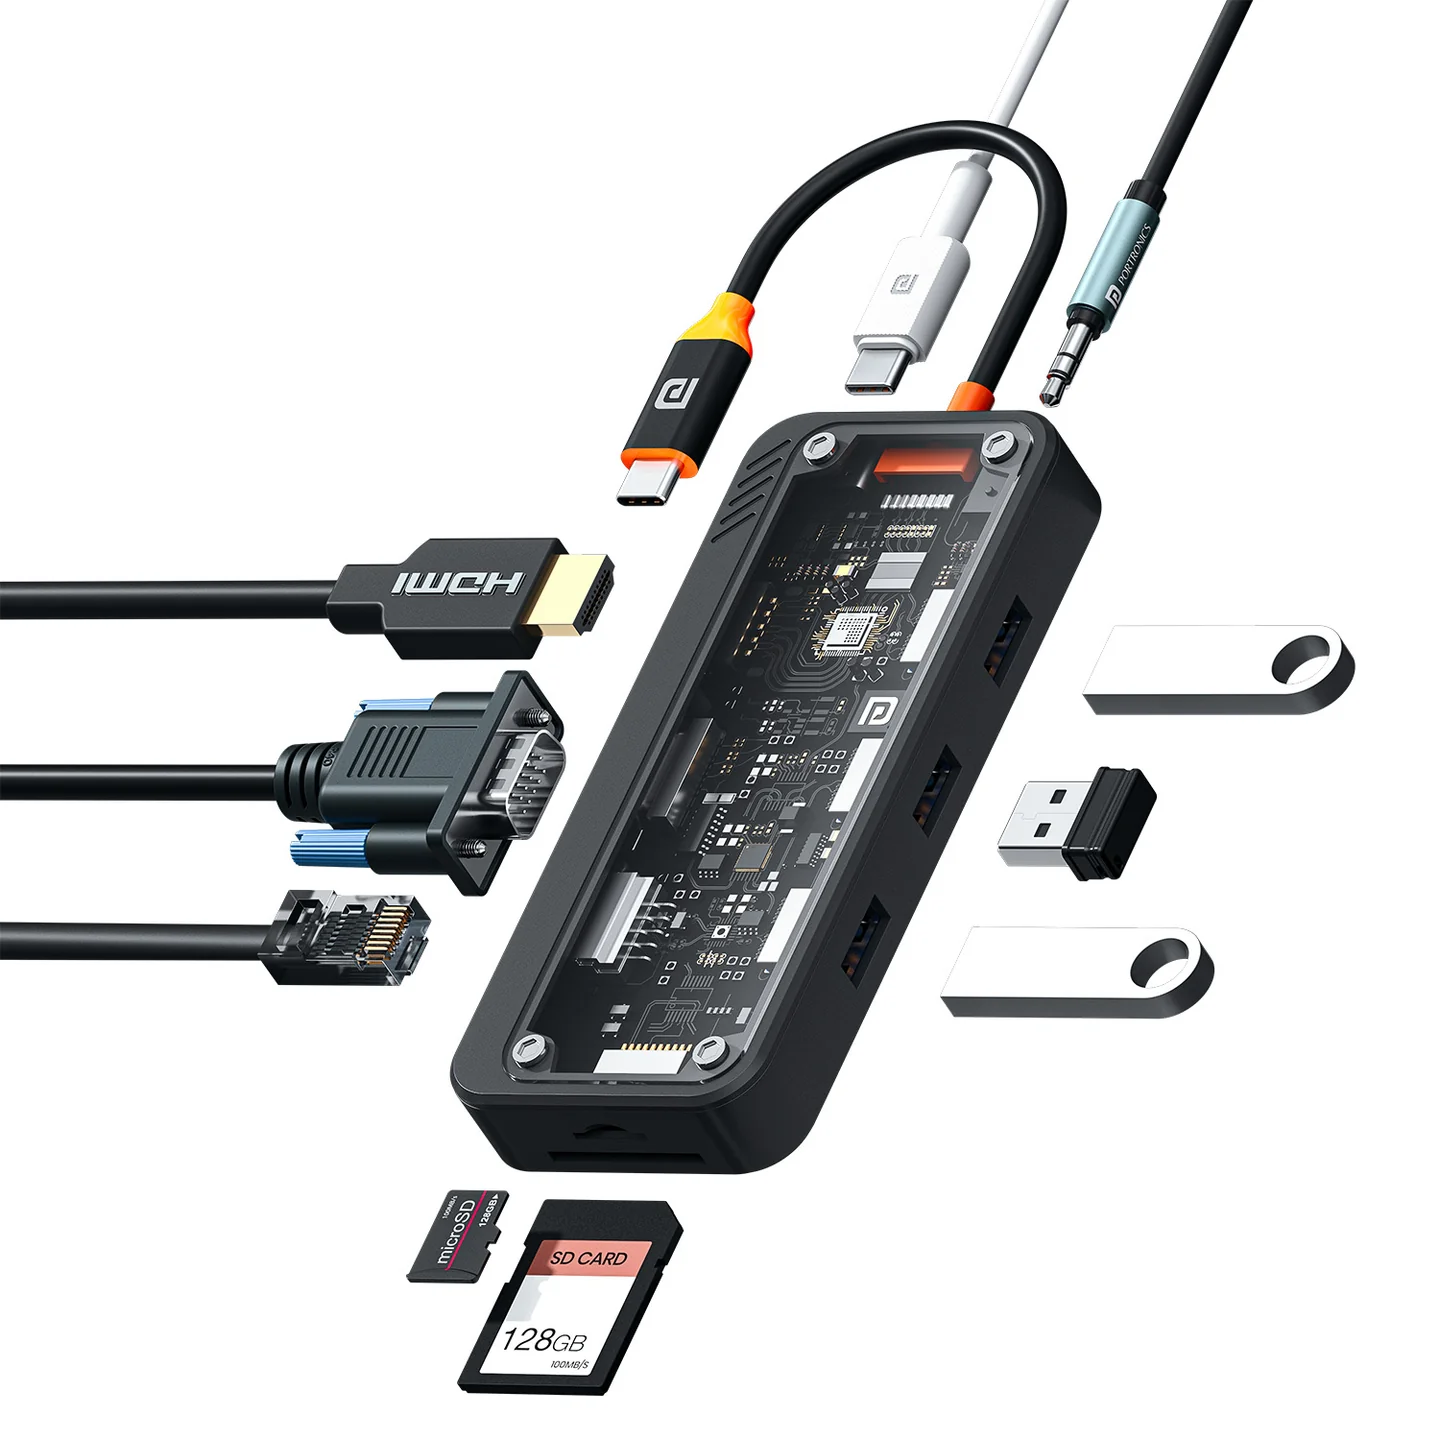
The Portronics Mport View Three is a 10-in-1 USB-C docking station that expands a compatible laptop, tablet or other USB-C device with HDMI and VGA display outputs, USB data ports, wired Ethernet, SD/TF card readers, USB-C Power Delivery charging and a 3.5mm audio jack.
Quick Reference
| Feature | Details |
|---|---|
| Product | Portronics Mport View Three |
| Product Code | POR 3264 |
| Host Connector | USB-C |
| HDMI Output | Up to 4K × 2K at 30Hz |
| VGA Output | Up to 1920 × 1080 at 60Hz |
| USB 3.0 | 1 port; up to 5Gbps |
| USB 2.0 | 2 ports; up to 480Mbps |
| Ethernet | RJ45 10/100Mbps |
| USB-C PD | Pass-through charging up to 100W |
| Card Readers | SD and TF/microSD; simultaneous reading supported |
| Audio | 3.5mm audio jack |
| Housing | ABS |
| Dimensions | Approx. 122.5 × 51.9 × 17.6mm |
| Weight | Approx. 63.7g |
| Host Compatibility | Compatible USB-C devices; video output requires host support for display output over USB-C |
Actual resolution, transfer speeds and charging power depend on the host device, connected accessories, cables and charger.
Ports & Functions
| Port | Function |
|---|---|
| USB-C Host Connector | Connects the docking station to a compatible host device |
| HDMI | Connects to a monitor, TV or projector; up to 4K × 2K at 30Hz |
| VGA | Connects to a compatible monitor or projector; up to 1920 × 1080 at 60Hz |
| USB 3.0 | High-speed data transfer up to 5Gbps |
| USB 2.0 × 2 | Connects compatible USB peripherals; up to 480Mbps |
| RJ45 Ethernet | Provides a wired network connection at 10/100Mbps |
| SD Card Slot | Reads compatible SD cards |
| TF / microSD Slot | Reads compatible TF/microSD cards |
| USB-C PD | Pass-through charging up to 100W; charging input only |
| 3.5mm Audio Jack | Connects compatible wired headphones or speakers |
Getting Started
- Check that your laptop, tablet or other host device has a compatible USB-C port.
- Confirm that the port supports the feature you want to use. HDMI and VGA display output require the host to support video output through USB-C.
- Connect the docking station's USB-C plug to the host device.
- Connect displays, peripherals, cards or an Ethernet cable to the matching ports.
- To charge the host, connect a compatible USB-C PD charger to the docking station's PD port.
- The docking station is designed for plug-and-play use and normally does not require a separate driver on compatible devices.
Connecting an HDMI Display
- Connect an HDMI cable from the docking station to a monitor, TV or projector.
- Select the correct HDMI input on the display.
- Open display settings on the host device and choose Duplicate/Mirror or Extend, if required.
- If the display does not appear, confirm that the host USB-C port supports video output.
- For 4K output, check that the host device, display and HDMI cable support the required resolution and refresh rate.
HDMI output supports up to 4K × 2K at 30Hz.
Connecting a VGA Display
- Connect a compatible VGA cable from the VGA port to the monitor or projector.
- Select the VGA input on the display.
- Open the host device's display settings and choose the required display mode.
- If there is no picture, confirm that the host supports video output through USB-C and check both cable connections.
VGA output supports up to 1920 × 1080 at 60Hz.
Using USB Data Ports
USB 3.0
- Connect a compatible USB device to the USB 3.0 port.
- Wait for the host device to detect it.
- Open the appropriate application or file manager.
- When using external storage, safely eject the drive before disconnecting it where your operating system supports this option.
The USB 3.0 port supports data transfer up to 5Gbps, depending on the connected device and workload.
USB 2.0
- Connect compatible accessories to either USB 2.0 port.
- Wait for the host device to detect the accessory.
- Use it with supported applications.
USB 2.0 supports up to 480Mbps and is suitable for compatible lower-speed peripherals.
Using the SD and TF Card Readers
- Insert an SD card into the SD slot or a TF/microSD card into the TF slot.
- Insert the card in the correct orientation without forcing it.
- Wait for the host device to detect the card.
- Open the file manager to view or transfer files.
- Eject the card safely before removing it, where supported by your operating system.
The two card slots support simultaneous reading. Actual card speed depends on the card and host device.
Wired Ethernet Connection
- Connect an Ethernet cable from your router or network outlet to the RJ45 port.
- Connect the docking station to the host device.
- Wait for the operating system to detect the wired network connection.
- Open network settings and select Ethernet if prompted.
The RJ45 port supports 10/100Mbps. Actual internet speed also depends on your router, cable, network service and host device.
USB-C PD Pass-Through Charging
- Connect the docking station to the host device.
- Connect a compatible USB-C PD charger to the docking station's PD port.
- Check the host device's charging indicator.
- Use a charger and cable that support the required Power Delivery rating.
The PD port supports pass-through charging up to 100W under compatible conditions. Actual power delivered to the host may be lower depending on the charger, cable, host device and other connected accessories.
The PD port is for charging only. It does not transfer data.
Using the 3.5mm Audio Jack
- Connect compatible wired headphones or speakers to the 3.5mm audio jack.
- Check the host device's audio settings if the connected device is not selected automatically.
- Start playback and adjust volume on the host device.
Audio support may vary depending on the host operating system and the connected device.
Compatibility Checklist
- The host device must have a compatible USB-C port.
- HDMI/VGA output requires host video-output support through USB-C.
- USB ports require USB data support.
- Ethernet requires host support for a wired network adapter.
- PD charging requires a compatible USB-C PD charger and host charging support.
- Card readers require compatible SD or TF/microSD cards.
- The product is designed to work with compatible devices without requiring a dedicated driver.
Heat During Use
The docking station's housing may feel warm during heavy use because of its aluminium internal components and the power/data load. A temperature of around 55°C under full load is described as within the stated operating limit.
If the hub becomes abnormally hot, disconnect it and allow it to cool before using it again. Check that the host device and cables are functioning normally.
Care & Safety
- Keep the docking station and ports dry and away from liquids.
- Do not pull or sharply bend the integrated cable.
- Do not force connectors or memory cards into ports.
- Avoid extreme temperatures, high humidity, dust and direct sunlight.
- Do not charge other devices through the USB-A interface; charging from that port may be slow.
- Safely eject storage devices and cards before disconnecting them.
- Disconnect the hub before cleaning and wipe it with a soft, dry cloth.
- Do not open, dismantle or modify the docking station.
Still stuck?
If the issue persists after performing all troubleshooting steps, please raise a support request.
Our support team will assist you further.
Support
- Visit: www.portronics.com
- Support Portal: support.portronics.com
Was this article helpful?
That’s Great!
Thank you for your feedback
Sorry! We couldn't be helpful
Thank you for your feedback
Feedback sent
We appreciate your effort and will try to fix the article