TABLE OF CONTENTS
- Product Overview
- Quick Reference
- What's in the Box
- Before You Begin
- Step 1 — Download the Xlife App
- Step 2 — Switch On the Otoscope
- Step 3 — Connect Your Smartphone to the Otoscope Wi-Fi
- Viewing the Ear Image
- Using the Ear-Cleaning Attachment
- Capturing or Reviewing Images
- Charging the XLife Otoscope
- Battery and Operating Time
- Cleaning and Maintenance
- Safety Precautions
- Still stuck?
Product Overview
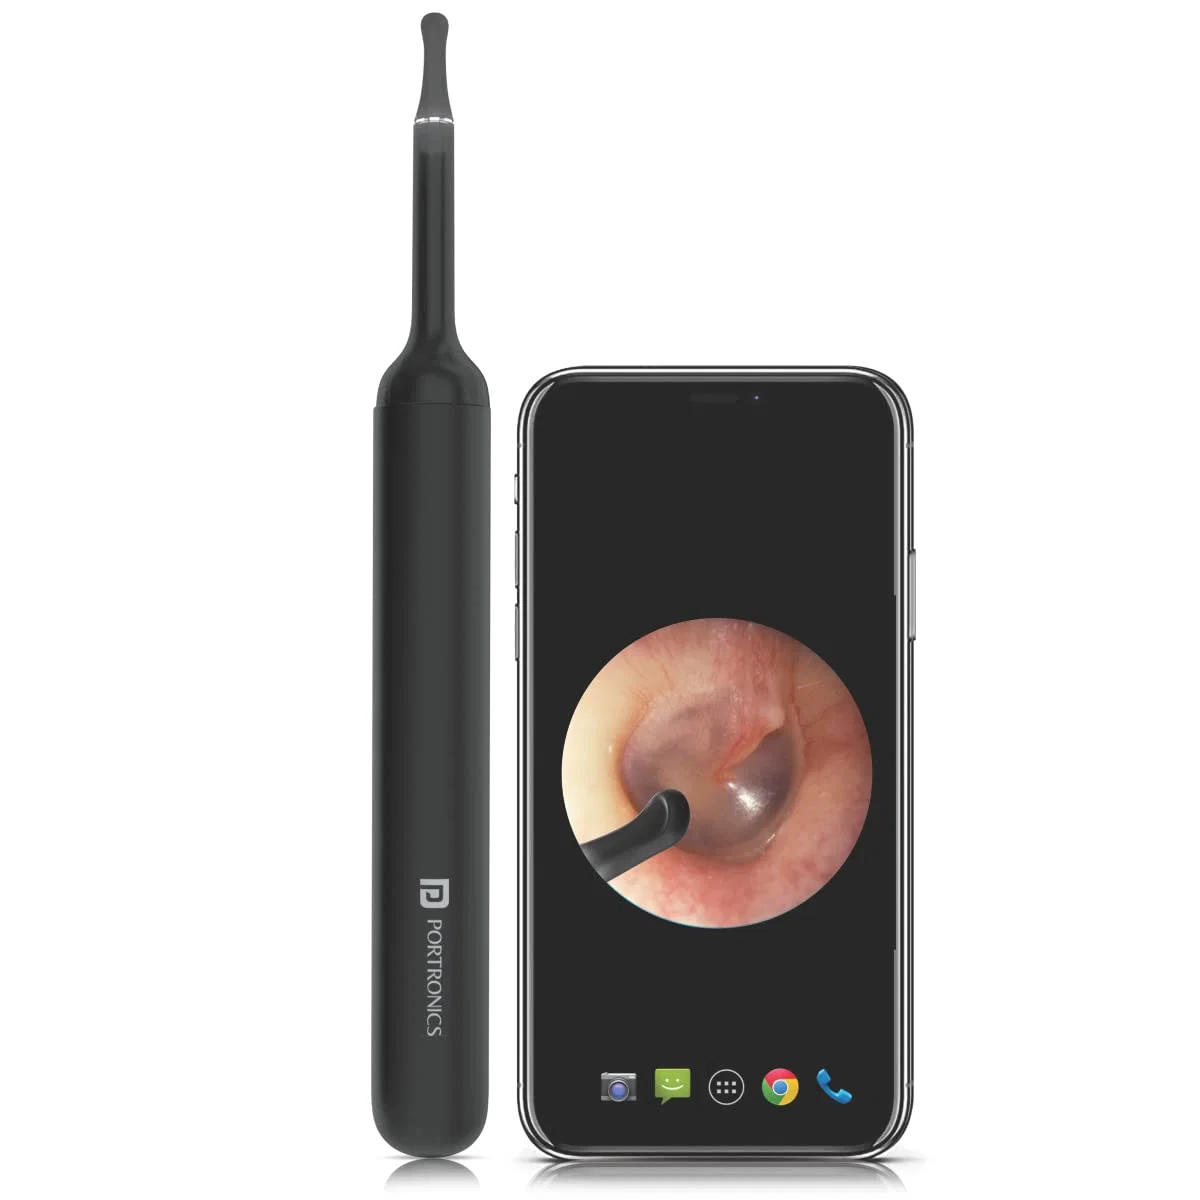
The Portronics XLife is a smart wireless ear-cleaning otoscope that connects to your smartphone over 2.4GHz Wi-Fi. Its camera lets you view the ear area on the Xlife app while using the ear-cleaning attachment carefully.
Quick Reference
| Feature | Details |
|---|---|
| Product | Portronics XLife Smart Wireless Ear Cleaning Otoscope |
| Product Code | POR 1760 |
| Camera | 3-megapixel endoscope; 1080p Full HD listing |
| Lens Diameter | 3.5mm |
| LED Lights | 6 |
| Image Frame Rate | 20 FPS |
| Depth of Field | 10–50mm |
| Gyroscope | 3-axis |
| Wireless Connection | 2.4GHz Wi-Fi |
| Wi-Fi Standard | IEEE 802.11b/g |
| Battery Capacity | 100mAh |
| Operating Time | Up to 30 minutes |
| Charging Time | Approximately 30 minutes |
| Charging Input | 5V/0.5A |
| Operating Temperature | -10°C to 45°C |
| Product Weight | Approx. 13g |
| App | Xlife app for iOS and Android |
| Warranty | 12 months |
Actual operating time may vary with usage and battery condition.
What's in the Box
| Item | Quantity |
|---|---|
| XLife Ear Otoscope | 1 |
| Charging Cable | 1 |
| User Guide | 1 |
| Silicone Ear Spoon Covers | 8 |
Before You Begin
- Charge the otoscope before first use.
- Download the Xlife app on your smartphone.
- Make sure you are in a stationary, well-lit and stable environment.
- Keep people, pets and moving objects at least 2 feet away while using the otoscope.
- Do not use the device in a moving vehicle or while walking.
Step 1 — Download the Xlife App
- iPhone: Search for Xlife in the Apple App Store.
- Android: Search for Xlife in Google Play.
- You can also scan the QR code provided with the product to access the app download.
Install the app and allow any permissions required for its normal operation.
Step 2 — Switch On the Otoscope
- Press and hold the power button on the ear-cleaning rod.
- The device switches ON and the blue indicator light flashes.
- Keep the otoscope close to your smartphone while connecting.
Step 3 — Connect Your Smartphone to the Otoscope Wi-Fi
- Open your smartphone's Wi-Fi settings.
- Find the Wi-Fi network broadcast by the otoscope. It appears in the format
Xlife-XO-XXXXXX. - Tap the device's Wi-Fi network to connect.
- Once connected, return to the Xlife app.
- Enter the app's live-view screen and start using the otoscope.
The otoscope uses its own 2.4GHz Wi-Fi connection for image transmission. Your phone may show that this Wi-Fi network has no internet access; this is expected when connected directly to the otoscope.
Viewing the Ear Image
- Connect the phone to the otoscope's Wi-Fi.
- Open the Xlife app.
- Check that the live camera image appears.
- Use the on-screen view to guide the ear-cleaning attachment gently.
- Move slowly and avoid pushing the otoscope forcefully or deeply into the ear.
- Stop immediately if you feel pain, discomfort or dizziness.
The camera uses a 3.5mm lens, six LED lights and a 3-axis gyroscope. The image transmission rate is 20 FPS.
Using the Ear-Cleaning Attachment
- Make sure the device is switched OFF before fitting or changing an attachment.
- Fit the supplied silicone ear spoon cover securely onto the cleaning tip, as applicable.
- Check that the cover is properly seated before use.
- Switch on the otoscope and connect it to the Xlife app.
- Use the live image to guide slow, gentle movements.
- Do not use the device aggressively or for extended periods.
- After use, switch OFF the otoscope and clean the attachment before storing it.
Do not use a damaged, loose or missing silicone cover.
Capturing or Reviewing Images
The Xlife app provides the camera view from the otoscope. Use the app's available on-screen controls to view the image and capture or save footage if those options are available in your app version.
If you notice anything unusual, stop using the tool and consult a qualified healthcare professional. The otoscope view is not a substitute for a medical examination.
Charging the XLife Otoscope
- Switch OFF the otoscope.
- Connect the supplied charging cable to the charging port.
- Connect the other end to a compatible 5V/0.5A USB power source.
- Allow approximately 30 minutes for charging.
- Disconnect the charger when charging is complete.
Do not use a power source exceeding the specified input. Keep the charging port dry and clean.
Battery and Operating Time
- Battery capacity: 100mAh.
- Operating time: up to 30 minutes.
- Charging time: approximately 30 minutes.
- The operating time depends on use and battery condition.
Turn OFF the device after use to conserve battery power.
Cleaning and Maintenance
- Clean the lens carefully with a professional alcohol cotton swab.
- Clean the ear-cleaning attachment after use.
- Keep the charging port and device dry.
- Do not immerse the otoscope in water or other liquids.
- Store the device in a clean, dry place.
- Do not use a damaged cable, otoscope or attachment.
Safety Precautions
- Use the device gently. Do not insert it forcefully or deeply into the ear.
- Stop immediately if you feel pain, discomfort or dizziness.
- Do not use the device on a child under 3 years old.
- Keep the device and small accessories away from children.
- Do not use it while walking, in a moving vehicle or in another unstable environment.
- Stay at least 2 feet away from people, animals and moving objects while using it.
- Do not use the device if it or its charging cable is damaged.
- Do not expose the device to water or excessive moisture.
- Do not disassemble or attempt to repair the otoscope.
- Keep the device within its operating temperature range of -10°C to 45°C.
Still stuck?
If the issue persists after performing all troubleshooting steps, please raise a support request.
Our support team will assist you further.
Support
- Visit: www.portronics.com
- Support Portal: support.portronics.com
Was this article helpful?
That’s Great!
Thank you for your feedback
Sorry! We couldn't be helpful
Thank you for your feedback
Feedback sent
We appreciate your effort and will try to fix the article