TABLE OF CONTENTS
- Product Overview
- Quick Reference
- What's in the Box
- Parts & Features
- Connecting Power
- Operating Modes
- Understanding the Red LED
- Cleaning the Collection Tray
- Safety & Care
- Still stuck?
Product Overview
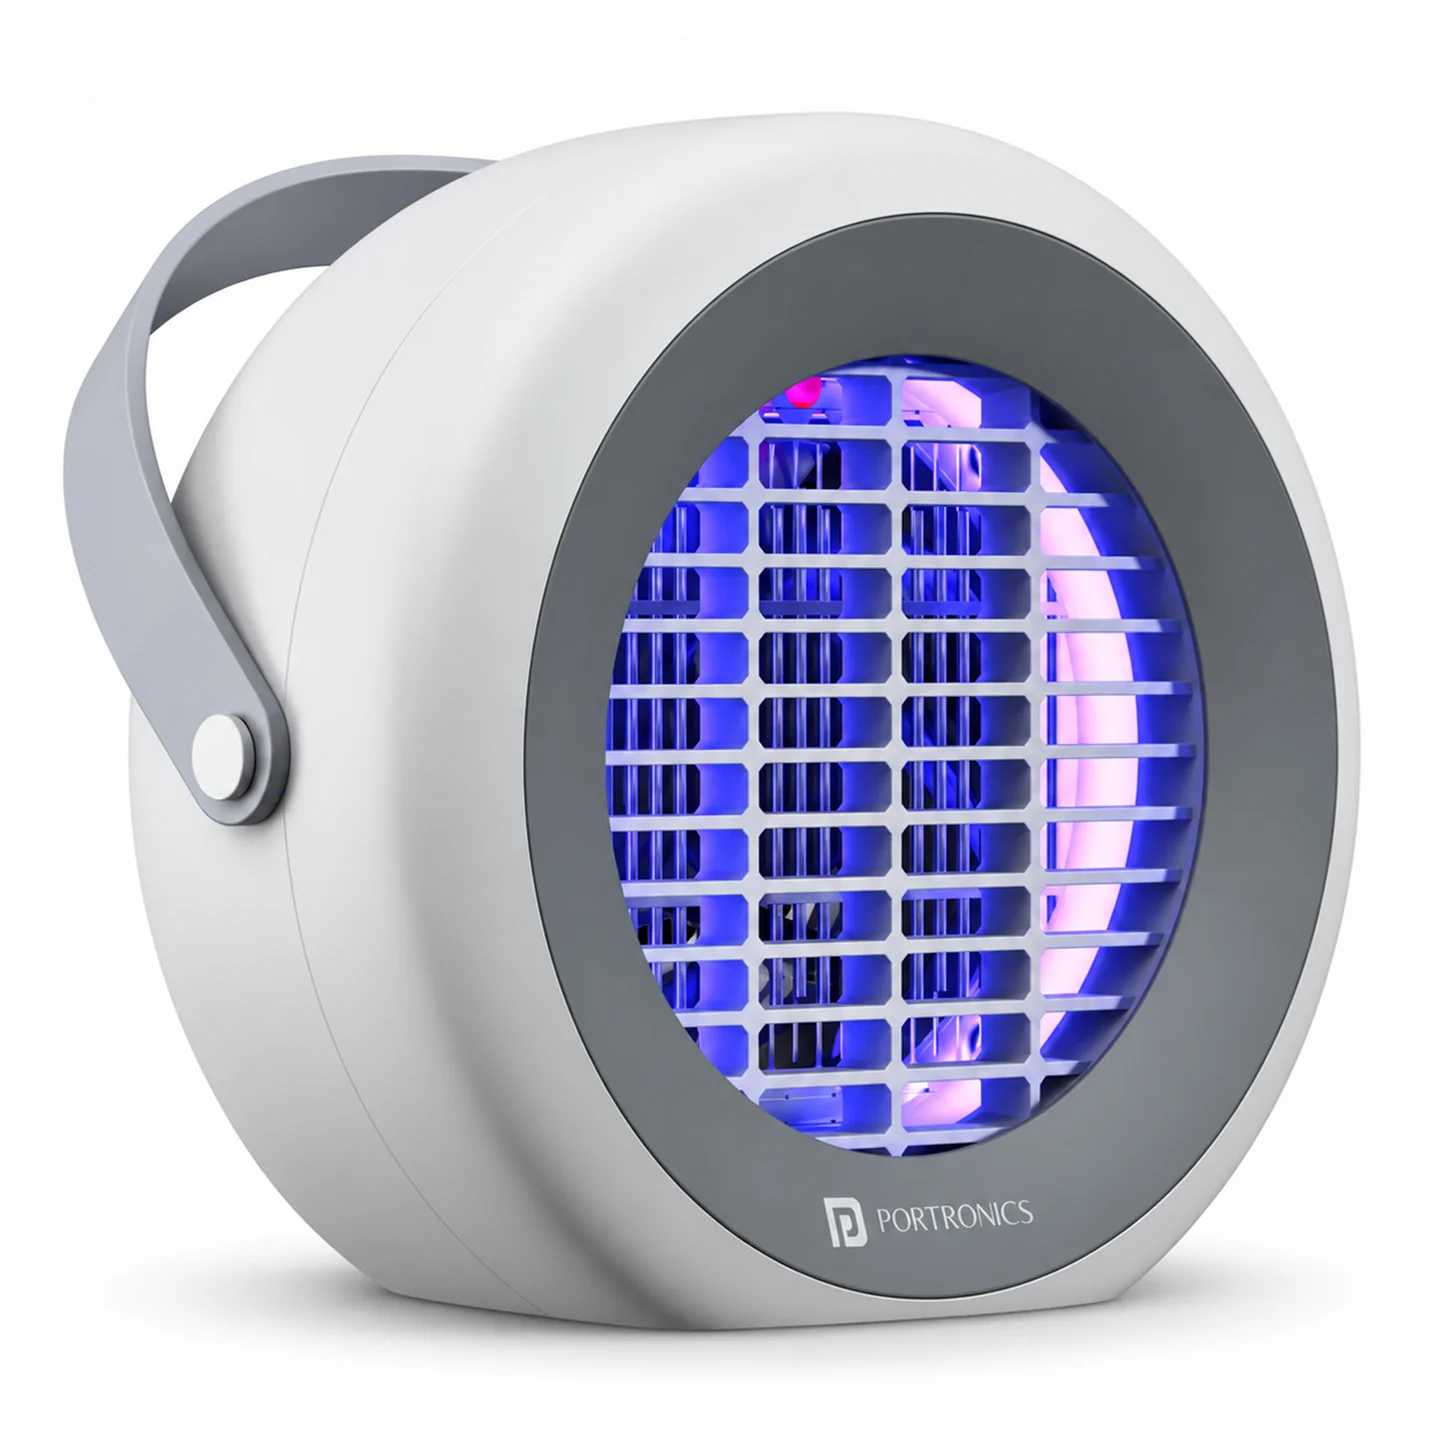
The Portronics Nixo is a USB-powered UV electric mosquito-killer lamp for indoor use. It attracts flying insects with UV light and uses a high-voltage grid to eliminate them. It also has a fan mode and a removable collection tray for dead insects.
Power requirement: Nixo must be connected to a suitable USB power source while operating. It is not a cordless/rechargeable lamp.
Quick Reference
| Feature | Details |
|---|---|
| Product | Portronics Nixo UV Electric Mosquito Killer Lamp |
| Power Input | USB Type-C |
| Input Voltage / Current | 5V / 2A |
| Input Power | 7W |
| High-Voltage Grid | 800–1000V |
| Light Source | UV LED |
| Fan | Yes |
| Material | ABS plastic |
| Use | Indoor only |
What's in the Box
| Item | Quantity |
|---|---|
| Nixo Lamp | 1 |
| USB Cable | 1 |
| Cleaning Brush | 1 |
| User Manual | 1 |
Parts & Features
| Part | Function |
|---|---|
| Buttons | Select the operating mode |
| Hanging option | Allows the unit to be hung where suitable |
| Red LED | Indicates that the high-voltage grid is on |
| High-voltage grid | Eliminates insects that contact the grid |
| UV light | Attracts flying insects |
| Type-C port | Connects the USB power cable |
| Fan | Operates in Silent mode and Combined mode |
| Collection tray | Collects dead insects for cleaning |
Connecting Power
- Connect the USB cable to the Type-C port on Nixo.
- Connect the other end to a suitable 5V/2A USB power source.
- Place the lamp on a stable surface or use its hanging option where suitable.
- Keep the lamp away from moisture and flammable materials.
Nixo requires a power connection during use; do not treat it as a battery-powered or rechargeable lamp.
Operating Modes
Nixo has three operating modes.
1. Electric-Shock Mode
- Press the button marked with the lightning symbol.
- The UV LED and high-voltage grid turn on.
- Press the same button again to turn this mode off.
Important: When the red LED inside the device is lit, the high-voltage grid is on. Never touch the grid or insert fingers or metal objects into the unit while it is operating.
2. Silent Mode
- Press the button marked with the fan symbol.
- The UV LED and fan turn on.
- Press the same button again to turn this mode off.
3. Combined Mode
- Press the lightning-symbol and fan-symbol buttons simultaneously.
- The UV LED, high-voltage grid and fan operate together.
- To turn the unit completely off, press both switches.
- To turn off an individual function, press its corresponding switch.
Understanding the Red LED
The red LED inside the unit indicates that the high-voltage grid is turned on.
Do not touch the grid, even when cleaning insects from around the unit. Always disconnect the USB power cable before cleaning or maintenance.
Cleaning the Collection Tray
Dead insects collect in the removable tray.
- Turn the unit off.
- Disconnect the USB cable from the power source.
- Ensure the unit is completely disconnected before cleaning.
- Remove the collection tray and clear the dead insects.
- Use the supplied brush if needed.
- Refit the tray before using the unit again.
Never wash the appliance with water or expose it to rain. Keep the high-voltage grid away from your hands and tools.
Safety & Care
- For indoor use only.
- Connect to a suitable 5V/2A USB power source while operating.
- Do not use in damp areas or near water.
- Keep away from flammable, explosive or combustible materials.
- Keep the appliance out of reach of children.
- Never touch the high-voltage grid or insert fingers or metal objects into the unit while it is operating.
- Always disconnect USB power before cleaning or maintenance.
- Do not wash the appliance with water or expose it to rain.
- Do not disassemble or repair the appliance yourself.
- Never use the unit with a damaged cable.
- Keep the unit away from excessive heat.
Still stuck?
If the issue persists after performing all troubleshooting steps, please raise a support request.
Our support team will assist you further.
Support
- Visit: www.portronics.com
- Support Portal: support.portronics.com
Was this article helpful?
That’s Great!
Thank you for your feedback
Sorry! We couldn't be helpful
Thank you for your feedback
Feedback sent
We appreciate your effort and will try to fix the article