TABLE OF CONTENTS
- Product Overview
- Quick Reference
- What's in the Box
- Parts & Controls
- Before You Begin
- Step 1 — Download the Bebird App
- Step 2 — Switch ON the Cleansify
- Step 3 — Connect Your Phone to Cleansify Wi-Fi
- Viewing the Camera Image
- Using the Ear Spoon
- Replacing the Ear Spoon Tip
- Charging the Cleansify
- Cleaning & Maintenance
- Safety Precautions
- Still stuck?
Product Overview
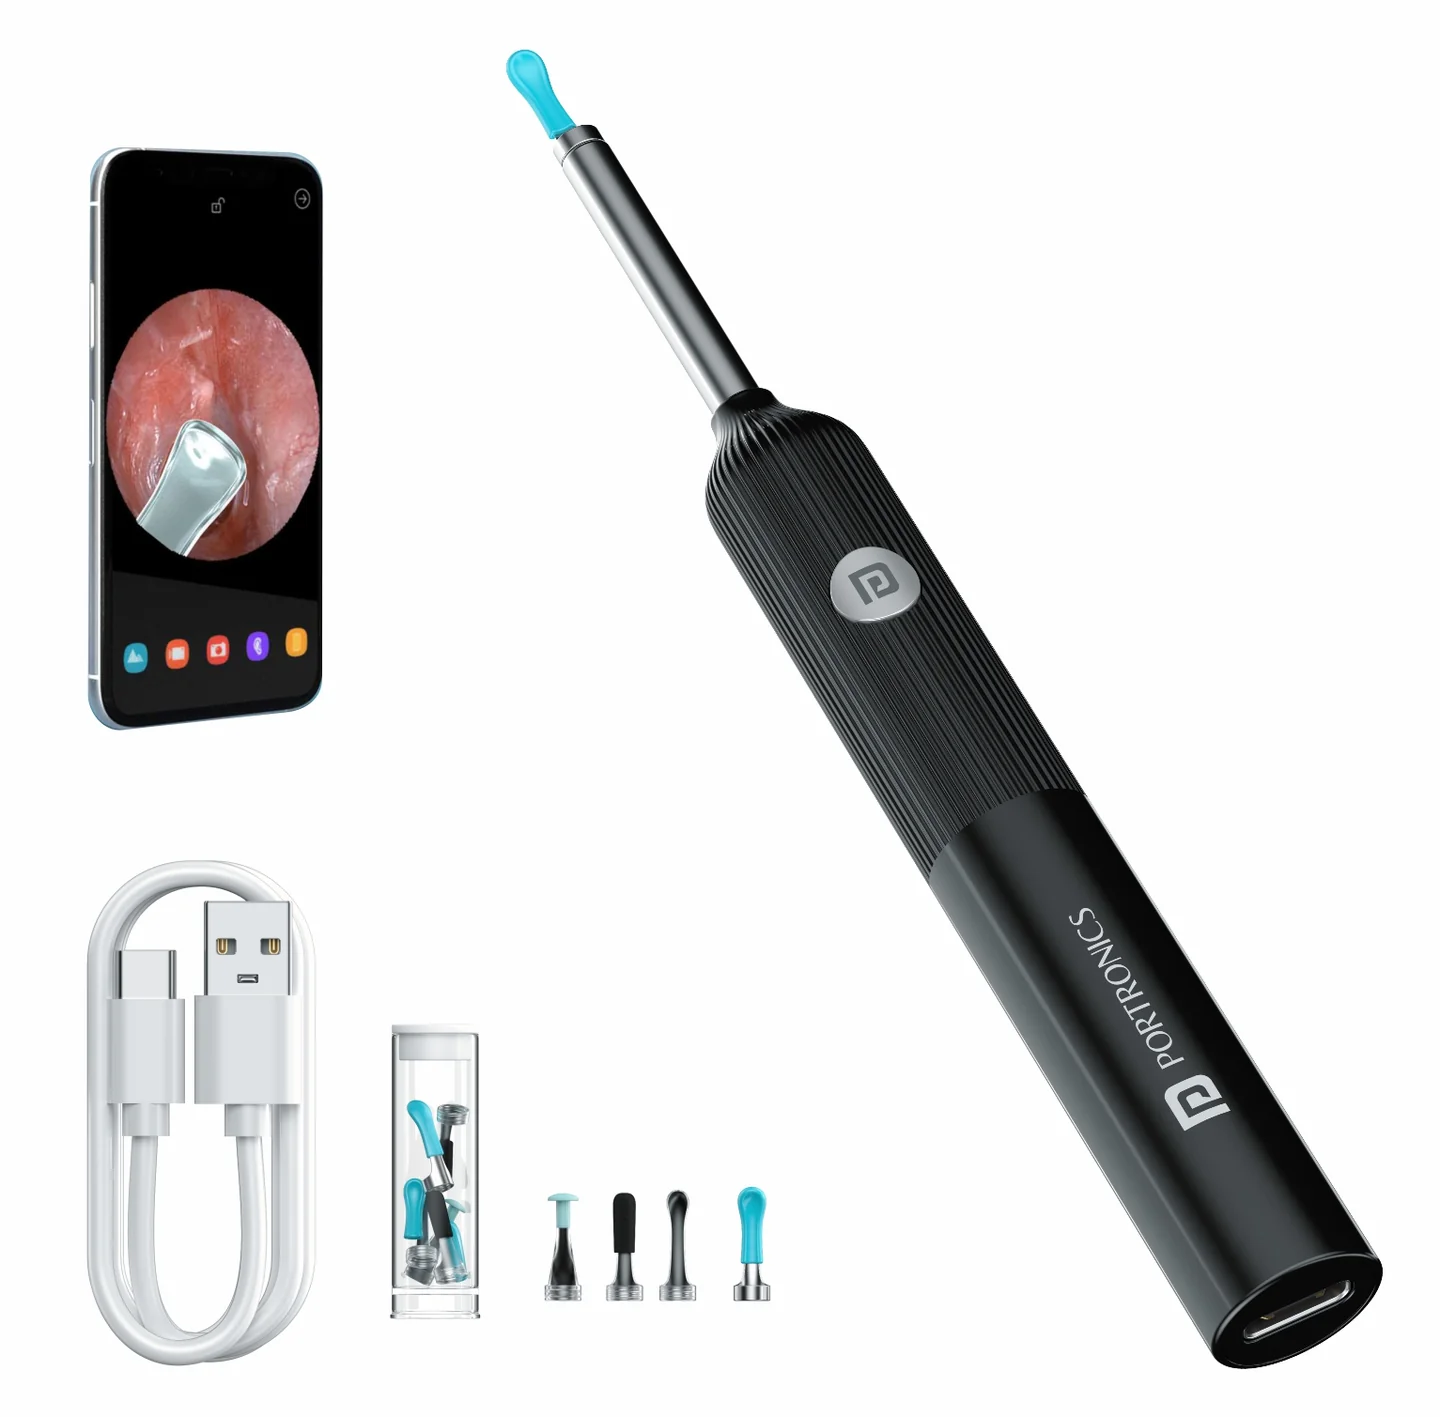
The Portronics Cleansify is a smart wireless ear-cleaning otoscope that connects to your smartphone through the Bebird app and a dedicated 2.4GHz Wi-Fi connection. Its camera and LED illumination let you view the ear area on your phone while using the ear-cleaning spoon attachment carefully.
Quick Reference
| Feature | Details |
|---|---|
| Product | Portronics Cleansify |
| Product Code | POR 1564 |
| Camera | 3MP |
| Lens Diameter | 3.5mm |
| Optimum Focal Length | 12–15mm |
| Depth of Field | 10–50mm |
| Image Transmission Rate | 20 FPS |
| Gyroscope | 3-axis |
| Wireless Frequency | 2.4GHz |
| Wi-Fi Standard | IEEE 802.11b/g |
| Battery | 180mAh rechargeable battery |
| Charging Input | 5V/0.5A |
| Charging Time | Approximately 1 hour |
| App | Bebird |
| Operating Temperature | -10°C to 45°C |
| Rod Weight | Approx. 13g |
| Warranty | 12 months |
Battery runtime can vary with usage. Check the battery indicator and recharge the device when required.
What's in the Box
| Item | Quantity |
|---|---|
| Metal and Silicone Ear Spoon | 1 |
| Q-Elastic Ear Spoon | 1 |
| Charging Cable | 1 |
Parts & Controls
| Part | Function |
|---|---|
| Camera Lens | Displays the ear area in the Bebird app |
| LED Light | Illuminates the viewing area |
| Power Button | Switches the otoscope ON or OFF |
| Blue Indicator Light | Flashes after the device starts |
| Ear Spoon Head | Used for gentle ear-cleaning |
| Replaceable Ear Tip | Attaches to the ear spoon and should be secured before use |
| Charging Port | Recharges the built-in battery |
Before You Begin
- Charge the otoscope using the supplied charging cable.
- Install the Bebird app on your smartphone.
- Keep the otoscope and smartphone close to each other during setup.
- Use the device in a stationary, stable environment.
- Check that the ear spoon and replaceable tip are securely fitted before use.
Step 1 — Download the Bebird App
- iPhone: Search for Bebird in the Apple App Store.
- Android: Search for Bebird in Google Play.
- You can also scan the QR code supplied with the product to access the app.
Open the app after installation and allow the permissions it requests for its normal operation.
Step 2 — Switch ON the Cleansify
- Press and hold the power button on the ear-cleaning rod.
- The device switches ON.
- The blue indicator light flashes after startup.
Keep the otoscope close to your phone while connecting.
Step 3 — Connect Your Phone to Cleansify Wi-Fi
- Open your smartphone's Wi-Fi settings.
- Look for the network named in this format:
bebird-R1-XXXXXX. - Select the Cleansify Wi-Fi network and wait for the phone to connect.
- Return to the Bebird app.
- Select Bebird R1 in the app.
- Tap Start to open the camera view.
Cleansify uses its own 2.4GHz Wi-Fi connection to transmit the camera image. Your phone may show that the connected Wi-Fi network has no internet access; this can be normal while connected directly to the otoscope.
Viewing the Camera Image
- Switch ON the otoscope.
- Connect your phone to the
bebird-R1-XXXXXXWi-Fi network. - Return to the Bebird app and select Bebird R1.
- Tap Start.
- Check that the live camera view appears.
- Hold the device steadily while viewing the image.
The camera has a 3MP sensor, 3.5mm lens, 3-axis gyroscope and 20 FPS image transmission.
Using the Ear Spoon
- Check that the replaceable ear tip is fitted securely.
- Open the live view in the Bebird app.
- Use the camera image to guide slow, gentle movements.
- Do not insert the ear spoon deeply or force it against the ear canal.
- Stop immediately if you feel pain, discomfort or dizziness.
- After use, switch OFF the device and clean the ear spoon and tip.
Do not use a loose, damaged or missing ear tip.
Replacing the Ear Spoon Tip
The ear spoon tip can be removed and replaced.
- Hold the ear spoon securely.
- To remove the existing tip, twist it anticlockwise.
- Align the replacement tip with the ear spoon connector.
- Twist the replacement tip clockwise to secure it.
- Tighten the retaining ring so the ear spoon tip cannot fall off.
- Check that the tip is firmly attached before using the device.
To avoid material ageing, replace the ear tip at least once every three months. Replace it sooner if it becomes loose, worn or damaged.
Charging the Cleansify
- Switch OFF the otoscope.
- Connect the supplied charging cable to the charging port.
- Connect the other end to a compatible 5V/0.5A USB power source.
- Allow approximately 1 hour for charging.
- Disconnect the charging cable when charging is complete.
Use the supplied charging cable. Keep the charging port clean and dry.
Cleaning & Maintenance
- Clean the camera lens carefully with a professional alcohol cotton swab.
- Clean the ear spoon and replaceable tip after use.
- Do not put the product in water or any other liquid.
- Keep the charging port dry.
- Store the otoscope and accessories in a clean, dry place.
- Avoid leaving the product or accessories in direct sunlight, as heat may soften the materials.
- If the device is not used frequently, charge it once a month to help maintain battery health.
Safety Precautions
- Use the ear spoon gently. Do not insert it deeply or force it into the ear canal.
- Stop immediately if you feel pain, discomfort or dizziness.
- Do not use the device while walking or moving.
- Use it in a stable environment and avoid being bumped by other people.
- Do not use the product if the ear spoon tip is loose or damaged.
- Do not put the product in liquid.
- Do not disassemble or attempt to repair the otoscope.
- Keep the product away from direct sunlight and excessive heat.
- Keep the device and small accessories away from children.
- Seek professional medical advice for ear pain, discharge, suspected infection, injury or persistent blockage. The camera view is not a medical diagnosis.
Still stuck?
If the issue persists after performing all troubleshooting steps, please raise a support request.
Our support team will assist you further.
Support
- Visit: www.portronics.com
- Support Portal: support.portronics.com
Was this article helpful?
That’s Great!
Thank you for your feedback
Sorry! We couldn't be helpful
Thank you for your feedback
Feedback sent
We appreciate your effort and will try to fix the article