TABLE OF CONTENTS
- Product Overview
- Quick Reference
- What's in the Box
- Parts & Controls
- Setting Up the Phone Holder
- Adjusting the Phone Angle
- Extending the Selfie Stick
- Using the Lockable Balancing Handle
- Opening the Tripod
- Pairing the Bluetooth Remote
- Using the Wireless Remote
- Using the Portable Selfie Light
- Charging the Bluetooth Remote
- iPhone Remote Setup
- Using the Remote for Photos and Videos on iPhone
- Usage Tips
- Care & Maintenance
- Troubleshooting
- Safety Instructions
- Still stuck?
Product Overview
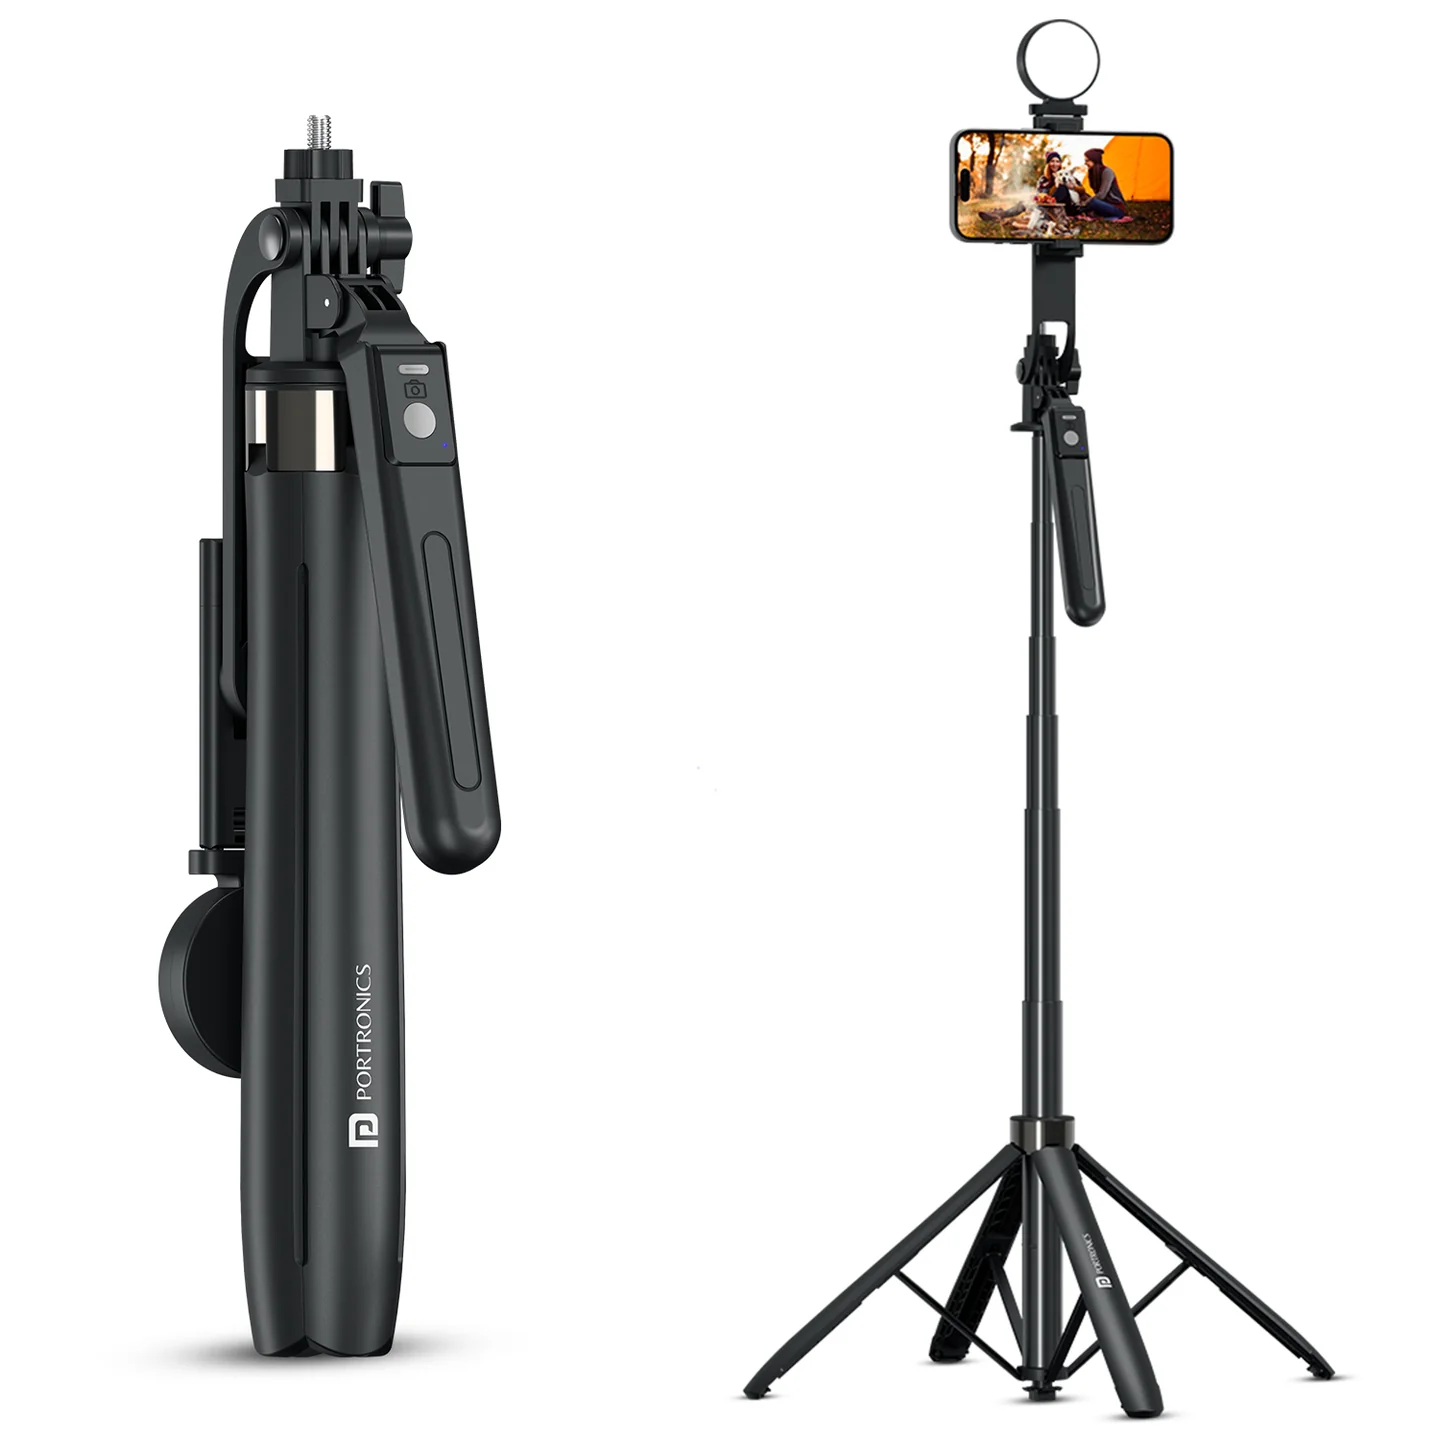
The Portronics Lumistick Neo (POR 3513) is an adjustable selfie stick with a four-legged tripod, a lockable balancing handle, a detachable Bluetooth remote and a rechargeable LED selfie light. It can be used as a handheld selfie stick or opened into a tripod for hands-free photos, videos, group shots and vlogging.
The telescopic aluminium rod extends up to 1.8 metres. The phone holder rotates and tilts to help position the phone for different shooting angles.
Quick Reference
| Feature | Details |
|---|---|
| Product | Portronics Lumistick Neo |
| Product Code | POR 3513 |
| Colour | Black |
| Material | Aluminium alloy |
| Product Type | Adjustable selfie stick with tripod |
| Maximum Extendable Length | 1.8m / 180cm |
| Phone Rotation | 360° |
| Vertical Tilt Adjustment | Up to 270° |
| Tripod | Four-legged design |
| Connectivity | Bluetooth |
| Remote Charging Port | USB Type-C |
| Phone Compatibility | Android and iOS smartphones |
| Warranty | 6 months |
What's in the Box
| Item | Quantity |
|---|---|
| Lumistick Neo Selfie Stick | 1 |
| Portable Selfie Light | 1 |
| Wireless Remote | 1 |
| Type-C Charging Cable | 1 |
Parts & Controls
| Part | Function |
|---|---|
| Phone Holder / Clamp | Holds the smartphone |
| Telescopic Aluminium Rod | Extends the selfie stick up to 1.8m |
| Lockable Balancing Handle | Provides a steadier grip while recording |
| Four Tripod Legs | Open to create a standing tripod |
| Bottom Tripod Button | Releases the tripod legs |
| Wireless Remote | Controls the phone camera remotely |
| Remote Power Button | Turns the remote ON or OFF |
| Capture Button | Takes photos or starts video, as supported by the phone |
| Video Key | Video shortcut key shown on the remote |
| Page / Direction Keys | Page Up, Page Down, Left and Right keys |
| Pause / Play Key | Pause / Play key; the remote diagram also indicates a double-click Like function |
| Portable Selfie Light | Provides additional light for photos and videos |
| Light Power Button | Turns the light ON/OFF, changes lighting modes and adjusts brightness |
| Type-C Charging Ports | Used to charge the remote and selfie light |
Setting Up the Phone Holder
- Gently pull open the phone clamp.
- Place the smartphone inside the holder.
- Adjust the clamp so the phone is held securely.
- Check that the phone is stable before extending the rod or moving the stick.
Adjusting the Phone Angle
- Rotate the phone holder up to 360° for horizontal or vertical shots.
- Tilt the holder up to 270° to frame the shot.
- Check that the holder is secure before releasing the phone.
Extending the Selfie Stick
- Hold the stick securely.
- Pull the telescopic rod gently to extend it.
- Adjust it to the required height, up to 1.8m.
- Check that the extended sections are firmly positioned before use.
Do not pull the rod forcefully or extend it beyond its intended travel.
Using the Lockable Balancing Handle
- Hold the handle firmly.
- Pull the handle downward to secure the lock.
- Check that the handle is locked before recording.
- Maintain a firm grip while taking photos or videos.
The handle is designed to improve grip and stability during shooting.
Opening the Tripod
- Hold the selfie stick securely.
- Press the bottom button to release the tripod legs.
- Spread all four legs evenly.
- Place the tripod on a flat, stable surface.
- Check that the legs are fully open and the stand is steady before mounting or using the phone.
Pairing the Bluetooth Remote
- Turn ON Bluetooth on your phone.
- Switch ON the remote using its Power Button.
- The remote's blue indicator light will flash to show pairing mode.
- Open the phone's Bluetooth settings.
- Search for Lumistick Neo.
- Select the device to connect.
- Once connected, the indicator light will stop flashing.
The remote can then be used to control compatible camera functions from a distance.
Using the Wireless Remote
| Control | Function shown in the product guide |
|---|---|
| Power Button | Turns the remote ON/OFF |
| Capture Button | Clicks photos / starts video |
| Video Key | Video shortcut key |
| Page Up / Page Down | Page navigation |
| Left / Right | Directional navigation |
| Pause / Play | Pause / Play; double-click Like is also indicated on the remote diagram |
| Indicator Light | Shows pairing and battery status |
The exact response of shortcut and navigation keys may depend on the phone, app and operating system.
Using the Portable Selfie Light
The Lumistick Neo includes a detachable rechargeable selfie light.
| Button Action | Function |
|---|---|
| Press once | Turns the light ON |
| Press again | Changes lighting modes |
| Long-press | Adjusts brightness levels |
The product information does not name each lighting mode or specify the number of brightness steps.
Charging the Selfie Light
- Connect a USB cable to the light's charging port.
- Use a 5V power adapter.
- Check the indicator light for charging status.
- Allow the light to charge before use.
| Light Indicator | Status |
|---|---|
| Red — Flashing | Low charge |
| Red — Steady | Charging |
| Green — Steady | Fully charged |
Charging the Bluetooth Remote
- Connect a Type-C cable to the remote's charging port.
- Connect the cable to a suitable USB power source.
- Check the remote indicator.
| Remote Indicator | Status |
|---|---|
| Red — Flickering | Low battery |
| Red — Steady | Charging |
| Light OFF | Fully charged |
The available product information does not specify the remote's battery capacity or charging duration.
iPhone Remote Setup
- Turn OFF Screen Rotation Lock.
- Go to Settings → Accessibility → Touch → AssistiveTouch.
- Turn ON AssistiveTouch.
- Open the AssistiveTouch settings and locate Tracking Sensitivity.
- Adjust the slider towards the turtle icon.
- The recommended setting is approximately one-quarter to one-third of the slider bar.
Using the Remote for Photos and Videos on iPhone
- Open the iPhone Camera app or another camera/video app.
- Make sure the remote is paired and connected.
- Use the remote button to capture photos or videos.
If the Capture Button Does Not Work
The floating AssistiveTouch button may not be aligned with the camera shutter button.
- Press the floating AssistiveTouch circle.
- Drag it towards the camera shutter button.
- Align it properly with the shutter control.
- Try capturing a photo again.
Once aligned, the remote should work with the photo/video controls as described in the product instructions.
Usage Tips
- Lock the balancing handle before shooting for better stability.
- Use tripod mode for group shots or video recording.
- Ensure the phone is tightly secured in the holder.
- Avoid over-extending the stick in windy conditions.
- Always place the tripod on a flat, stable surface.
- Check the tripod legs and handle lock before releasing the product.
Care & Maintenance
- Keep the product away from water and wet surfaces.
- Do not disassemble the product.
- Avoid dropping or applying excessive force.
- Charge using certified adapters only.
- Store the selfie stick and accessories carefully when not in use.
Troubleshooting
| Issue | Possible Cause | Recommended Action |
|---|---|---|
| Remote does not connect | Bluetooth is OFF or remote is not in pairing mode | Turn ON Bluetooth and the remote, then reconnect Lumistick Neo |
| Device does not stay stable | Tripod legs or balancing handle are not secured | Open all four legs and lock the handle |
| Phone is not secure | Clamp is not adjusted properly | Reposition the phone and adjust the clamp |
| Remote capture button does not work on iPhone | AssistiveTouch is not enabled or aligned with the shutter | Follow the iPhone Remote Setup steps |
| Remote battery is low | Remote needs charging | Charge using the Type-C port |
| Selfie light is not working | Light battery may be low | Charge the light and check the indicator |
Safety Instructions
- Do not use near water or wet surfaces.
- Keep the product away from children.
- Do not disassemble the product.
- Avoid dropping or applying excessive force.
- Charge using certified adapters only.
- Always secure the phone in the holder before extending or repositioning the stick.
- Place the tripod on a flat, stable surface.
- Avoid over-extending the stick in windy conditions.
Still stuck?
If the issue persists after performing all troubleshooting steps, please raise a support request.
Our support team will assist you further.
Support
- Visit: www.portronics.com
- Support Portal: support.portronics.com
Was this article helpful?
That’s Great!
Thank you for your feedback
Sorry! We couldn't be helpful
Thank you for your feedback
Feedback sent
We appreciate your effort and will try to fix the article