Bubble Complete Guide
Modified on Thu, 2 Apr at 11:20 AM
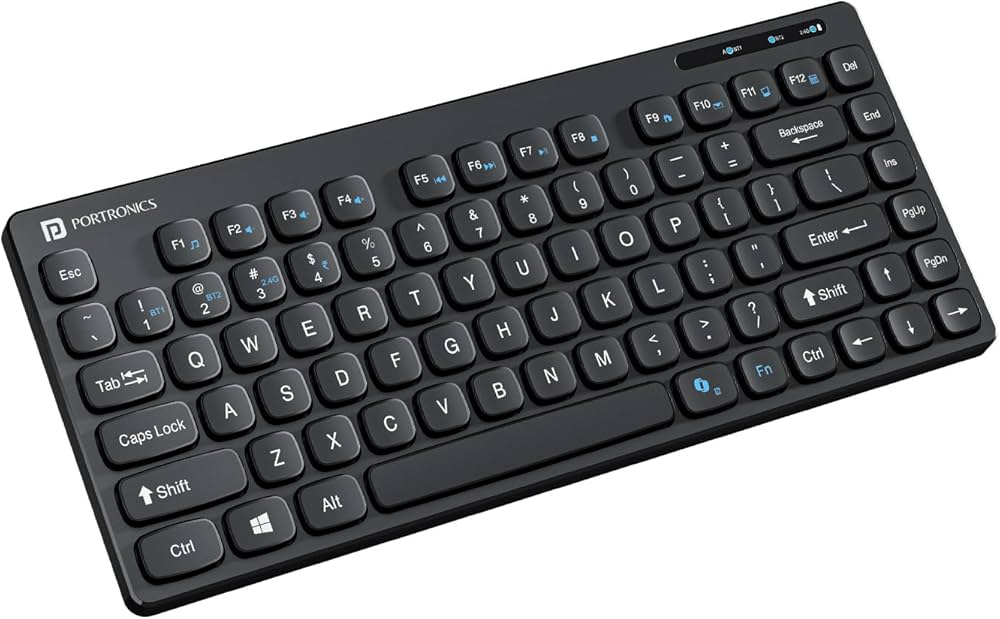
Portronics Bubble Keyboard – Setup & Troubleshooting Guide
1. Product Overview
Model: Portronics Bubble
Type: Multimedia Wireless Keyboard
Connectivity
2.4 GHz Wireless via USB Receiver
Bluetooth (BT1 / BT2)
Power Supply
AAA Batteries
Compatibility
Windows Devices
macOS Devices
Android Devices (with supported USB interface)
Keyboard Specifications
Interface: 2.4 GHz Wireless + USB Receiver
Wireless Range: Up to 10 meters
Package Contents
Portronics Bubble Wireless Keyboard
USB Receiver
User Manual
2. Connectivity Guide
A. Connecting via 2.4 GHz USB Receiver
Step 1: Turn ON the Keyboard
Turn on the keyboard using the power switch located on the upper back of the keyboard.
Step 2: Insert the USB Receiver
Locate the USB receiver stored in the back of the keyboard.
Insert the receiver into the USB port of your laptop, desktop, or tablet.
Step 3: Activate 2.4 GHz Mode
Press Fn + 3 (2.4G) to switch the keyboard to 2.4 GHz wireless mode.
Step 4: Automatic Connection
Once the receiver is inserted, the keyboard will automatically connect to your device.
No manual pairing or driver installation is required.
Step 5: Start Using the Keyboard
After the device detects the keyboard, it will be ready for use immediately.
B. Connecting via Bluetooth
Step 1: Turn ON the Keyboard
Turn on the keyboard using the power switch located on the upper back of the keyboard.
Step 2: Select Bluetooth Mode
Press Fn + 1 (BT1) or Fn + 2 (BT2).
The indicator light on the right side of the keyboard will glow according to the selected mode.
Step 3: Enter Pairing Mode
Press and hold Fn + 1 (BT1) or Fn + 2 (BT2) for 5–7 seconds.
The blue or green indicator light will start blinking rapidly, indicating that the keyboard has entered pairing mode.
Step 4: Enable Bluetooth on Your Device
For Windows
Open Settings
Go to Bluetooth & Devices
Turn Bluetooth ON
Click Add Device
Select Bluetooth
Choose Bubble BT1 / BT2
Click Connect
For macOS
Open System Settings
Select Bluetooth
Turn Bluetooth ON
Locate Bubble BT1 / BT2
Click Connect
Step 5: Connection Confirmation
Once the keyboard is connected:
The indicator light will stop blinking
The keyboard will respond normally while typing
The keyboard is ready to use
3. Power Saving Mode
To conserve battery power, the keyboard automatically enters sleep mode after a period of inactivity.
How to Wake the Keyboard
Press any key on the keyboard to wake it up.
The keyboard will reconnect automatically within a few seconds.
4. Troubleshooting Guide
Issue 1: Keyboard Not Working After Connecting USB Receiver
Recommended Checks
Ensure the USB receiver is properly inserted into the USB port.
Try connecting the receiver to another USB port.
Restart your computer or laptop.
Ensure the keyboard power switch is ON.
Issue 2: Keyboard Not Responding
Recommended Checks
Check that the batteries are correctly installed.
Replace the batteries if they are low or depleted.
Turn the keyboard OFF and then ON again.
Issue 3: Keyboard Stops Working After Some Time
This may happen if the keyboard enters power-saving mode.
Solution
Press any key on the keyboard to wake it from sleep mode.
Issue 4: Wireless Connection Not Stable
Recommended Checks
Ensure the keyboard is within the recommended wireless range (up to 10 meters).
Avoid placing the receiver near strong wireless interference sources.
Reinsert the USB receiver to re-establish the connection.
5. Maintenance and Care
To maintain the performance of the keyboard:
Clean the keyboard surface using a soft dry cloth.
Avoid exposing the keyboard to liquids or excessive moisture.
Remove the batteries if the keyboard will not be used for an extended period.
Store the keyboard in a dry and dust-free environment.
Still Facing Issues?
If the issue persists after performing all troubleshooting steps, please Click here raise a support request.
Our support team will assist you further.
Was this article helpful?
That’s Great!
Thank you for your feedback
Sorry! We couldn't be helpful
Thank you for your feedback
Feedback sent
We appreciate your effort and will try to fix the article