TABLE OF CONTENTS
- 1. Overview
- 2. Full Specifications
- 3. In the Box
- 4. Body Overview — Buttons & Ports
- 5. Getting Started
- 6. Bluetooth Connection
- 7. TWS (True Wireless Stereo) / Duet Mode
- 8. Aux-in Mode
- 9. Headphone Mode
- 10. FM Transmitter
- 11. Charging
- 12. General Safety Instructions
- 13. Warranty & Support
1. Overview
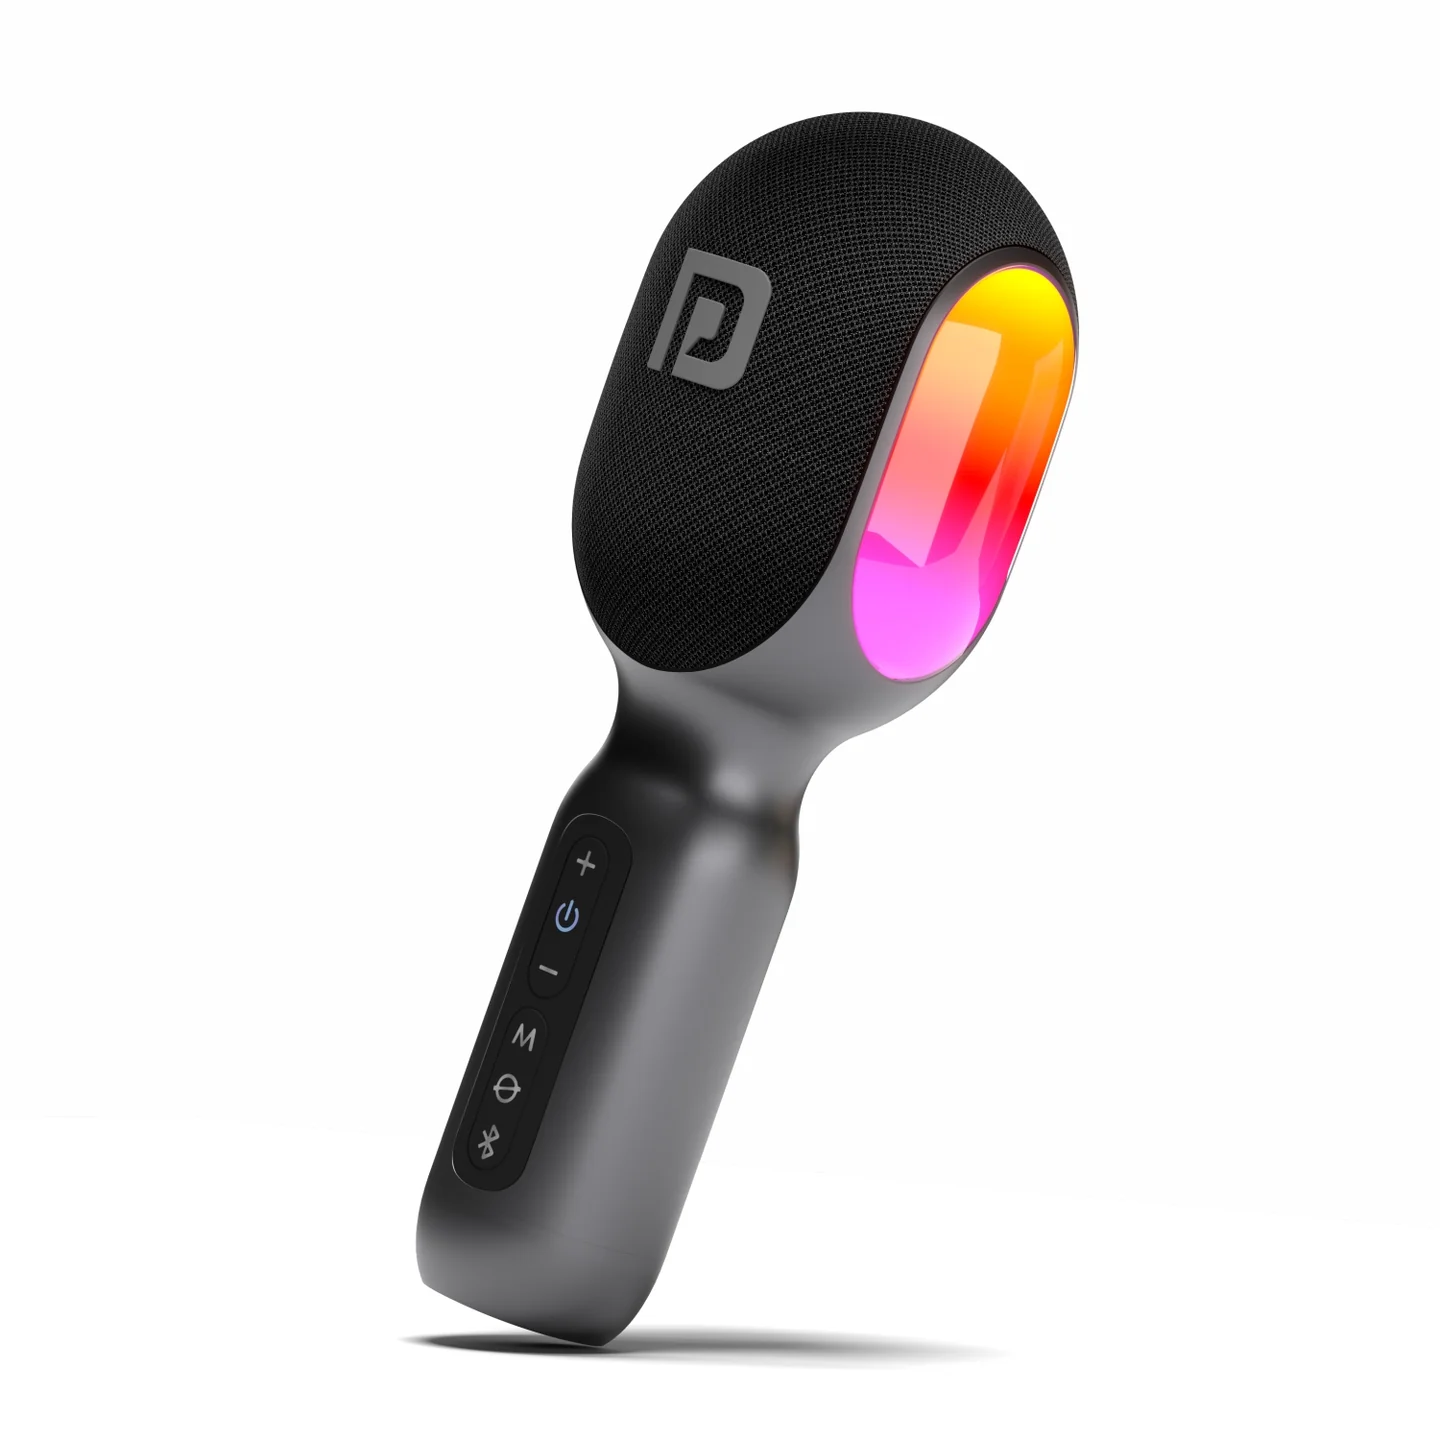
The Dash 2 is a wireless karaoke microphone with a built-in speaker, running on Bluetooth 5.3 with a DSP (Digital Signal Processing) audio effect. It supports Aux-in, FM transmission, private headphone listening, and TWS duet pairing with a second Dash 2 unit, along with 4 sound modes, 4 LED lighting modes, and a voice-cancelling feature for turning songs into backing tracks.
2. Full Specifications
| Category | Details |
|---|---|
| Bluetooth Version | 5.3 |
| Bluetooth Distance | Single mode: 10m; TWS mode: 5m |
| Aux In | 3.5mm |
| Battery Capacity | 3.7V 2500mAh, 9.25Wh (Lithium 18650 battery) |
| Input Rating | DC 5V 1A |
| Microphone Working Modes | Speech, original sound, karaoke, professional |
| Speaker Driver | 52mm full-range driver x1 |
| LED Light Modes | Flow, breathing, nightlight, rhythm |
| Charging Time | 3.5 hours @ 5V 1A |
| Total Playing / Usage Time | 3 hours @ 100% volume; 10 hours @ 50% volume |
| Charging Jack | USB-C |
3. In the Box
- Dash 2 Wireless Karaoke Microphone with Speaker × 1
- USB Type-C Cable × 1
- User Manual × 1
4. Body Overview — Buttons & Ports
| # | Button | Long Press (2–3s) | Short Press |
|---|---|---|---|
| 1 | + (Plus) | Next track | Volume up for microphone/speaker |
| 2 | ⏻ (Power) | Power on/off | Switch music volume / microphone volume |
| 3 | – (Minus) | Previous track | Volume down for microphone/speaker |
| 4 | M (Mode) | Turn on the FM transmitter and switch FM frequency (87.9 / 88.5 / 89.7MHz) | Switch microphone working mode |
| 5 | Ø (Voice Cancel) | Suppress or restore the vocal in music (long press again to restore) | — |
| 6 | Bluetooth | Enter TWS mode and search for another Dash 2 to connect (long press 3s) | Press twice: disconnect the paired Bluetooth device |
| 7 | ☀ (LED Light) | Turn on/off the LED lighting | Switch LED light modes (flow, breathing, nightlight, rhythm) |
5. Getting Started
- Long press the Power (⏻) button for 2 seconds to power the microphone on or off.
- There are 4 sound effects on the microphone: Karaoke, Professional, Speech, and Original Sound.
- Short press the M button to switch between sound effects.
Tip: If there is no signal input for 20 minutes, the microphone will shut down automatically.
6. Bluetooth Connection
- Turn on Bluetooth from your Android/iOS smartphone. In the Bluetooth search list, look for "Dash 2". Upon successful connection, a voice prompt says "Bluetooth connected", followed by a light indication.
- Open your phone's music player — the speaker will play the selected music.
- The speaker automatically pairs with the most recently used Bluetooth device. Short press the Bluetooth button twice to disconnect the current connection and pair with another device.
- Open your karaoke/music app and start singing. Short press the Power (⏻) button to select music volume or microphone volume, then press the +/– buttons to adjust it.
7. TWS (True Wireless Stereo) / Duet Mode
Note: This only works in Bluetooth mode.
- Power on the first Dash 2, search for "Dash 2" from your device, and connect.
- Power on the second Dash 2. Long press the Bluetooth button on both microphones simultaneously for 3 seconds. Both will prompt "searching for connection" and then "TWS channel" to pair in TWS/duet mode.
- Once the two microphones are paired, the Power button lights on both stop twinkling. The microphone connected to your device is the master unit.
- Two Dash 2 units paired before will automatically reconnect in TWS mode when both are powered on again.
- Long press the Bluetooth button for 3 seconds on either microphone to disconnect TWS pairing.
- In TWS mode, if one microphone is powered off, the other will also power off.
8. Aux-in Mode
- Insert the AUX cable to connect the microphone to your device, and insert 3.5mm headphones into the microphone's headphone port.
- Power on the microphone.
- Open your karaoke/music app and start singing or recording.
Note: Aux-in mode is for voice recording and supports original sound effects only. Audio won't play through the microphone — insert 3.5mm headphones as well. Unplugging the AUX cable switches the microphone back to Bluetooth mode automatically.
9. Headphone Mode
- Power on the microphone and connect it to your device via Bluetooth.
- Insert 3.5mm headphones into the headphone port.
- Open your karaoke/music app and start singing or recording.
Note: Audio and your singing play through the headphones instead of the microphone in this mode — enjoy your private singing time.
10. FM Transmitter
- Power on the microphone.
- Long press the M button for 2 seconds to turn on the FM transmitter — the microphone will broadcast on the current frequency.
- Long press the M button repeatedly for 2 seconds to switch the microphone's frequency, or adjust the frequency on your device/car radio to match the microphone's.
Note: There are 3 FM frequencies to choose from: 87.9MHz, 88.5MHz, 89.7MHz. Make sure the frequency matches your car FM or other radio product — only one frequency is allowed to match at a time.
11. Charging
- The microphone will prompt "battery low" every 5 minutes once the battery is under 10%, and the LED will flash red. Charge the battery via an adaptor/charger immediately.
- Charging is indicated by a red light on the power button. When fully charged, the red indicator light turns off.
Note: Use a good-quality adaptor rated 5V/1A. Charge a low-battery speaker immediately. Do not charge in sub-zero environments — this can damage the battery. Do not use the microphone while charging, as output power is lower than normal in that state. When the battery is under 30%, microphone power is automatically reduced to protect the battery and avoid voice distortion.
12. General Safety Instructions
- Do not use the speaker in extremely cold or hot environments.
- Avoid dropping the speaker or hitting it with a hard object — it may damage the hardware.
- Be cautious when charging the speaker; excessive or prolonged charging will damage battery lifetime.
- Charge the speaker to full capacity when using it for the first time.
- When the battery is low, the lighting will flash red and voice prompts say "battery low" — please charge the speaker in time.
- If you don't use the speaker for a long time, charge it at least once a month to prevent the lithium battery from getting damaged.
- Adjust the volume to an appropriate level to avoid disturbing others.
13. Warranty & Support
Warranty: 12 months, covering product design, feature, and functionality-related faults. Damage due to physical impact, liquid exposure, fire, or misuse is not covered.
Need Help?
- Visit: support.portronics.com
Was this article helpful?
That’s Great!
Thank you for your feedback
Sorry! We couldn't be helpful
Thank you for your feedback
Feedback sent
We appreciate your effort and will try to fix the article