TABLE OF CONTENTS
- 1. Introduction
- 2. Safety Notice
- 3. Package Includes
- 4. Specifications
- 5. Controls & Ports
- 6. Power On
- 7. Using Wireless (Bluetooth) for the First Time
- 8. TWS Mode
- 9. FM Radio Mode
- 10. Micro SD Card / USB Mode
- 11. Clock Setting
- 12. Alarm Clock Setting / Screen Brightness
- 13. 12/24-Hour System Switching
- 14. White Noise
- 15. RGB Light Operation
- 16. Wireless Charger Function
- 17. Charging the Speaker
- 18. Safety Instructions
- 19. Support
1. Introduction
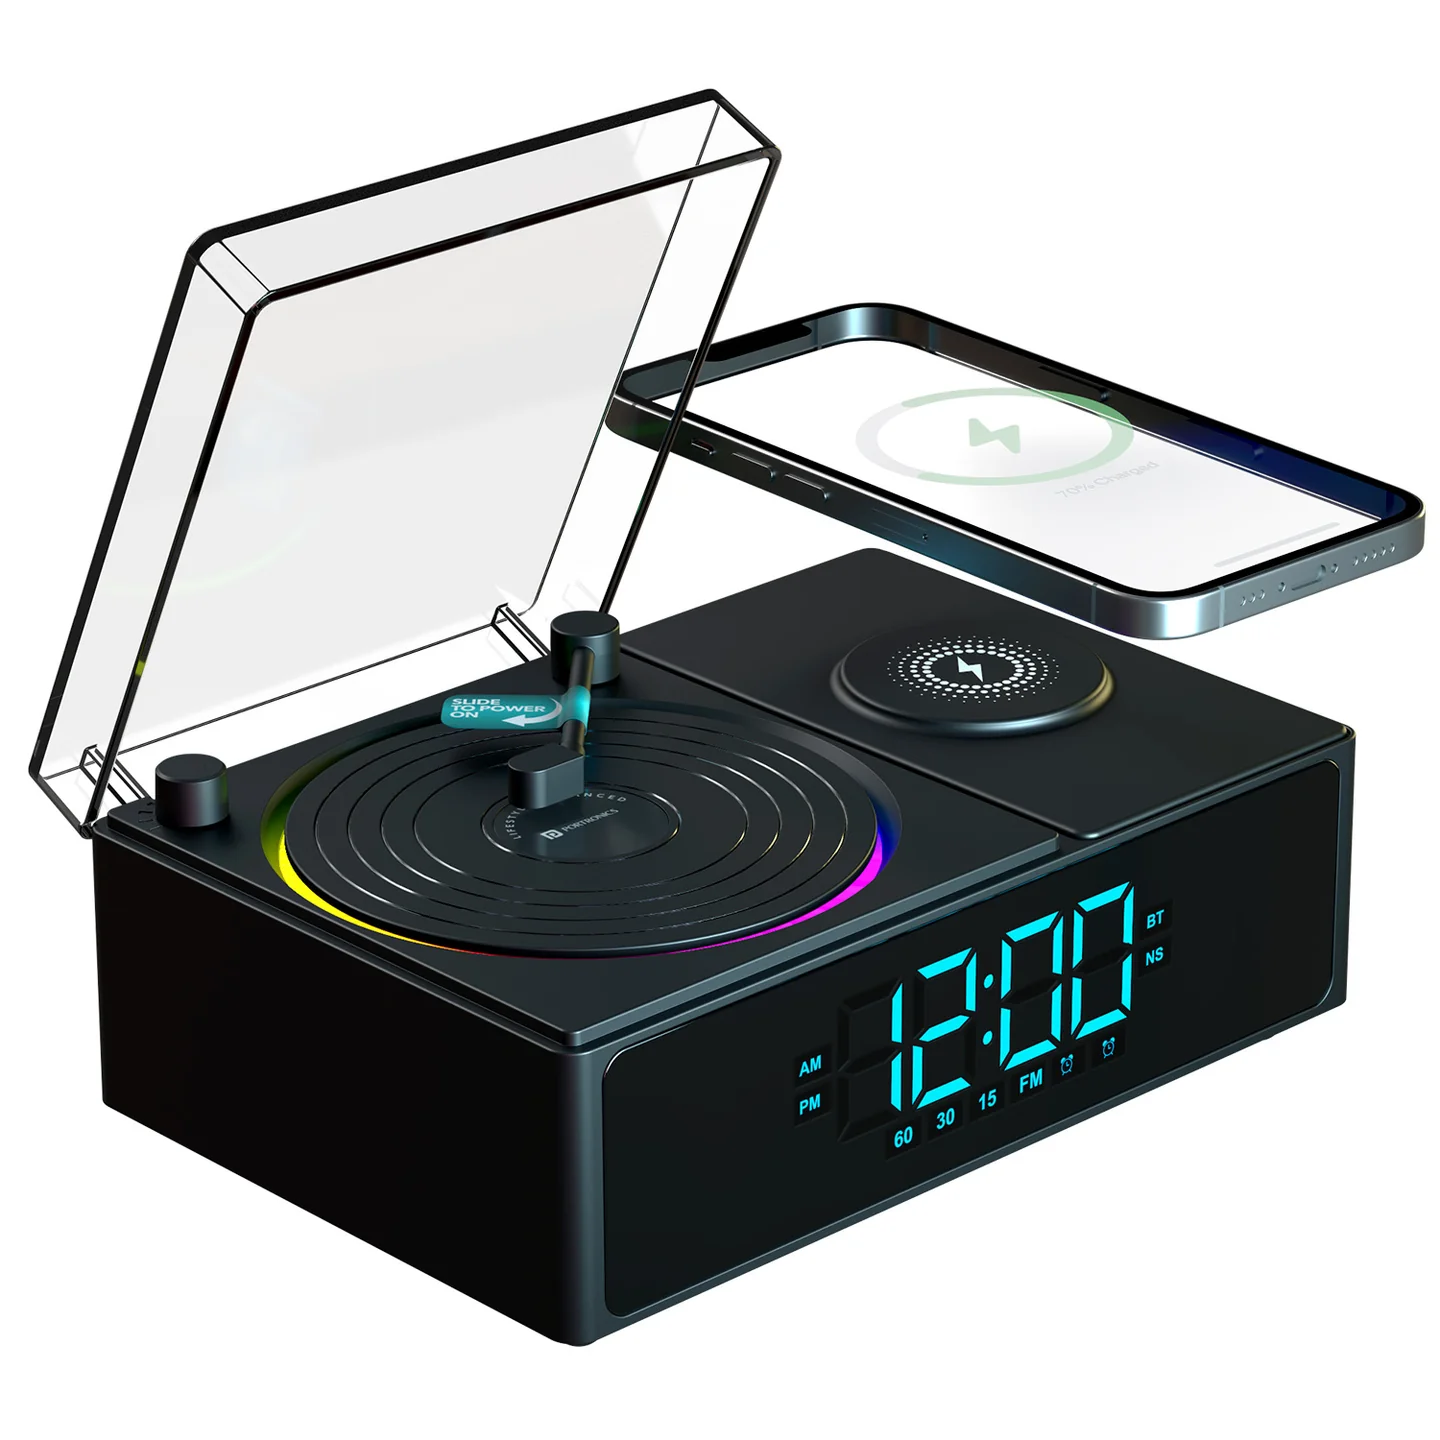
Thank you for choosing "Sound Flow." Please read this user manual carefully before using the product, and save it for future reference. Sound Flow combines a Bluetooth speaker, a 15W wireless phone charger, a digital alarm clock, and white noise modes in one retro turntable-styled design, with a spinning RGB-lit platter, FM radio, and TF card/USB playback.
2. Safety Notice
- Do not disassemble or modify the speaker for any reason, as it may get damaged or burn.
- Keep the equipment and all accessories out of reach of children and pets — it can cause choking and/or serious injury.
- Do not place the item in water, as liquid can damage it.
3. Package Includes
- Sound Flow Speaker — 1
- Charging Cable — 1
- User Manual — 1
4. Specifications
| Specification | Details |
|---|---|
| Bluetooth Version | V5.3 |
| Speaker Output | 5W |
| Wireless Charger for Phone | 15W |
| Transmission Distance | 10m |
| Frequency | 2.4GHz–2.48GHz |
| Built-in Lithium Battery | 3.7V / 2000mAh |
| Product Size | 191 x 127 x 78mm |
5. Controls & Ports
| # | Control | Function |
|---|---|---|
| 1 | M (Menu / Play-Pause) | Short press: play/pause music · Long press: switch between modes (BT, FM Radio, USB, TF Card, AUX, White Noise) |
| 2 | Previous (⏮) | Short press: previous song / adjust time / adjust alarm |
| 3 | Next (⏭) | Short press: next song / adjust time / adjust alarm |
| 4 | Alarm (⏰) | Alarm clock setting / screen brightness adjustment |
| 5 | Clock (?) | Clock settings / TWS |
| 6 | Type-C Port | Charges the speaker |
| 7 | TF Card Slot | Insert a TF (microSD) card to play stored audio |
| 8 | USB Port | Insert a USB drive to play stored audio |
| 9 | AUX Port | Connect a 3.5mm audio cable |
Also on the unit: the Power Button doubles as the turntable's "tonearm stylus" switch; the Wireless Charger pad sits beside the spinning platter; and the Digital Screen displays time, mode, and status icons.
6. Power On
Slide the power tonearm stylus switch to the "CD" position. The speaker powers on with a colourful RGB light effect on the platter.
7. Using Wireless (Bluetooth) for the First Time
7.1 Initial Pairing Mode: the first time you turn on the speaker, you'll hear a "beep" — this means it's in pairing mode and ready to connect.
7.2 Connecting with a Mobile Phone:
- Go to your phone's Bluetooth settings.
- Search for available devices.
- Select "Portronics Sound Flow" from the list to pair.
- Once connected, you'll hear a confirmation tone.
8. TWS Mode
When you have two Sound Flow speakers, short-press the Clock button twice to activate TWS (True Wireless Stereo) mode — the two speakers will connect to each other for stereo playback.
9. FM Radio Mode
- Press and hold the Menu button to switch to FM radio.
- Connect the charging cable to the product via the Type-C port to act as a radio antenna — the other end doesn't need to connect to anything.
- Short-press the Menu button to begin channel searching (channels save automatically).
- Short-press Previous/Next to switch between saved channels.
10. Micro SD Card / USB Mode
Insert the Micro SD card or USB flash drive into the appropriate slot or port. A voice prompt confirms the device is reading the audio files, and playback begins automatically. Use the Previous/Next buttons to control playback.
11. Clock Setting
- Short-press the Clock button to enter hour/minute setting mode.
- Use Previous/Next to set the desired hour and minute.
- Short-press the Clock button to confirm and save.
- After setting the time, press and hold the Clock button repeatedly to select a sleep timer:
- 1 long press: display shows L15 (15-minute sleep timer)
- 2 long presses: display shows L30 (30-minute sleep timer)
- 3 long presses: display shows L60 (60-minute sleep timer)
- 4 long presses: display shows OFF (sleep timer disabled)
12. Alarm Clock Setting / Screen Brightness
- Long-press the Alarm button to adjust screen brightness.
- Short-press the Alarm button to enter alarm setting mode.
- Press once to adjust the hour, press again to adjust the minutes.
- Use Previous/Next to set the desired hour and minutes.
- Short-press the Alarm button again to confirm the time.
- Use Previous/Next to turn the alarm ON or OFF — an alarm icon appears on screen when it's on.
- When the alarm rings, press the Alarm button to stop it.
13. 12/24-Hour System Switching
- Short-press the Clock button to enter time setting.
- Long-press the Clock button to switch between 12-hour and 24-hour display.
- Short-press the Clock button twice to confirm.
Only in 12-hour mode will the AM/PM icon show on the digital screen.
14. White Noise
Long-press the Menu button to switch to white noise mode, then short-press Previous/Next to choose your favourite white noise sound.
15. RGB Light Operation
Double-press the Menu button to switch between LED light modes on the platter, to match your mood.
16. Wireless Charger Function
When a phone with wireless charging capability is placed on the charging pad, the screen displays a charging symbol (white light). The symbol disappears once the phone is removed from the charging position.
17. Charging the Speaker
- Locate the USB-C Charging Port on the back of the speaker.
- Use the included USB-C cable and plug it into the speaker's charging port.
- Connect to a power source — use a Type-C power adapter rated 25W or higher for optimal performance.
- Power On While Charging: you can use the speaker while it charges. Charging time may vary depending on the power source.
- Charging Indicator: the LED glows red while charging and turns off once fully charged.
18. Safety Instructions
- Do not expose the device to liquid, moisture, or humidity — this can affect the internal circuit.
- Don't use abrasive cleaning solvents to clean the device.
- Do not expose the device to extremely high or low temperatures, as this shortens the life of electronic components and can distort plastic parts.
- Don't dispose of the device in fire, as it may result in an explosion.
- Avoid contact with sharp objects, as this can cause scratches and damage.
- Do not listen at high volume for a prolonged time, to avoid hearing damage — set the volume to a safe level; the louder the volume, the greater the potential damage.
19. Support
If the issue persists after performing all troubleshooting steps, please raise a support request.
Our support team will assist you further.
Support
- Visit: www.portronics.com
- Support Portal: support.portronics.com
Was this article helpful?
That’s Great!
Thank you for your feedback
Sorry! We couldn't be helpful
Thank you for your feedback
Feedback sent
We appreciate your effort and will try to fix the article