TABLE OF CONTENTS
- Product Overview
- Quick Reference
- Before You Begin
- Step 1 — Install the Base
- Step 2 — Attach the Arm to the Base
- Step 3 — Attach the VESA Plate to the Monitor
- Step 4 — Mount the Monitor onto the Arm
- Step 5 — Adjust Monitor Angle and Orientation
- Step 6 — Adjust Arm Tension
- Step 7 — Manage the Cables
- Safety & Maintenance
- Installation Help
- Still stuck?
Product Overview
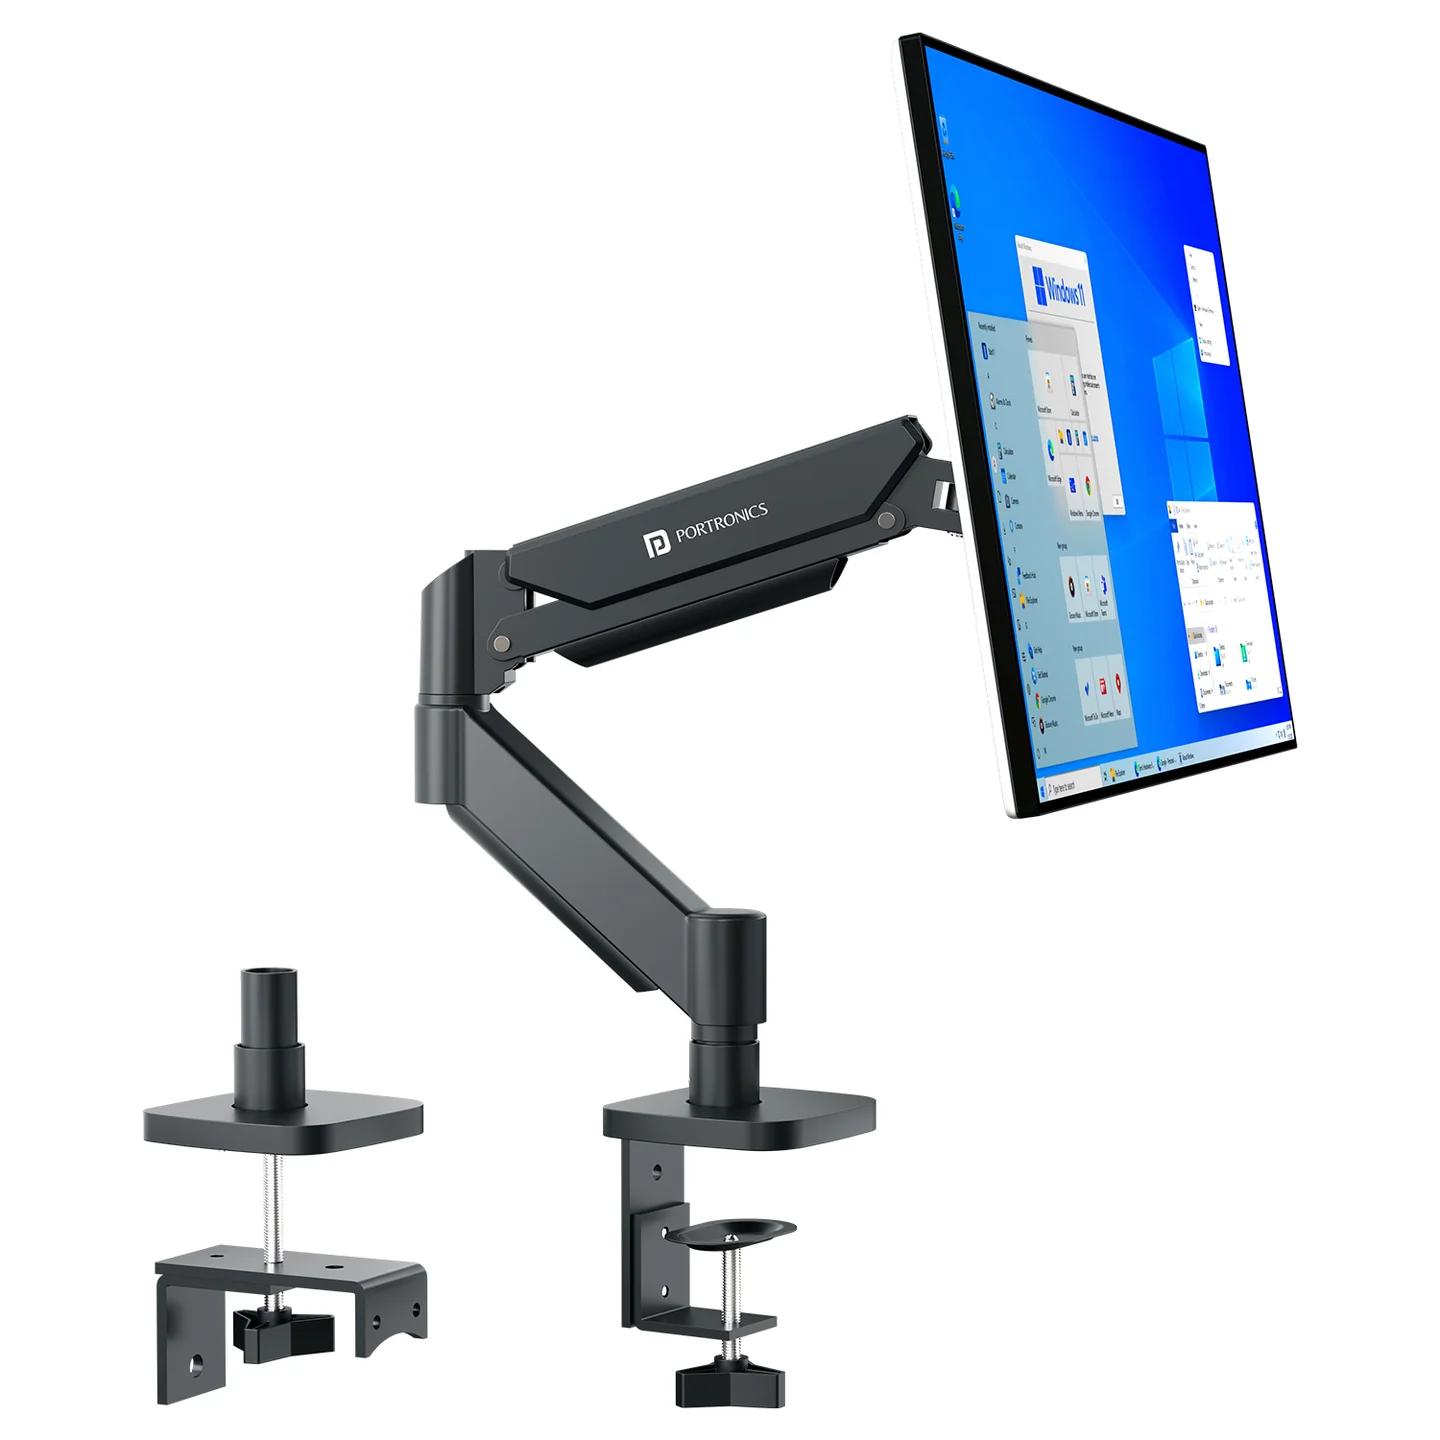
The Portronics Aerolift One is a full-motion desk-mounted monitor arm designed to help position a compatible monitor for comfortable viewing. It supports clamp and grommet mounting, monitor tilt and swivel, 90° portrait rotation, and cable routing through the arm.
Quick Reference
| Feature | Details |
|---|---|
| Product | Portronics Aerolift One |
| Monitor VESA Patterns | 75 × 75mm and 100 × 100mm |
| Monitor Types | Flat and curved monitors |
| Desk Thickness | 10mm–85mm |
| Mounting Options | Clamp mount or grommet mount |
| Adjustments | Tilt, swivel and 90° portrait rotation |
| Tools | Supplied Allen keys |
Before You Begin
- Check that the desk is stable and suitable for a desk-mounted arm.
- Confirm the desk thickness is between 10mm and 85mm.
- Check that the monitor supports VESA 75 × 75mm or 100 × 100mm mounting.
- Lay out the arm pieces, base/mounting hardware, VESA plate, screws, washers/spacers and Allen keys shown in the package diagram.
- Select either clamp mounting or grommet mounting before assembling the base.
Step 1 — Install the Base
Choose one of the two mounting methods.
Option A: Clamp Mount
- Attach the clamp assembly to the base plate using the supplied screws.
- Position the clamp at the chosen desk edge.
- Ensure the base plate is correctly seated on the desk.
- Tighten the clamp securing hardware.
- Check that the base is stable and does not move before attaching the arm.
Option B: Grommet Mount
Use this option if your desk has a suitable mounting hole.
- Insert the threaded rod through the desk hole.
- Position the base plate over the hole and pass the threaded rod through it.
- From underneath the desk, fit and tighten the securing nut using the supplied hardware.
- Check that the base is stable before continuing.
Do not proceed if the base shifts or the desk surface is unstable.
Step 2 — Attach the Arm to the Base
- Slide the lower arm onto the mounting pole.
- Set the lower arm to the desired height.
- Tighten the height-locking screw with the supplied Allen key.
- Attach the upper arm to the lower arm.
- Secure the joint with the supplied Allen key.
- Check that both arm sections are properly seated and secured.
Step 3 — Attach the VESA Plate to the Monitor
- Place the monitor face-down on a clean, soft, flat surface, following the monitor manufacturer's handling guidance.
- Locate the monitor’s VESA mounting holes.
- Select the screw set that matches the mounting holes and monitor design.
- Align the VESA plate with the holes.
- Fasten the screws securely so the plate sits flat against the monitor.
- Use the supplied spacers only where needed for your monitor’s mounting design.
Do not force screws that do not fit or use screws that are too long for the monitor.
Step 4 — Mount the Monitor onto the Arm
- Hold the monitor securely.
- Align the VESA plate with the head of the swivel arm.
- Slide the plate into the mount until it clicks into place.
- Engage the locking mechanism securely.
- Carefully check that the monitor is locked before letting go.
For safety, have another person help hold the monitor if it is difficult to support while attaching it.
Step 5 — Adjust Monitor Angle and Orientation
The arm allows you to adjust the monitor’s position:
- Tilt: angle the monitor forward or backward.
- Swivel: turn the monitor left or right.
- Portrait rotation: rotate the monitor 90° when needed.
Use the supplied 6mm Allen key to loosen or tighten the VESA plate adjustment screw. Position the screen, then tighten the screw to hold the selected angle.
Support the monitor with one hand while making adjustments. Do not force the joints.
Step 6 — Adjust Arm Tension
If the arm does not hold the monitor position, use the supplied Allen key to adjust the tension screw gradually.
Clockwise increases tension and anticlockwise decreases it. Because the directions conflict, make only small adjustments while supporting the monitor, follow any markings on your unit, and do not overtighten the screw. If the arm still will not hold position, contact installation support.
Step 7 — Manage the Cables
- Route monitor cables underneath the arm through the built-in channels.
- Push the cables into the plastic wire clips.
- Leave enough slack for tilt, swivel and portrait rotation.
- Keep cables away from moving joints and pinch points.
- Move the monitor through its range slowly to confirm that no cable is stretched or trapped.
Safety & Maintenance
- Install the arm on a stable desk.
- Confirm the monitor is within the mount’s rated weight capacity before mounting it.
- Keep hands and fingers away from moving joints and pinch points.
- Do not overload the arm or force its movement.
- Ensure all screws, the base and the monitor lock are secure before use.
- Wipe the mount with a dry cloth; avoid chemicals.
- Check screw tightness regularly.
- Recheck arm tension after changing the monitor.
- If any part is bent, cracked or damaged, stop using the mount until it is checked.
Installation Help
For installation issues or queries, the supplied :
- Phone: 7428859424 / 9582898597
- Hours: Monday–Saturday, 10:00 AM–6:00 PM
Still stuck?
If the issue persists after performing all troubleshooting steps, please raise a support request.
Our support team will assist you further.
Support
- Visit: www.portronics.com
- Support Portal: support.portronics.com
Was this article helpful?
That’s Great!
Thank you for your feedback
Sorry! We couldn't be helpful
Thank you for your feedback
Feedback sent
We appreciate your effort and will try to fix the article