TABLE OF CONTENTS
- Product Overview
- Quick Reference
- What's in the Box
- Parts & Controls
- Before Using the LintX Pro
- Powering ON and Selecting a Speed
- How to Remove Lint
- Fabric-Care Precautions
- Charging the LintX Pro
- LED Display and Battery Status
- Cleaning & Maintenance
- Safety Precautions
- Troubleshooting
- Still stuck?
Product Overview
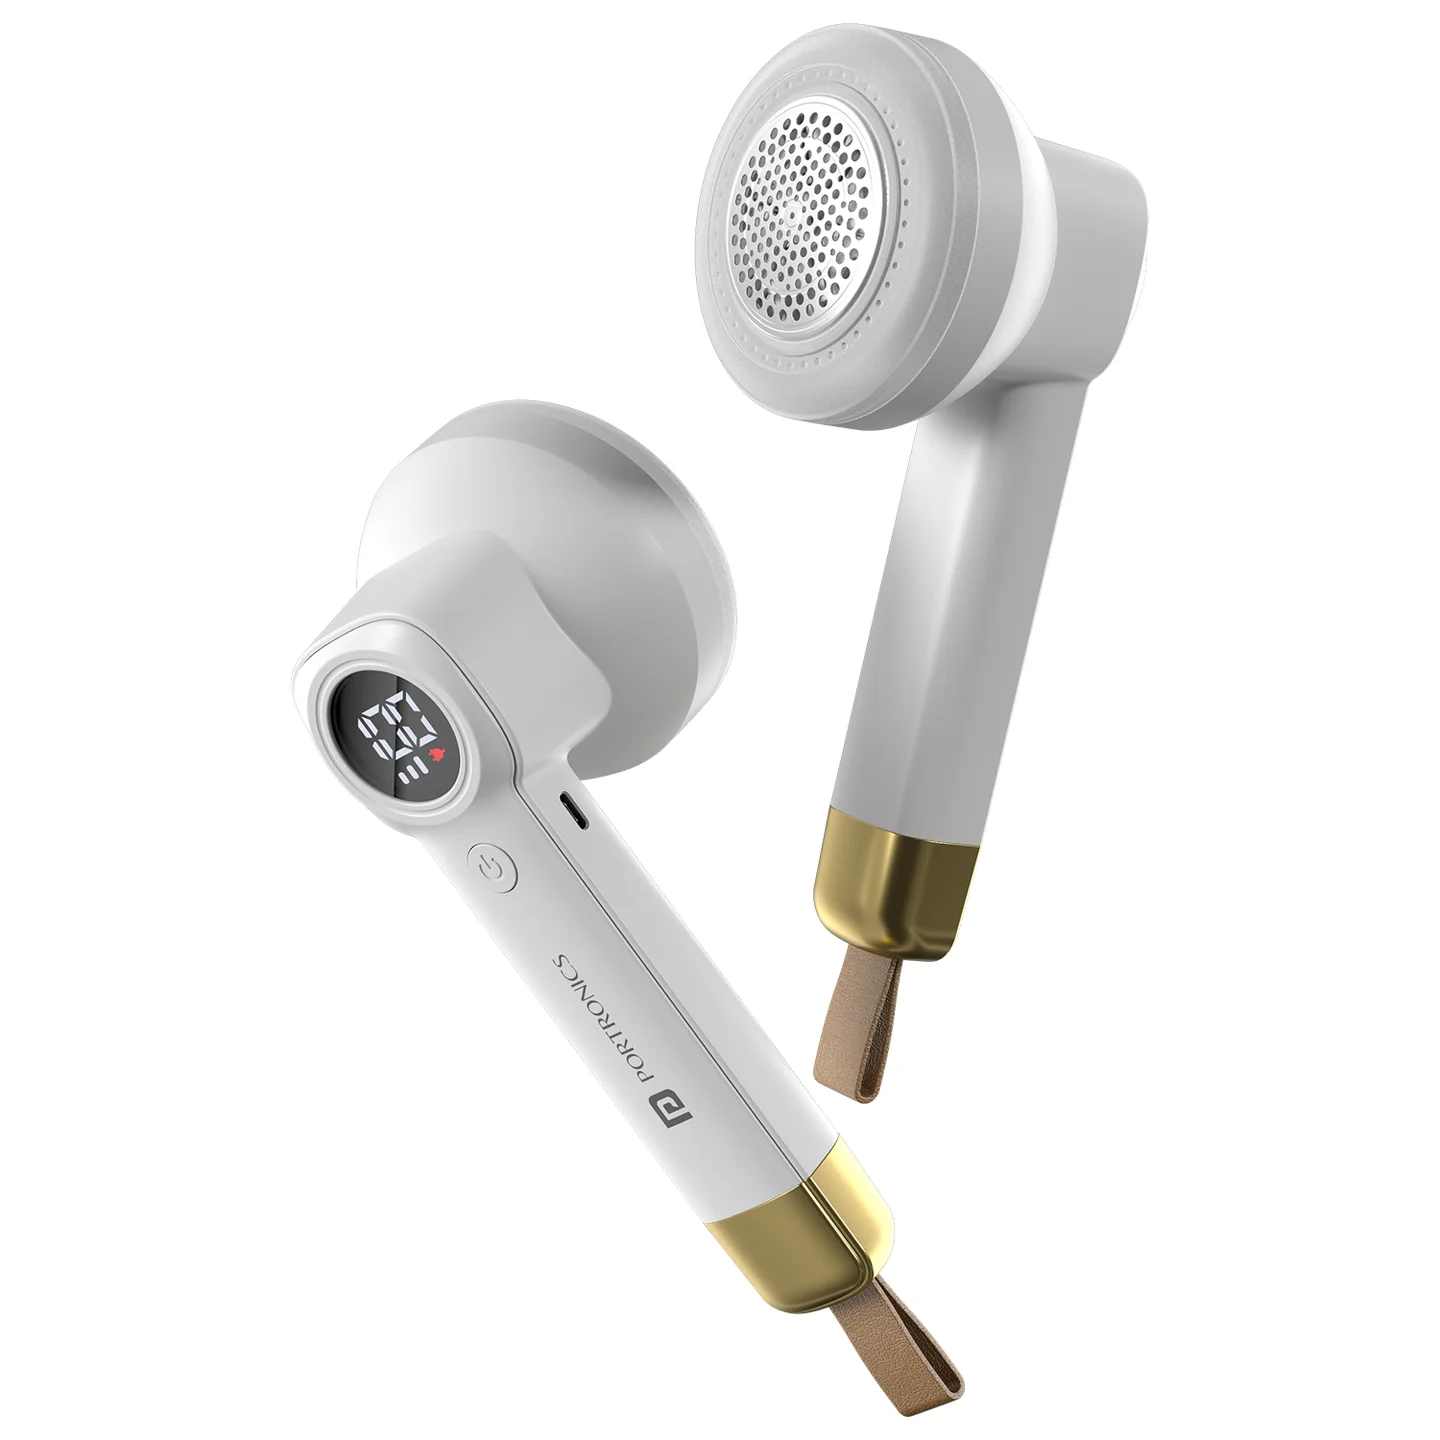
The Portronics LintX Pro (POR 3569) is a rechargeable fabric lint remover designed to remove lint, fuzz and fabric pills from suitable clothes, sofas and blankets. It uses six stainless-steel blades, a honeycomb mesh cover, three speed modes and a detachable lint container.
The LED digital display shows the selected speed and battery status. The rechargeable battery provides up to 90 minutes of use on a full charge.
Quick Reference
| Feature | Details |
|---|---|
| Product | Portronics LintX Pro |
| Product Code | POR 3569 |
| Colour | White |
| Product Type | Rechargeable Lint Remover |
| Motor | BLDC |
| Speed Modes | 3 — Low, Medium and High |
| Maximum Speed | Up to 6900 RPM |
| Battery Capacity | 800mAh |
| Charging Port | USB Type-C |
| Full Charge Time | Approx. 3 hours |
| Runtime | Up to 90 minutes |
| Blade System | 6 stainless-steel blades |
| Mesh Cover | Honeycomb mesh |
| Lint Container | Detachable |
| Display | LED digital display for speed and battery status |
| Suitable Materials | Suitable clothes, sofas and blankets |
| Warranty | 12 months |
Actual runtime may vary depending on the selected speed and usage conditions.
What's in the Box
| Item | Quantity |
|---|---|
| LintX Pro | 1 |
| USB Type-C Charging Cable | 1 |
| Cleaning Brush | 1 |
Parts & Controls
| Part / Control | Function |
|---|---|
| Honeycomb Mesh Cover | Helps protect fabric from snags while allowing lint to reach the blades |
| Six-Blade Assembly | Removes lint, fuzz and fabric pills |
| Power / Speed Button | Turns the device ON and adjusts the speed |
| LED Digital Display | Shows the selected speed and battery status |
| Detachable Lint Container | Collects removed lint and can be emptied |
| USB Type-C Port | Connects the charging cable |
Before Using the LintX Pro
- Spread the garment or fabric flat on a stable surface.
- Make sure the lint container and mesh cover are securely attached.
- Remove or avoid hard objects such as buttons, zippers and decorative attachments in the area being treated.
- Check that the blade and mesh assembly are not damaged.
- Select a suitable speed for the fabric.
Do not use the lint remover on clothes while wearing them. Avoid delicate fabrics such as silk, lace or loose knits.
Powering ON and Selecting a Speed
- Press the Power Button to turn ON the device.
- Use the button to adjust the speed.
- Select the setting appropriate for the fabric:
- Low: For light lint and more delicate suitable fabrics.
- Medium: For regular lint removal.
- High: For heavier lint on suitable fabrics.
- Turn OFF the device after use.
The three speed modes operate up to 6900 RPM. The LED display shows the selected speed.
How to Remove Lint
- Spread the garment or fabric flat on a stable surface.
- Ensure the lint container and honeycomb mesh cover are attached securely.
- Press the Power Button to turn ON the remover.
- Select Low, Medium or High speed as appropriate.
- Gently move the device across the fabric in circular motions.
- Do not press hard against the fabric.
- Turn OFF the device after use.
For delicate but suitable fabrics, begin with Low speed and test on a small, inconspicuous area first.
Fabric-Care Precautions
- Do not use the device on clothes while they are being worn.
- Avoid delicate fabrics such as silk, lace or loose knits.
- Test on a small, inconspicuous area before treating the full garment.
- Do not press hard against the fabric.
- Keep the mesh cover securely fitted while operating.
- Do not use the device if the mesh or blades are damaged.
- Keep fingers and objects away from the blade assembly.
Charging the LintX Pro
- Turn OFF the device.
- Connect the USB Type-C cable to the charging port.
- Connect the other end to a suitable USB power source.
- The LED display indicates charging status.
- Allow approximately 3 hours for a full charge.
- Disconnect the cable after charging.
The product provides up to 90 minutes of use on a full charge.
Important: Do not use the lint remover while it is charging. Do not overcharge the device.
The available product information does not specify the charging input voltage/current, so use a suitable USB power source and avoid assuming an unsupported adapter rating.
LED Display and Battery Status
The LED digital display shows:
- The selected speed setting.
- The battery status.
- Charging status while the device is connected to power.
The display indicates when the battery is fully charged.
Cleaning & Maintenance
Clean the device regularly to maintain lint-removal performance.
- Turn OFF the device before cleaning.
- Disconnect the charging cable.
- Remove the lint container and empty it regularly.
- Remove the mesh cover carefully, following its fitted design.
- Use the supplied cleaning brush to clear lint from the blade and mesh area.
- Ensure all components are dry before reassembling.
- Refit the mesh cover and lint container securely before use.
Do not wash the device with water or expose it to water. Do not pour water or cleaning liquid into the device.
Safety Precautions
- Do not use the device on clothes while wearing them.
- Avoid delicate fabrics such as silk, lace or loose knits.
- Keep the device away from children.
- Do not open the blade assembly manually.
- Stop using the device if the mesh or blades are damaged.
- Do not operate the device while charging.
- Do not overcharge the battery.
- Turn OFF and unplug before cleaning.
- Do not wash or expose the device to water.
Troubleshooting
| Issue | Possible Cause | Recommended Action |
|---|---|---|
| Device does not work | Lint container or mesh cover is not fitted correctly | Check that both parts are securely attached |
| Device does not work | Battery is depleted | Charge the device |
| Lint is not removed completely | Lint container is full | Empty the container |
| Lint is not removed completely | Mesh or blade area needs cleaning | Use the supplied cleaning brush |
| Device does not charge | Type-C cable or power source is not connected correctly | Check the cable and power connection |
| Runtime is shorter than expected | Higher speed or usage conditions | Use a suitable lower speed and charge fully |
Still stuck?
If the issue persists after performing all troubleshooting steps, please raise a support request.
Our support team will assist you further.
Support
- Visit: www.portronics.com
- Support Portal: support.portronics.com
Was this article helpful?
That’s Great!
Thank you for your feedback
Sorry! We couldn't be helpful
Thank you for your feedback
Feedback sent
We appreciate your effort and will try to fix the article