TABLE OF CONTENTS
- Product Overview
- Quick Reference
- What's in the Box
- Parts & Controls
- Charging the Oria Pro
- Powering ON and OFF
- Selecting a Light Mode
- Adjusting Brightness
- Understanding the Battery Indicator
- Attaching Oria Pro to a Phone
- Adjusting the Light Position
- Using the Built-In Mirror
- Using the Foldable Stand
- Cleaning & Maintenance
- Safety Precautions
- Troubleshooting
- Still stuck?
Product Overview
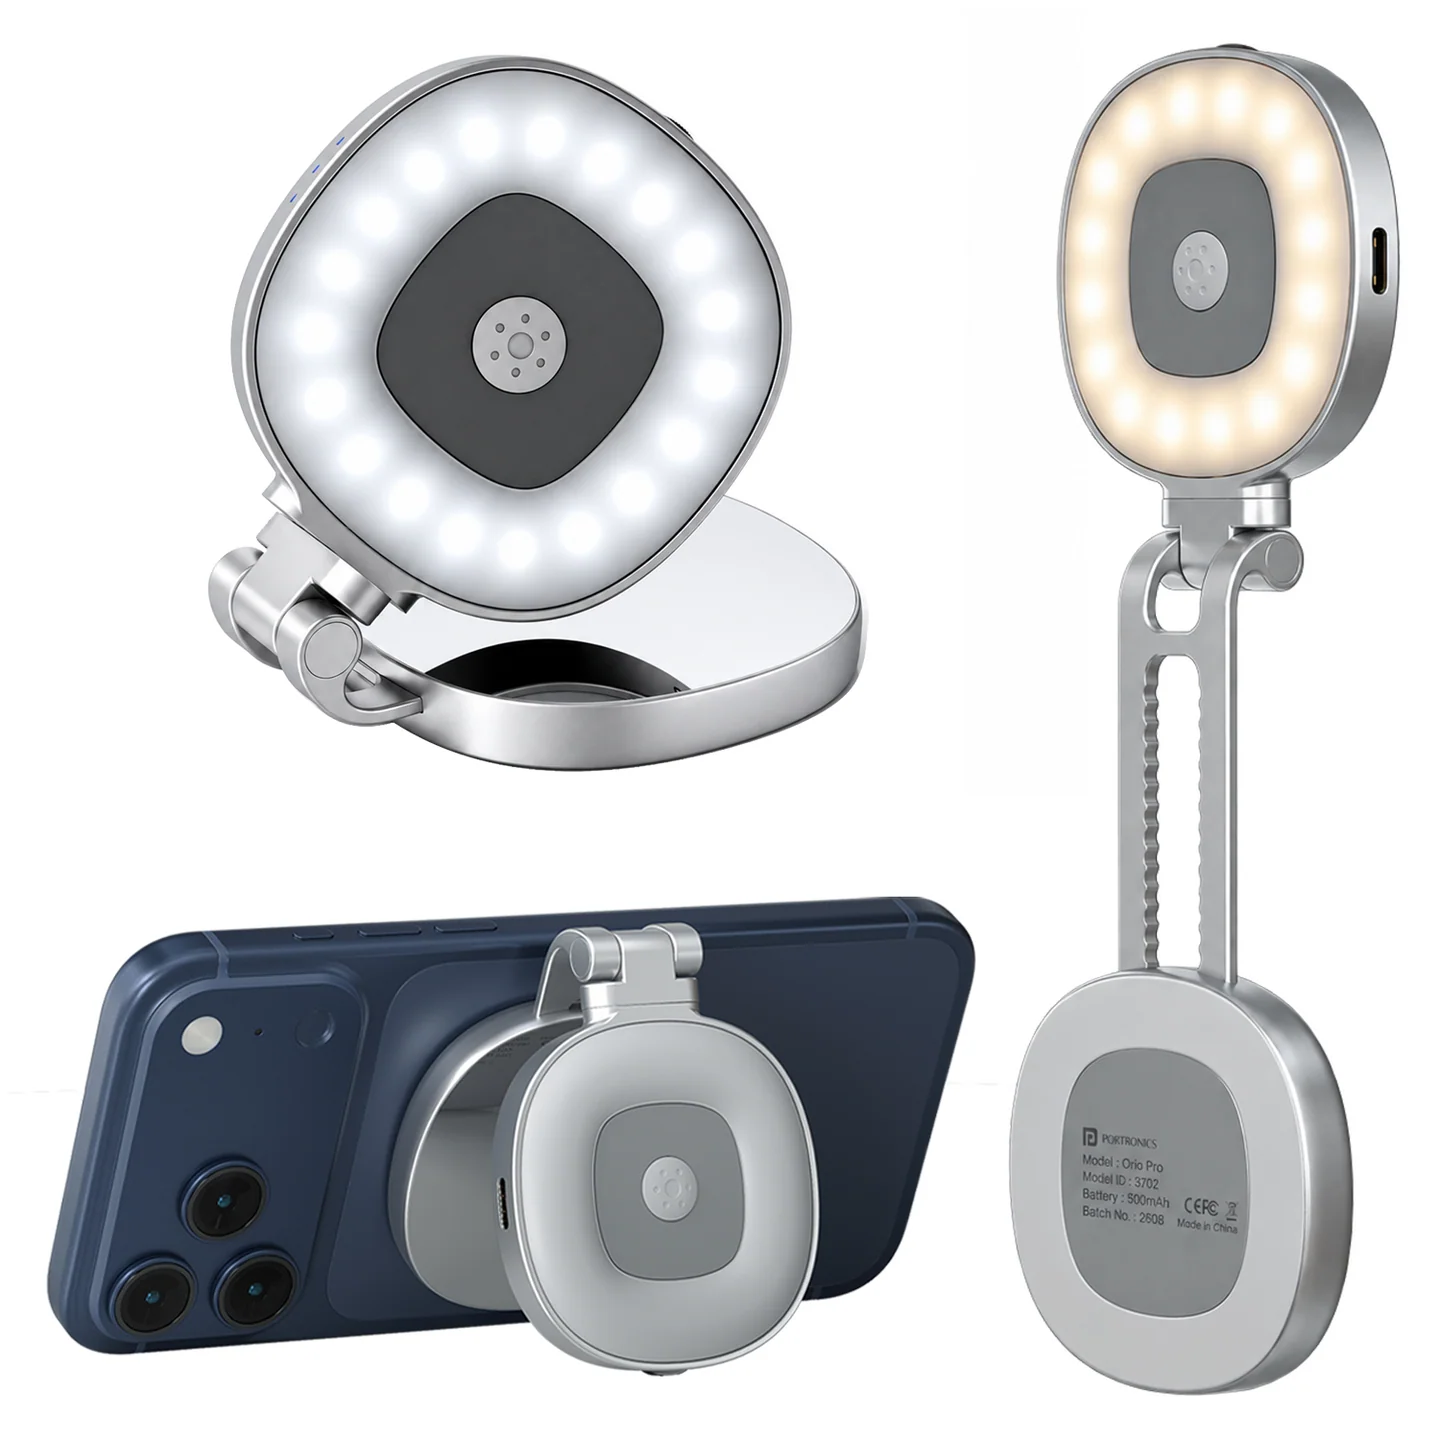
The Portronics Oria Pro (POR 3702) is a magnetic selfie light with a built-in mirror and an adjustable foldable stand. It provides three light colour modes, adjustable brightness and a rechargeable battery. The light can attach magnetically to compatible phones and can be positioned at different angles for selfies, makeup, video calls and content creation.
Quick Reference
| Feature | Details |
|---|---|
| Product | Portronics Oria Pro |
| Product Code | POR 3702 |
| Colour | White |
| Product Type | Magnetic Mirror LED Light with Adjustable Foldable Stand |
| Battery | 500mAh Lithium Polymer |
| Charging Port | USB Type-C |
| Charging Input | 5V/1A |
| Charging Time | Approx. 1.5 hours |
| Battery Backup | Approx. 1.5 hours at low brightness |
| Light Modes | Warm, Neutral White and Cool White |
| Brightness | Adjustable using the brightness control wheel |
| Mode Memory | Remembers the light mode used before the last power-off |
| Pass-Through Charging | Supported |
| Warranty | 6 months |
Actual battery backup depends on the selected brightness and usage conditions.
What's in the Box
| Item | Quantity |
|---|---|
| Oria Pro Magnetic Selfie Light | 1 |
| Magnetic Ring | 1 |
| USB Type-C Charging Cable | 1 |
Parts & Controls
| Part / Control | Function |
|---|---|
| Type-C Charging Port | Connects the charging cable |
| Power / Mode Button | Long-press for 3 seconds to turn the light ON or OFF; short-press to change the light mode |
| Battery Indicator | Shows remaining battery using three indicator levels |
| Brightness Control Wheel | Turn right to increase brightness and left to decrease brightness |
| Shaft / Extension Rod | Extends the light for multi-angle positioning |
| Diffuser | Softens the light output |
| Magnetic Ring | Attaches the light magnetically to a compatible phone or magnetic ring |
| Built-In Mirror | Helps with makeup checks and framing |
Charging the Oria Pro
- Connect a USB Type-C cable to the charging port.
- Connect the other end to a compatible 5V/1A USB power source.
- The battery indicator flashes while charging.
- When fully charged, all three indicator lights turn ON.
- Disconnect the charging cable after charging.
The charging time is approximately 1.5 hours.
Pass-through charging: Pass-through charging is supported.
Powering ON and OFF
- Power ON: Press and hold the Power / Mode Button for 3 seconds. The indicator lights turn ON one by one.
- Power OFF: Press and hold the same button for 3 seconds again.
Selecting a Light Mode
After powering ON the Oria Pro, short-press the Power / Mode Button to cycle through the three light modes.
| Button Action | Light Mode |
|---|---|
| Short-press 1 | Warm Light |
| Short-press 2 | Neutral White Light |
| Short-press 3 | Cool White Light |
The product has a mode-memory function. When powered ON again, it retains the light mode used before the last power-off.
Adjusting Brightness
- Turn ON the fill light.
- Locate the Brightness Control Wheel.
- Turn the wheel to the right to increase brightness.
- Turn the wheel to the left to decrease brightness.
- Adjust the brightness to suit the surrounding light and your usage.
Understanding the Battery Indicator
The battery indicator displays the remaining battery across three levels after the product is powered ON.
| Indicator Behaviour | Meaning |
|---|---|
| Three-level indicator display | Shows remaining battery level |
| Indicator flashes while charging | Charging in progress |
| All indicator lights ON | Fully charged |
| First LED flashes | Low battery |
Attaching Oria Pro to a Phone
iPhone 12 and Later
iPhone 12 and later models can attach the magnetic fill light directly to the back of the phone.
- Bring the Oria Pro magnetic ring close to the back of the phone.
- Align it with the phone's magnetic area.
- Allow the magnetic mount to attach.
- Check that the light is secure before adjusting its position.
Other Phone Models
For other phone models, use the included magnetic ring.
- Remove the protective sticker from the magnetic ring.
- Attach the magnetic ring to the back cover of the phone or phone case.
- Align the Oria Pro magnetic fill light with the attached ring.
- Attach the light magnetically.
- Check that it is secure before use.
Make sure the phone case surface is clean and dry before attaching the magnetic ring.
Adjusting the Light Position
- The fill light can be flipped through 180°.
- When attached to the phone, extend the shaft / extension rod to create multi-angle lighting.
- The built-in mirror can also be flipped through 180° for convenient use.
- Adjust the position gently and check that the magnetic attachment remains secure.
Using the Built-In Mirror
- Flip the mirror to the required viewing position.
- Adjust the light and stand angle for convenient viewing.
- The mirror can be rotated through 180° according to the product instructions.
Using the Foldable Stand
The foldable stand allows the Oria Pro to be positioned for hands-free use.
- Unfold the stand carefully.
- Place it on a flat, stable surface.
- Adjust the light angle and extension rod as needed.
- Check that the stand is stable before using the device.
Cleaning & Maintenance
- Switch OFF the product before cleaning.
- Clean the product using a soft, dry cloth.
- Do not use abrasive cleaning materials.
- Do not expose the product to corrosive chemicals.
- Avoid dropping, colliding with or applying heavy impact to the product.
- Keep the charging port dry.
- Do not disassemble or attempt to repair the product yourself.
Safety Precautions
- Avoid dropping or subjecting the product to heavy impact.
- Do not place the product in excessively high temperatures.
- Keep away from corrosive chemicals.
- Do not disassemble or repair the product yourself.
- Use a compatible 5V/1A charging source.
- Keep the product and charging port away from moisture.
- Check the magnetic attachment before moving or repositioning the phone.
Troubleshooting
| Issue | Possible Cause | Recommended Action |
|---|---|---|
| Light does not turn ON | Battery is low or power button action is incorrect | Charge the product and long-press the Power / Mode Button for 3 seconds |
| Light mode does not change | Button was not short-pressed | Short-press the Power / Mode Button to cycle through modes |
| Brightness does not change | Brightness wheel is not being adjusted | Turn the wheel right or left |
| Magnetic light does not attach | Phone does not have a compatible magnetic mount | Attach the included magnetic ring to the phone or case |
| Battery indicator flashes | Charging is in progress or battery is low | Check whether the product is connected to a 5V/1A source |
| Battery runs out quickly | High brightness setting | Reduce brightness using the control wheel |
| Mirror or light does not stay in position | Hinge or shaft is not adjusted properly | Reposition gently and avoid forcing the hinge |
Still stuck?
If the issue persists after performing all troubleshooting steps, please raise a support request.
Our support team will assist you further.
Support
- Visit: www.portronics.com
- Support Portal: support.portronics.com
Was this article helpful?
That’s Great!
Thank you for your feedback
Sorry! We couldn't be helpful
Thank you for your feedback
Feedback sent
We appreciate your effort and will try to fix the article