TABLE OF CONTENTS
- Product Overview
- Quick Reference
- Getting Started
- ANC & Transparency Modes
- EQ Sound Modes
- Music Controls
- Calls
- Android Setup: Enable OTG
- iPhone Setup: Allow Wired Accessories
- Troubleshooting Tips from the Manual
- Care & Safety
- Still stuck?
Product Overview
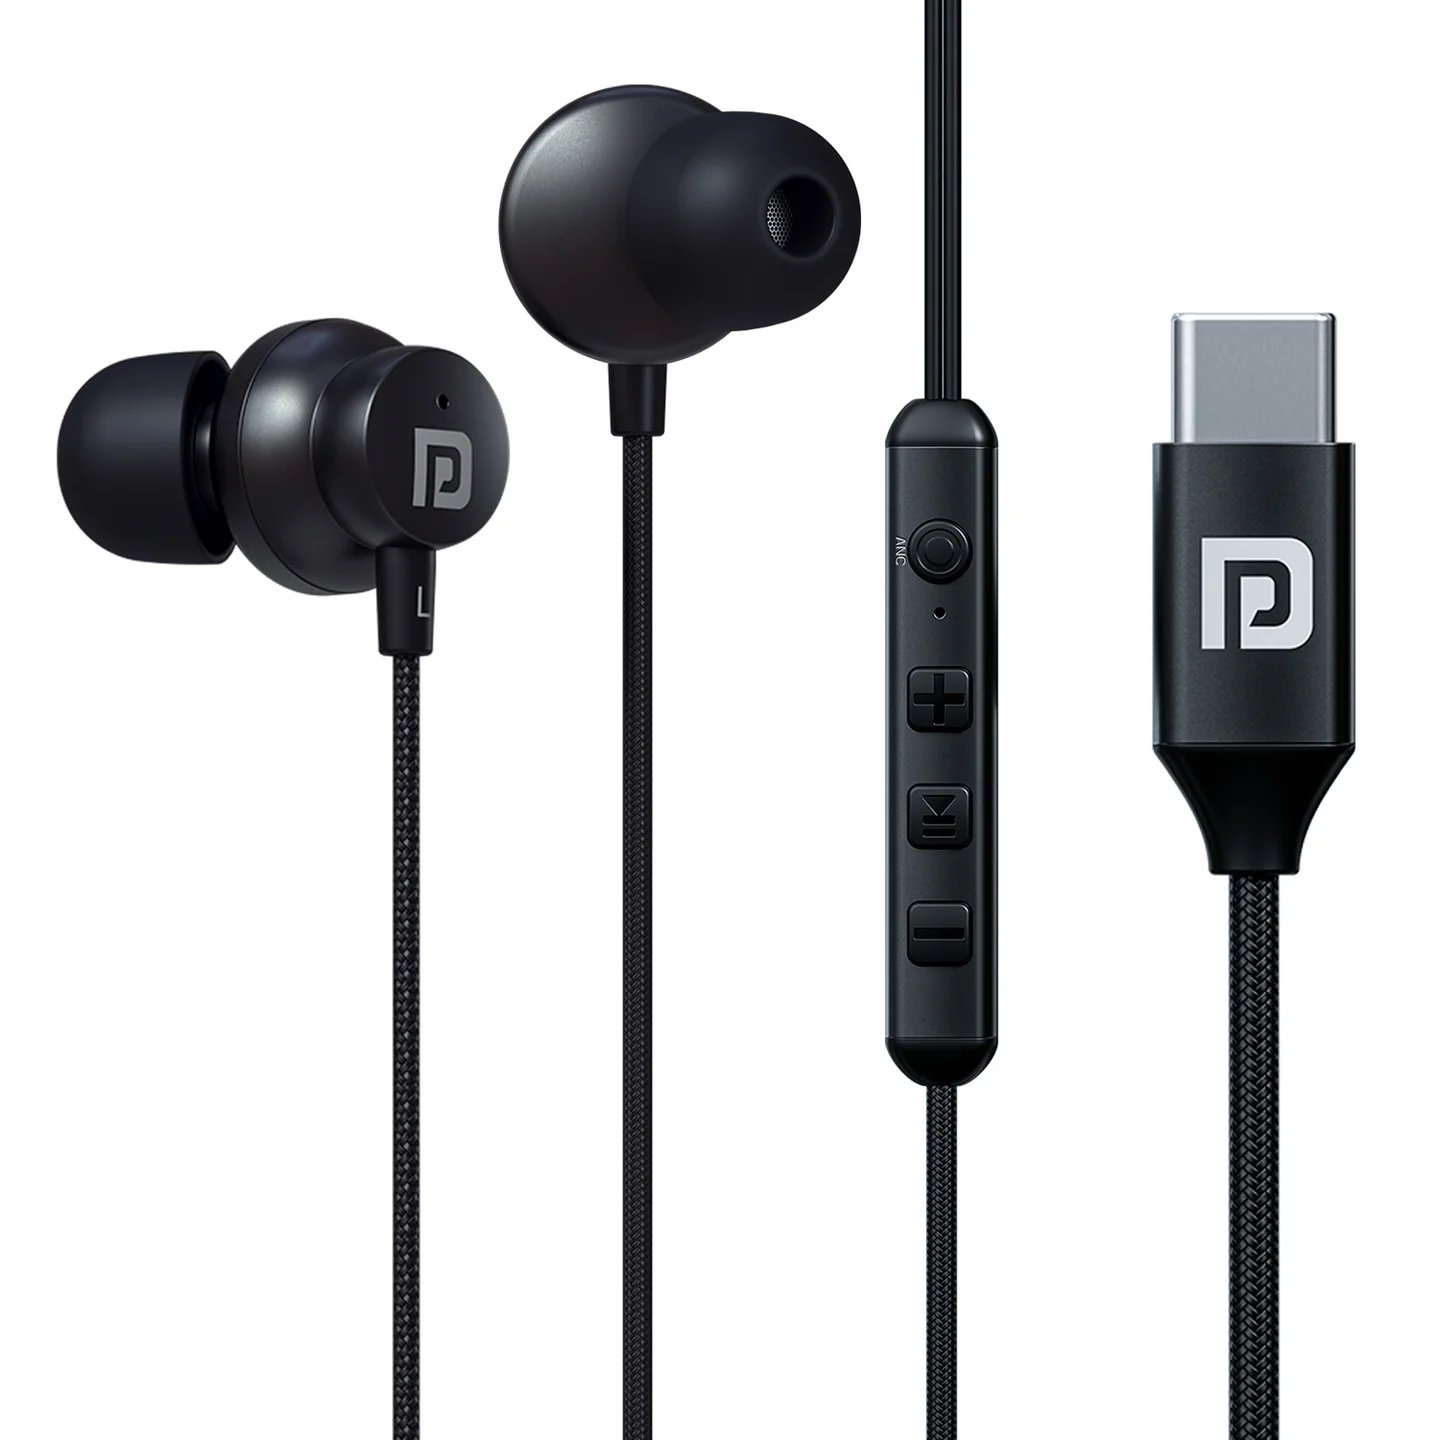
The Portronics Conch Z is a wired Type-C earphone with Active Noise Cancellation (ANC), a Transparency mode, five EQ sound modes and an in-line microphone for calls. It connects directly to a compatible Type-C device, so Bluetooth pairing is not required.
Quick Reference
| Feature | Details |
|---|---|
| Product | Portronics Conch Z |
| Connection | Wired Type-C |
| Driver Size | 12mm, according to the current Portronics listing |
| Noise Control | ANC and Transparency mode |
| EQ Modes | 5 sound modes |
| Microphone | In-line microphone |
| Bluetooth Pairing | Not required |
Getting Started
- Plug the Type-C connector into your compatible phone or other device that supports Type-C audio.
- Start playing music or open the app you want to use.
- If sound continues to play through your phone speaker, follow the Android or iPhone setup steps below.
Power on/off: Plug the Type-C connector into the phone to use Conch Z. Unplug it to disconnect and switch it off. This is a wired earphone and does not require Bluetooth pairing.
ANC & Transparency Modes
Use the ANC button to control the supported noise-control modes.
- ANC On: Press the ANC button. The white light turns on and a voice prompt plays.
- ANC Off: Press the ANC button again. The white light turns off and a voice prompt plays.
- Transparency Mode: The manual also describes activating Transparency mode using the ANC button, with the white light and a voice prompt.
EQ Sound Modes
Conch Z has 5 different EQ sound modes.
- Double-press the Multi-Function Button (MFB).
- Listen for the voice prompt confirming the selected EQ mode.
- Repeat the double-press action to change modes, if required.
Music Controls
| Action | Control |
|---|---|
| Play / Pause | Short-press the MFB once |
| Volume Up | Short-press the “+” button |
| Volume Down | Short-press the “−” button |
| Next Track | Long-press the “−” button |
| Previous Track | Long-press the “+” button |
Calls
| Action | Control |
|---|---|
| Incoming call | The earphone rings |
| Answer a call | Short-press the MFB |
| End a call | Long-press the MFB |
| Reject an incoming call | Long-press the MFB |
Android Setup: Enable OTG
If your Android phone does not detect Conch Z after connection:
- Open the phone’s Settings.
- Look for OTG. It may be under Additional Settings → OTG or Connected Devices, depending on the phone.
- Enable OTG.
- Unplug and reconnect the Conch Z Type-C connector.
- Test audio again.
Menu names may vary by phone manufacturer.
iPhone Setup: Allow Wired Accessories
If Conch Z does not work with an iPhone:
- Open Settings.
- Go to Privacy & Security → Wired Accessories.
- Allow wired accessory access when prompted.
- Reconnect the Type-C earphone and test audio.
Troubleshooting Tips from the Manual
Sound still plays through the phone after connecting Conch Z
- On Android, check that OTG is enabled.
- Close music and media apps completely.
- Reconnect the earphone, then restart the app.
During a call, audio stays on the phone
Some phone systems may require you to answer the call on the phone to route call audio through the wired earphone. Check the phone’s call audio route if available.
No sound from the earphone or microphone
- Make sure the Type-C connector is fully inserted.
- Check that device and media volumes are not muted.
- Remove any phone case or obstruction that prevents the connector from fitting completely.
Sound is low or only one side works
- Adjust the position or angle of the left and right earbuds.
- Check and gently clean the earbud sound outlets, Type-C connector and device port for dirt or debris.
Care & Safety
- Keep the Type-C connector and earbud sound outlets clean and dry.
- Do not force the connector into the device.
- Avoid pulling or sharply bending the cable.
- Listen at a moderate volume.
- Unplug the earphone before cleaning.
- Clean gently with a soft, dry cloth. Do not pour liquid onto the earphones or connector.
Still stuck?
If the issue persists after performing all troubleshooting steps, please raise a support request.
Our support team will assist you further.
Support
- Visit: www.portronics.com
- Support Portal: support.portronics.com
Was this article helpful?
That’s Great!
Thank you for your feedback
Sorry! We couldn't be helpful
Thank you for your feedback
Feedback sent
We appreciate your effort and will try to fix the article