TABLE OF CONTENTS
- Product Overview
- Quick Reference
- What's in the Box
- Parts & Controls
- Powering ON and First-Time Bluetooth Pairing
- Bluetooth Mode
- 2.4GHz Wireless Mode
- Switching Between Bluetooth and 2.4GHz
- ANC and Transparency Modes
- Spatial Audio
- Music Playback
- Phone Calls
- Voice Assistance
- 3.5mm AUX Wired Connection
- Charging the Headphones
- LED Indicator Guide
- Safety & Care
- Troubleshooting
- Still stuck?
Product Overview
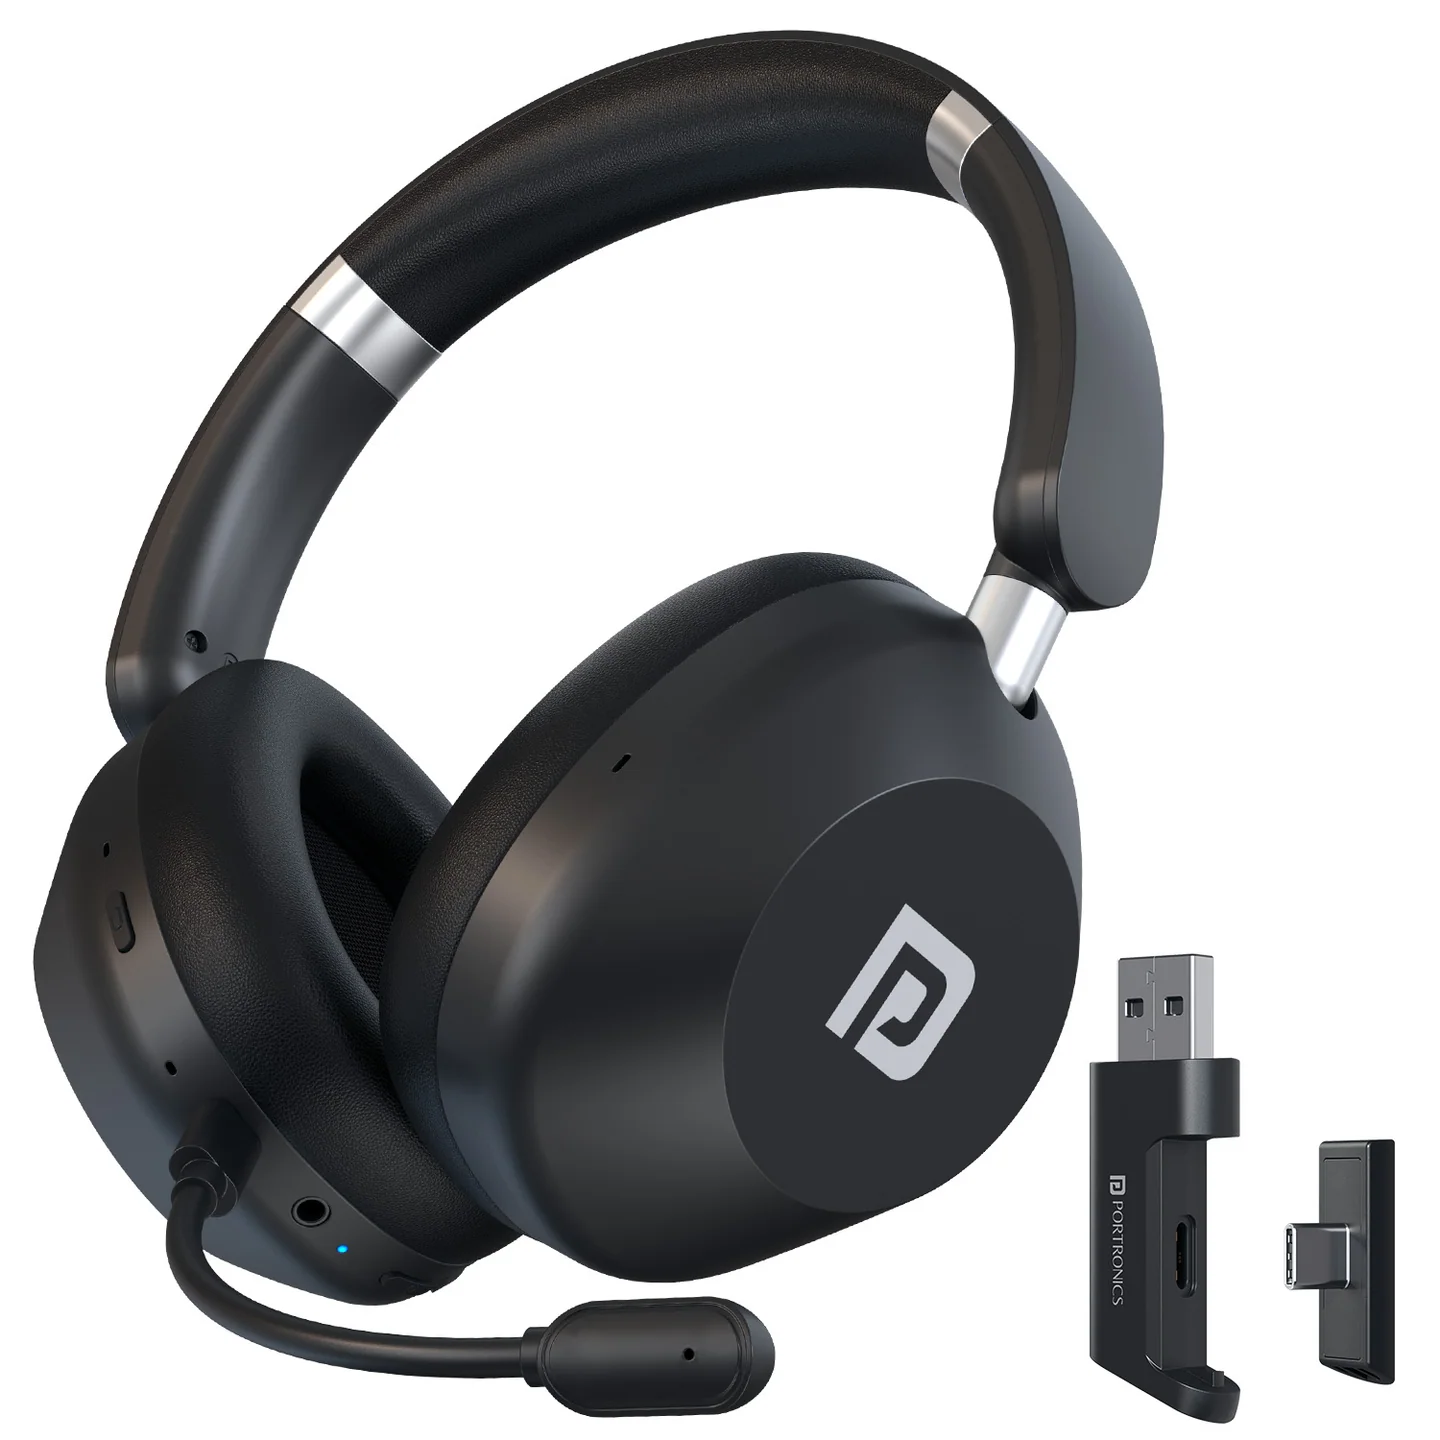
The Portronics Muffs A4 is a wireless over-ear headphone with Bluetooth and 2.4GHz wireless connectivity, ANC and Transparency modes, Spatial Audio, a detachable microphone and a 3.5mm AUX connection. It includes a USB-A / Type-C 2.4GHz receiver for compatible devices.
Quick Reference
| Feature | Details |
|---|---|
| Product | Portronics Muffs A4 |
| Product Codes | POR 3547 (Black), POR 3548 (Beige) |
| Driver Diameter | 40mm |
| Battery Capacity | 500mAh |
| Bluetooth Version | 6.0 |
| Wireless Receiver | 2.4GHz dongle, USB-A and Type-C |
| Receiver Distance | Up to 10m |
| ANC | Noise reduction specified up to 35dB |
| Audio Modes | ANC, Transparency and Normal |
| Spatial Audio | Supported |
| AUX Connection | 3.5mm |
| Charging Port | USB Type-C |
| Charging Time | Approx. 2 hours |
| Playback Time | 60h Bluetooth / 38h Bluetooth + ANC |
| Current Listing Playtime Claim | Up to 80h |
| Detachable Microphone | Included |
Actual playtime varies with volume, ANC / Spatial Audio use, connection mode and usage conditions.
What's in the Box
| Item | Quantity |
|---|---|
| Muffs A4 Headphones | 1 |
| USB-C Charging Cable | 1 |
| 2.4GHz Dongle (USB-A + Type-C) | 1 |
| Detachable Microphone | 1 |
| 1.2m AUX Cable | 1 |
Parts & Controls
| Control / Part | Function |
|---|---|
| Power Button | Long-press to turn headphones ON or OFF |
| Power Button — Single Press | Play / pause music; answer or end a call |
| Power Button — Double Press | Switch between Bluetooth and 2.4GHz wireless mode when the dongle is connected |
| Power Button — Triple Tap | Activate voice assistance |
| Mode Button — Single Press | Switch between ANC and Transparency modes |
| Mode Button — Long Press | Toggle Spatial Audio |
| + Button | Press once to increase volume; press and hold for next track |
| − Button | Press once to decrease volume; press and hold for previous track |
| Detachable Microphone | Voice input for compatible calls, meetings and gaming |
| 3.5mm AUX Port | Wired audio connection |
| USB-C Port | Charges the headphones |
Powering ON and First-Time Bluetooth Pairing
- Press and hold the Power Button to turn ON the headphones.
- When switched ON for the first time, the headphones automatically enter pairing mode.
- The blue indicator flashes while pairing mode is active.
- Open Bluetooth settings on your phone, laptop or other compatible device.
- Select the Muffs A4 device entry shown in the available Bluetooth list.
- After connection, the pairing indicator stops flashing and the blue power indicator shows that the headphones are ON.
If previously connected devices are unavailable, pairing mode can activate automatically.
Bluetooth Mode
- Turn ON the headphones.
- Enable Bluetooth on the phone or computer.
- Select the Muffs A4 entry from the available Bluetooth devices.
- Wait for the connection to complete.
- Start music, video or other audio on the connected device.
The specified receiver distance is up to 10 metres, subject to the environment and connected device.
2.4GHz Wireless Mode
The Muffs A4 package includes a 2.4GHz dongle with Type-C receiver and USB-A adapter.
Using the Type-C Receiver
- Insert the Type-C receiver into a compatible Type-C port on the device.
- Turn ON the headphones.
- Double-press the Power Button to switch from Bluetooth Mode to 2.4GHz Wireless Mode.
- Start audio on the connected device.
Using the USB-A Connection
To use the 2.4GHz wireless function through USB-A:
- Insert the Type-C receiver into the included USB-A adapter.
- Connect the USB-A adapter to the computer or other compatible device.
- Turn ON the headphones.
- Double-press the Power Button to switch to 2.4GHz Wireless Mode.
- Start audio playback.
Important: The Type-C receiver must be inserted into the included USB-A adapter before connecting it to a USB-A port.
Switching Between Bluetooth and 2.4GHz
- Connect the 2.4GHz dongle to the device when using 2.4GHz mode.
- Double-press the Power Button to switch between Bluetooth Mode and 2.4GHz Wireless Mode.
- Check that the selected connection is active before playing audio.
ANC and Transparency Modes
Use the Mode Button to switch between ANC and Transparency modes.
- Press the Mode Button once to switch between ANC and Transparency.
- The ANC indicator lights when ANC is active.
- The product sheet describes a solid green light for Transparency mode.
- ANC or Transparency operation is also described as using a sky-blue indicator.
Spatial Audio
- Press and hold the Mode Button to toggle Spatial Audio.
- A blue light indicates Spatial Audio is ON.
- When the blue Spatial Audio light is OFF, Spatial Audio is OFF.
Spatial Audio is controlled separately from the short-press ANC / Transparency mode selection.
Music Playback
| Action | Control |
|---|---|
| Play / Pause | Single press Power Button |
| Volume Up | Press + once |
| Volume Down | Press − once |
| Next Track | Press and hold + |
| Previous Track | Press and hold − |
Phone Calls
| Action | Control |
|---|---|
| Answer an incoming call | Single press Power Button |
| End an active call | Single press Power Button |
| Reject an incoming call | Press and hold Power Button |
The detachable microphone can be connected when a dedicated microphone position is needed.
Voice Assistance
Triple-tap the Power Button to activate voice assistance on a connected compatible device.
The response may depend on the connected phone or computer and its voice-assistant settings.
3.5mm AUX Wired Connection
- Connect one end of the included 3.5mm AUX cable to the headphones.
- Connect the other end to the 3.5mm audio port of your phone, PC or other audio device.
- Start audio playback on the connected device.
AUX provides a wired audio option when the connected source has a compatible 3.5mm output.
Charging the Headphones
- Connect the supplied USB-C charging cable to the headphones.
- Connect the other end to a USB adapter or computer USB port.
- The product sheet specifies an approximate charging time of 2 hours.
- The charging indicator turns OFF when the headphones are fully charged.
Charging Indicator Notes
The supplied sheet describes:
- Red light stays ON while charging.
- Red light turns OFF when fully charged.
- A separate indicator note says flashing red can indicate low battery or charging.
The red light is a low-battery/charging indication, and the light turning OFF as the full-charge indication.
Important: Do not use the headphones while charging.
LED Indicator Guide
| Indicator | Meaning stated in product sheet |
|---|---|
| Blue flashing | Pairing mode active |
| Blue light | Headphones powered ON |
| Solid green | Transparency mode ON |
| ANC indicator ON | ANC mode active |
| Sky blue | ANC or Transparency mode indication |
| Blue Spatial Audio light ON | Spatial Audio ON |
| Spatial Audio blue light OFF | Spatial Audio OFF |
| Red light ON while charging | Charging |
| Red light OFF | Fully charged |
Safety & Care
- Do not use the headphones while charging.
- Keep the headphones away from water and extreme heat.
- Clean with a soft, dry cloth.
- If the Bluetooth connection fails, toggle Bluetooth OFF and ON on the connected device and try again.
- Keep the detachable microphone and receiver accessories in a safe place when not in use.
- Do not force the USB receiver or AUX connector into a port.
Troubleshooting
| Issue | Possible Cause | Recommended Action |
|---|---|---|
| Headphones do not pair | Pairing mode is not active or old connection is interfering | Check the blue flashing indicator; toggle Bluetooth OFF/ON and retry |
| 2.4GHz mode does not connect | Receiver is not connected or mode has not been selected | Connect the dongle and double-press the Power Button |
| No connection through USB-A | Type-C receiver has not been fitted into USB-A adapter | Insert the Type-C receiver into the included USB-A adapter first |
| No sound over AUX | Cable or 3.5mm connection is loose | Reconnect both ends of the AUX cable |
| ANC / Transparency does not change | Mode button press is not recognised | Press the Mode Button once to switch modes |
| Spatial Audio does not turn ON | Mode button not long-pressed | Press and hold the Mode Button |
| Low battery | Headphones need charging | Charge through the USB-C port |
| Microphone not detected | Detachable microphone is not connected properly or app input is wrong | Reconnect mic and select the headphone microphone in the app |
Still stuck?
If the issue persists after performing all troubleshooting steps, please raise a support request.
Our support team will assist you further.
Support
- Visit: www.portronics.com
- Support Portal: support.portronics.com
Was this article helpful?
That’s Great!
Thank you for your feedback
Sorry! We couldn't be helpful
Thank you for your feedback
Feedback sent
We appreciate your effort and will try to fix the article