TABLE OF CONTENTS
- Product Overview
- Quick Reference
- What's in the Box
- Parts & Controls
- Connecting VoltClock to Power
- Wireless Charging
- USB-A Output
- Setting the Time
- Setting the Date
- Switching Between Celsius and Fahrenheit
- Setting and Activating the Dual Alarms
- Alarm and Snooze Behaviour
- Adjusting Display Brightness
- RGB Night Light
- Eco-Power and Timekeeping
- Display and Indicator Guide
- Care & Safety
- Troubleshooting
- Still stuck?
Product Overview
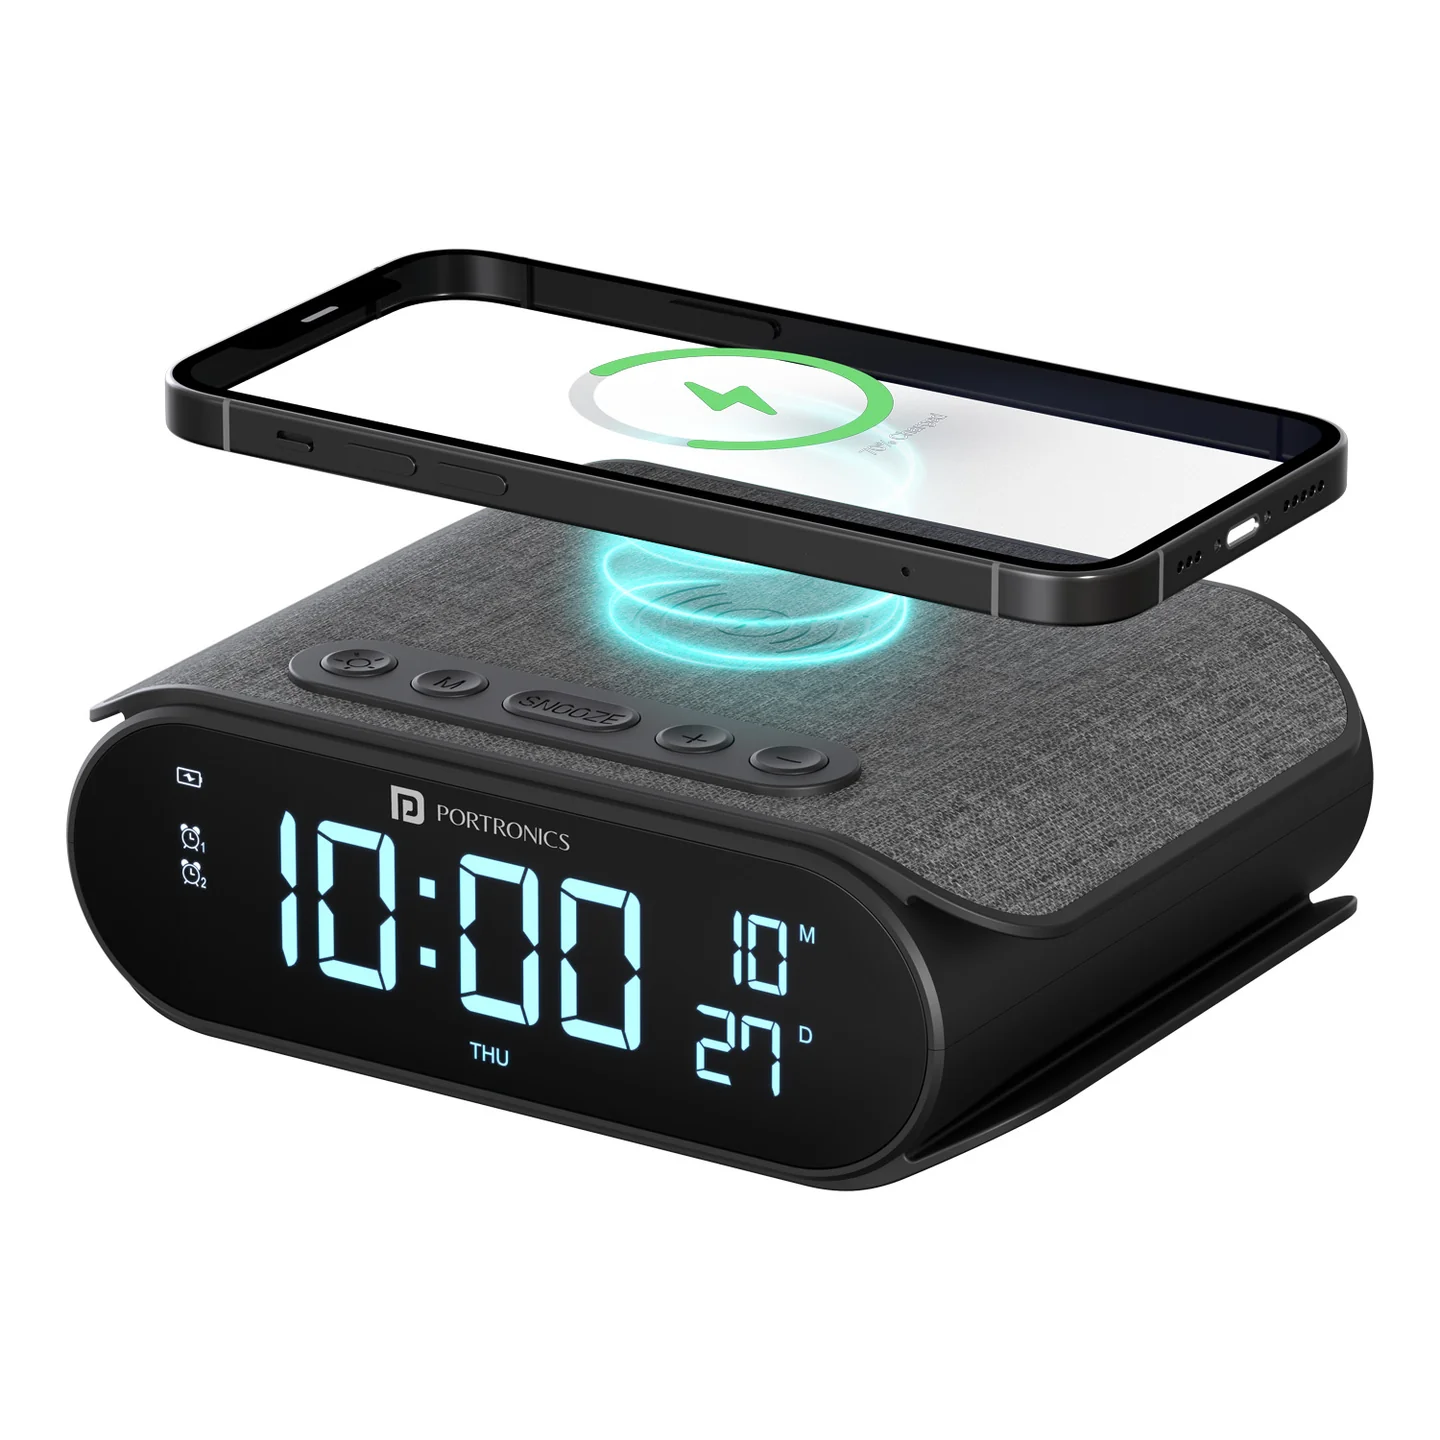
The Portronics VoltClock (POR 2129) is a Qi-compatible wireless charger with a digital alarm clock, date and temperature display, dual alarms and an RGB night light. It supports wireless charging up to 15W and also includes a USB-A output port for charging another compatible device.
The clock provides 12/24-hour time format, calendar settings, Celsius/Fahrenheit selection and adjustable display brightness.
Quick Reference
| Feature | Details |
|---|---|
| Product | Portronics VoltClock / VoltClock Charger |
| Product Code | POR 2129 |
| Colour | Black |
| Product Type | Wireless Charger with Alarm Clock |
| Wireless Charging Standard | Qi compatible |
| Maximum Wireless Output | 15W |
| Supported Wireless Output Levels | 5W / 7.5W / 10W / 15W |
| Power Input | DC 5V/3A or 9V/3A |
| USB-A Output | 5V/1A maximum |
| Charging Efficiency | 73% |
| Wireless Charging Distance | Up to 6mm |
| Operating Frequency | 110–205kHz |
| Clock Functions | Time, date and temperature display |
| Time Format | 12-hour / 24-hour |
| Alarms | Dual alarm |
| Night Light | 8 colour modes |
| Display Brightness | 5 levels, including OFF |
| Adapter Requirement | QC 3.0 or above; 18W or higher recommended |
| Warranty | 1 year |
Wireless charging output depends on the connected Qi-enabled device and its supported charging rate.
What's in the Box
| Item | Quantity |
|---|---|
| VoltClock Charger | 1 |
| Charging Cable | 1 |
Power adapter is not included. Use a compatible adapter meeting the required power specifications.
Parts & Controls
| Button / Part | Function |
|---|---|
| Wireless Charging Pad | Charges Qi-enabled phones and devices |
| Display | Shows time, date, temperature and alarm status |
| Light Button | Controls the RGB night light |
| M Button | Sets time and alarm values; confirms settings |
| SNOOZE Button | Displays calendar, sets date, changes temperature unit and snoozes alarm |
| + Button | Adjusts settings, controls Alarm 1 and adjusts display brightness |
| − Button | Adjusts settings, controls Alarm 2 and adjusts display brightness |
| USB-C Input | Connects the charger to the power adapter |
| USB-A Output | Provides up to 5V/1A output for a compatible device |
Connecting VoltClock to Power
- Connect the USB-A end of the supplied cable to a compatible power adapter.
- Connect the Type-C end of the cable to the VoltClock.
- Use a QC 3.0 or above adapter. An 18W-or-higher adapter is recommended for optimal performance.
- Connect the adapter to a suitable power outlet.
- The product indicates successful power connection by flashing its indicator twice.
Important: The power adapter is not included in the package. A lower-rated adapter may result in slower wireless charging and may not support alarm, wireless charging and USB-A output operating simultaneously.
Wireless Charging
- Confirm that the phone or device supports Qi wireless charging.
- Connect VoltClock to a suitable power source.
- Place the phone centrally on the wireless charging pad.
- Adjust its position until the device indicates that charging has started.
- Check the wireless charging indicator.
The maximum wireless output is 15W, with supported output levels of 5W, 7.5W, 10W and 15W.
Wireless Charging Indicator
| Indicator | Meaning |
|---|---|
| Flashes twice after power connection | Power connection successful |
| OFF | Standby |
| ON | Wireless charging in progress |
| OFF after charging | Device is charged |
| Flashes continuously | Foreign Object Detection (FOD) |
If the indicator flashes continuously, remove the phone and check the charging pad for metal objects or other foreign items.
USB-A Output
VoltClock also provides a USB-A output port rated at 5V/1A maximum.
- Connect a compatible USB charging cable to the USB-A output.
- Connect the other end to the device you want to charge.
- Confirm that the connected device indicates charging.
USB-A output and wireless charging performance may depend on the power adapter used. A QC 3.0 or above adapter is recommended for the alarm, wireless charging and USB output to work simultaneously.
Setting the Time
- Double-click the M Button to switch between 12-hour and 24-hour time formats.
- In 12-hour format, PM is displayed for afternoon/evening times.
- Click M once to set the hour.
- Use + or − to adjust the hour. Long-press either button for continuous adjustment.
- Click M again to set the minutes.
- Use + or − to adjust the minutes.
- Click M again to finish the time setting.
Setting the Date
- Short-press SNOOZE to display the year, month and day.
- To change the calendar, press and hold SNOOZE.
- Adjust the year, month and day using + or −.
- Long-press the buttons for continuous adjustment.
- The calendar setting exits automatically after the setting process as described by the device.
The date display automatically exits after approximately 5 seconds when viewed using a short press of SNOOZE.
Switching Between Celsius and Fahrenheit
- Double-press SNOOZE.
- The temperature unit switches between Celsius and Fahrenheit.
Setting and Activating the Dual Alarms
VoltClock supports two separate alarms.
Activate or Deactivate an Alarm
- Long-press + to activate or deactivate Alarm 1.
- Long-press − to activate or deactivate Alarm 2.
- The corresponding alarm indicator lights up when the alarm is activated.
Set the Alarm Time
- Long-press M to enter the alarm hour setting.
- Use + or − to adjust the hour. Long-press for continuous adjustment.
- Click M to move to the minutes setting.
- Use + or − to adjust the minutes.
- Click M again to finish setting the alarm.
Alarm and Snooze Behaviour
- If no button is pressed, the alarm rings for 3 minutes and then automatically stops.
- Press SNOOZE while the alarm is ringing to enter snooze mode.
- The alarm rings again after 5 minutes.
- The indicator flashes while the clock is in snooze mode.
- Short-press + or − to stop Alarm 1 or Alarm 2 for that day. The alarm remains scheduled to ring again the next day.
Adjusting Display Brightness
- Use + or − to cycle through the five display-brightness levels.
- The default setting is maximum brightness.
- Press − repeatedly to move through the brightness levels.
- The final setting turns the clock display light OFF.
RGB Night Light
VoltClock has eight night-light colour modes:
- RGB shade
- Red
- Yellow
- Light green
- Green
- Light blue
- Blue
- Pink
Turning ON and Changing the Night Light
- Press the Light Button once to turn ON the night light in RGB shade mode.
- Short-press the Light Button to cycle through the colour modes.
- Continue pressing to select the desired colour.
- Long-press the Light Button to turn OFF the night light.
- When turned ON again, the night light recalls the last-used colour.
Eco-Power and Timekeeping
- The built-in button cell is for timekeeping only.
- During a power disconnection, all other functions stop.
- Functions resume when power is reconnected.
The product therefore requires external power for wireless charging, display operation, alarms, night light and USB-A output.
Display and Indicator Guide
| Indicator / Status | Meaning |
|---|---|
| Power indicator flashes twice | Power connection successful |
| Wireless charging light ON | Device charging |
| Wireless charging light OFF | Standby or charging completed, depending on state |
| Wireless charging light flashes continuously | Foreign Object Detection |
| Alarm indicator ON | Corresponding alarm is activated |
| Snooze indicator flashes | Snooze mode active |
Care & Safety
- Do not disassemble the product or expose it to fire or water.
- Avoid high-temperature, high-humidity and corrosive environments.
- Keep the device away from magnetic cards.
- Maintain at least 20cm distance from implanted medical devices to avoid interference.
- Keep out of children's reach.
- Disconnect power before cleaning.
- Recommended operating temperature: 0°C–45°C.
- Recommended operating humidity: 20%–85% (at 40°C).
- The product contains a button cell. If swallowed, it can cause serious injury; seek immediate medical attention.
- Use a QC 3.0 or above adapter for alarm, wireless charging and USB-A output to work simultaneously.
- Avoid squeezing or colliding with the product.
Troubleshooting
| Issue | Possible Cause | Recommended Action |
|---|---|---|
| Wireless charging does not start | Phone is misaligned or not Qi compatible | Confirm Qi compatibility and reposition the phone |
| Indicator flashes continuously | Foreign object detected | Remove the phone and check the charging pad for foreign objects |
| Wireless charging is slow | Adapter output is insufficient | Use a QC 3.0 or above adapter; 18W or higher is recommended |
| USB-A output does not work | Adapter may not support simultaneous operation | Use a QC 3.0 or above adapter |
| Clock display does not remain active during power loss | Button cell is for timekeeping only | Reconnect external power to restore functions |
| Alarm does not ring | Alarm may be deactivated | Long-press + for Alarm 1 or − for Alarm 2 to activate it |
| Alarm rings again after stopping | Snooze was activated | Press + or − briefly to stop that alarm for the day |
| Date does not remain on display | Date view automatically exits | Short-press SNOOZE again to view the date |
| Night light does not change colour | Incorrect button action | Short-press Light to cycle colours |
| Display brightness does not change | Brightness control not operated | Press + or − to cycle through the five levels |
Still stuck?
If the issue persists after performing all troubleshooting steps, please raise a support request.
Our support team will assist you further.
Support
- Visit: www.portronics.com
- Support Portal: support.portronics.com
Was this article helpful?
That’s Great!
Thank you for your feedback
Sorry! We couldn't be helpful
Thank you for your feedback
Feedback sent
We appreciate your effort and will try to fix the article